Matching The Dynamic Range Of A Scan In Nuke
Expand or compress the luminance values of your elements to match the dynamic range of the scan…

Expand or compress the luminance values of your elements to match the dynamic range of the scan…
In order for a composite to look photo realistic and seamless, it has to give the impression that all of the various elements which are composited together were filmed at the same time by the same camera.
And to do that, the various elements – such as CG, DMP, FX, patches, etc. – all have to match the scan’s dynamic range.
Let's take a look at what that means.
A dynamic range simply describes the ratio between the maximum and minimum value of something.
That something can be a signal, like sound – or light (i.e. brightness):
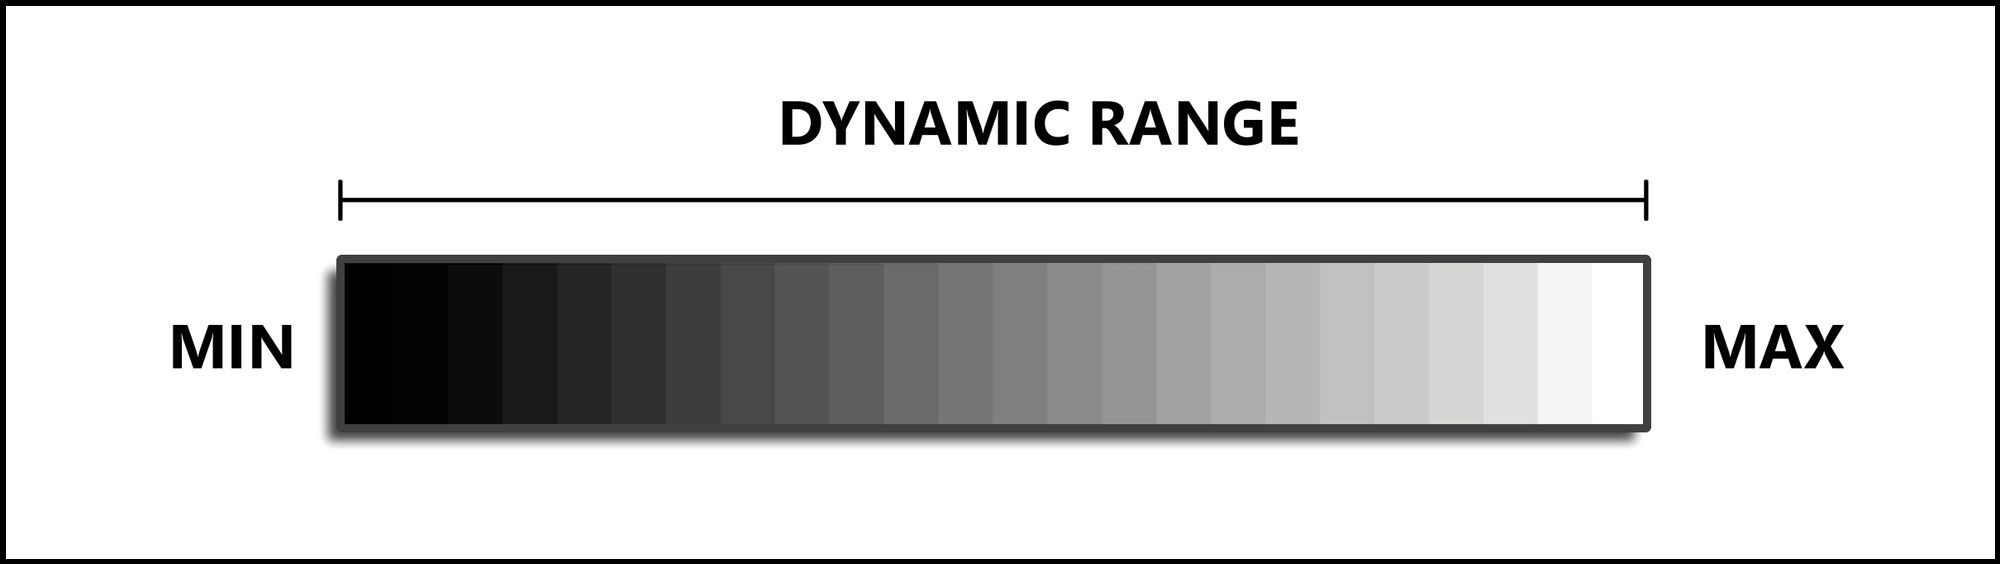
Dynamic range in terms of luminance values.
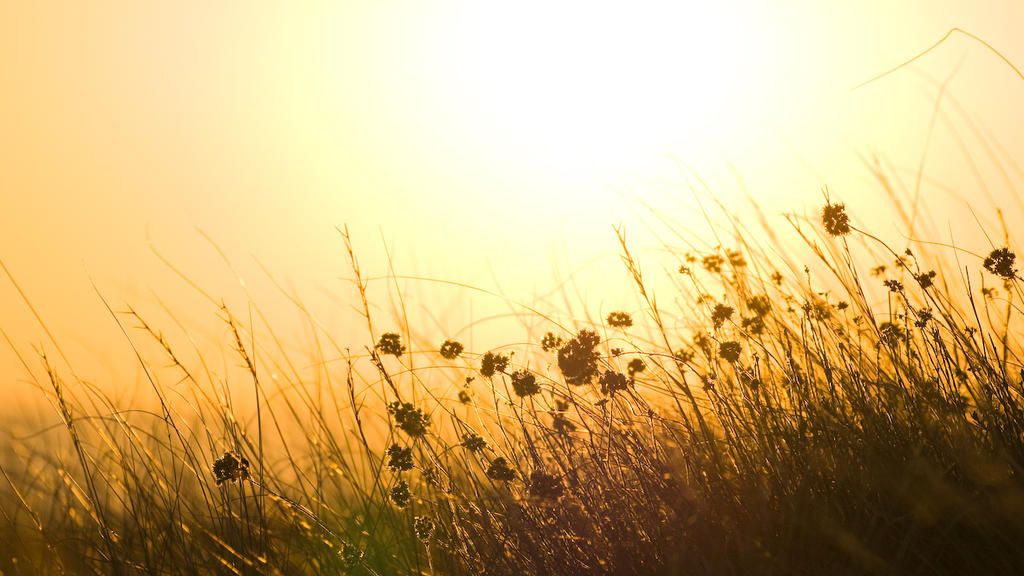
- A sunny outdoor scene will have a huge contrast between the brightest light and the darkest shadow: a high dynamic range.
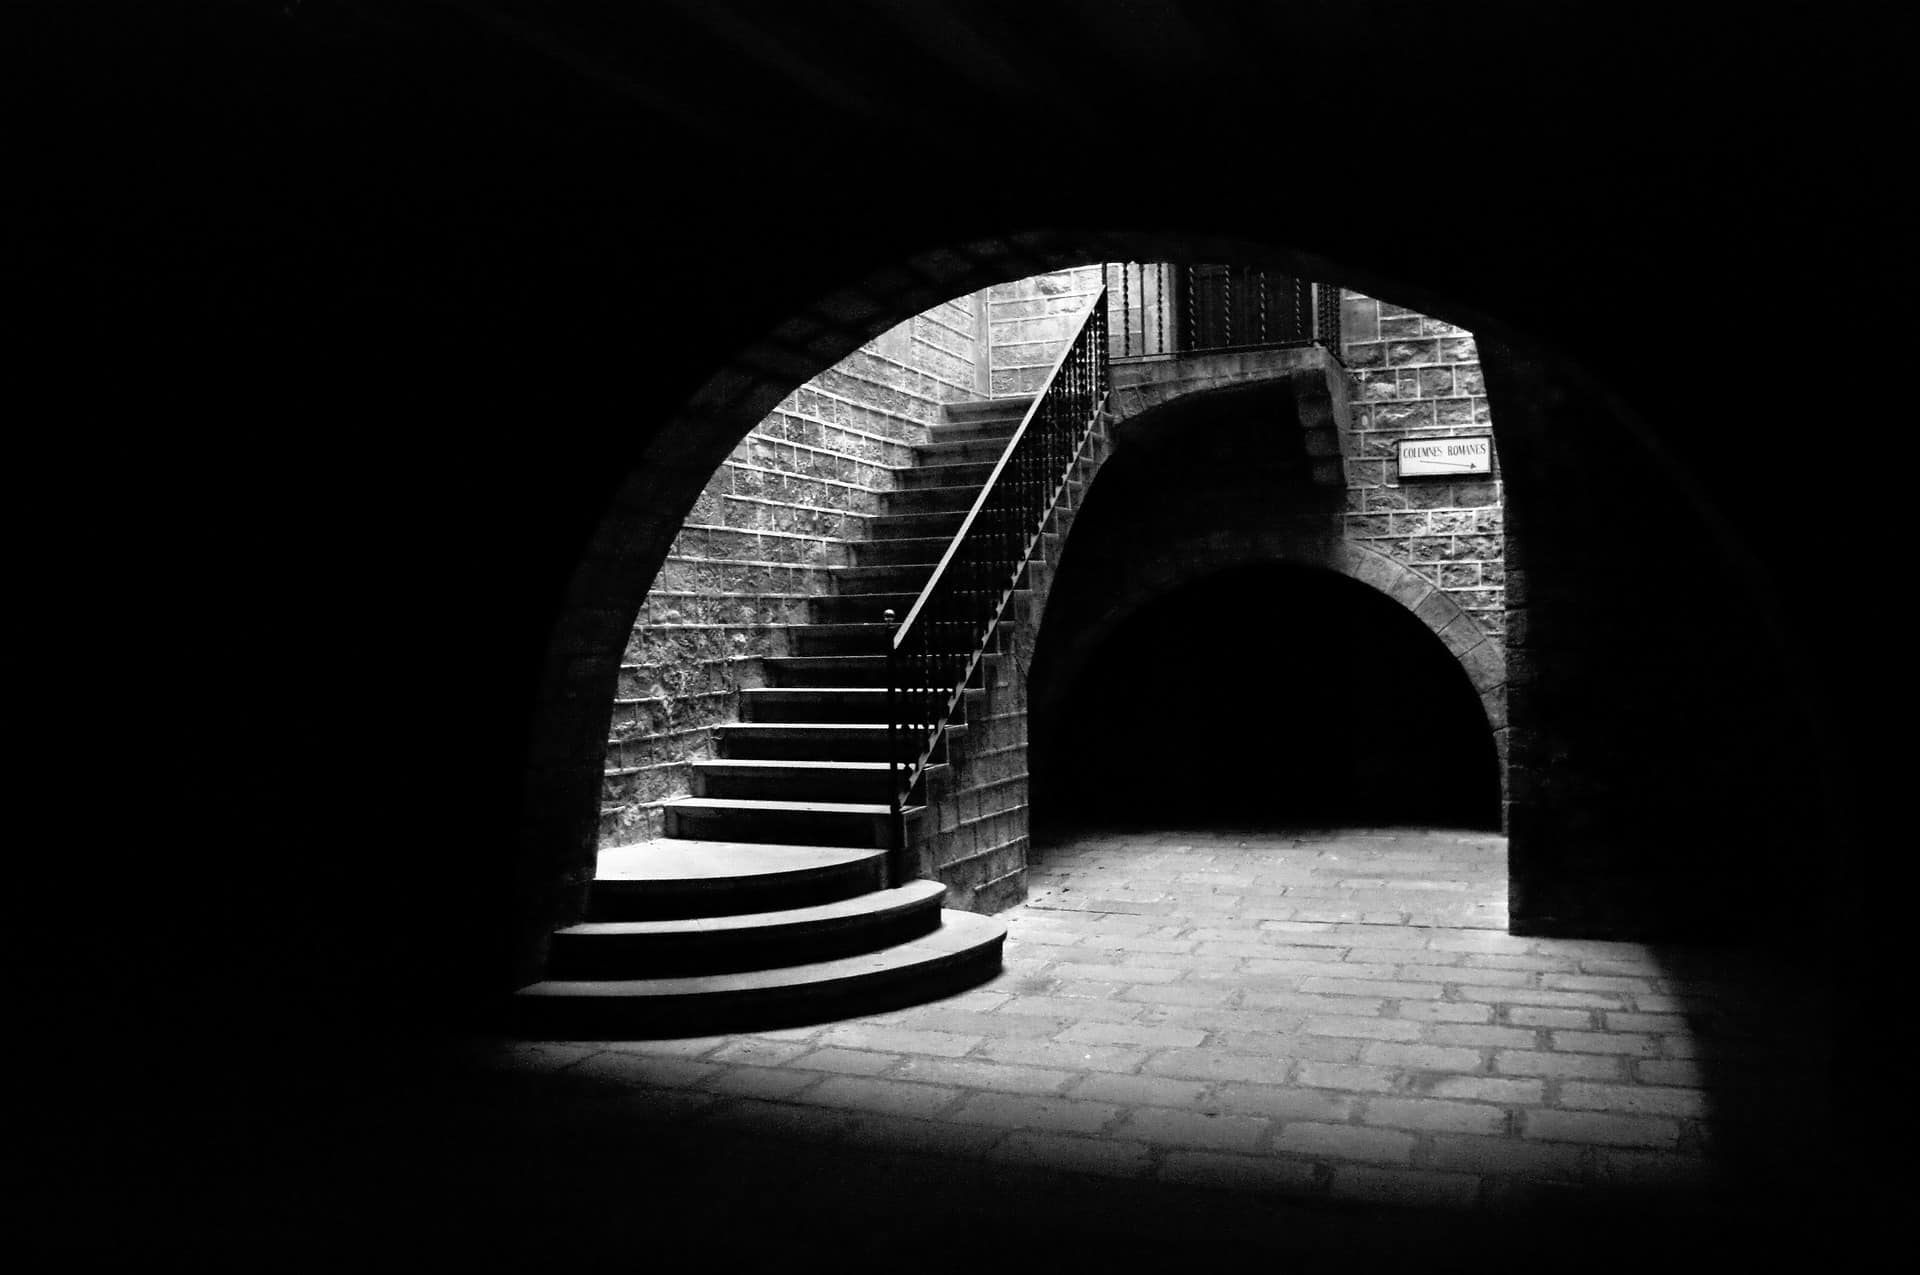
- An indoor scene lit by overcast daylight will have a much more mellow light in comparison. There will be less of a difference between the brightest and darkest areas: a medium dynamic range.
- An outdoor nighttime scene of a dark field lit by faint starlight, on the other hand, will have very little contrast: a low dynamic range.
The examples above are all source dynamic ranges. And rarely can an entire source dynamic range be captured in full.
Let's say that you shoot some footage with your camera.
By the time you see the footage on your computer, the original light that was captured in the scene has already gone through multiple 'funnels' which narrowed down its dynamic range:
Scene → Sensor
The light first travelled from the scene, through the lens, and to the camera's sensor.
And a sensor is only sensitive to a certain range of light. In photography, dynamic range describes the span between the brightest white and the darkest black that the sensor in a camera can capture.
Above or below these extremes, the pixel values in the captured picture get clamped and we lose image detail. That is, the highlights are blown out and the shadows are crushed.
So already, the source dynamic range of the scene is being reduced down to the limits of the sensor.
But that's not all:
Sensor → Image Format
How those pixels are stored also impacts the dynamic range of the picture.
By capturing footage to a RAW image format, you can retain a wide dynamic range in your pictures.
But if you capture (or later convert) the footage to a low dynamic range image format, such as JPEG, there just won’t be nearly as much colour information and nuance left in your image, in comparison.
For example, if you decrease the Viewer Gain in Nuke when looking at footage with a low dynamic range, you'll see that the highlights start to clip pretty quickly. The sun, or any sufficiently bright lights, will max out at a certain value, and the hottest areas will look flat and featureless.
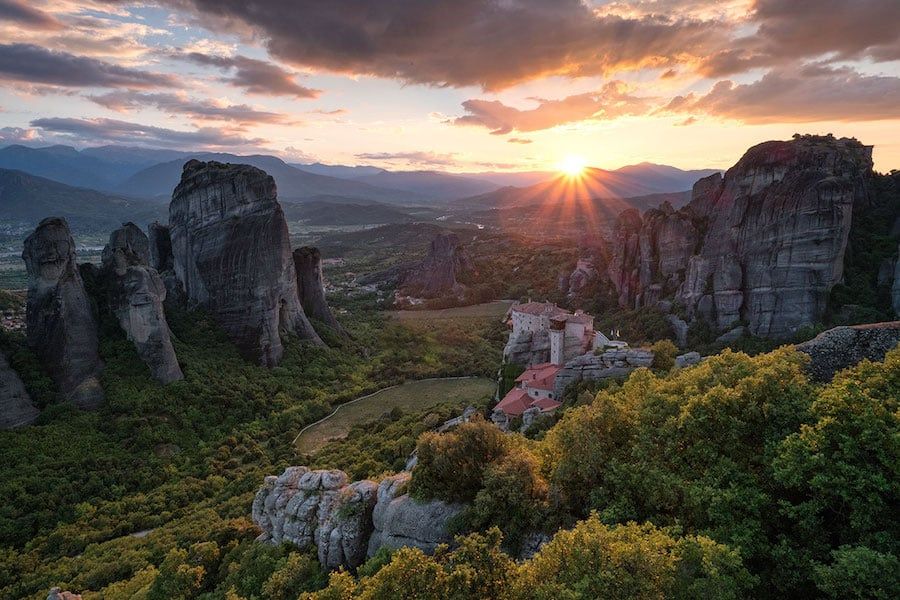
Let's take for instance the picture below and expose it down. If it had a high dynamic range, you would expect to see a small, hot core where the sun is, and more detail in the sun’s reflection in the water.
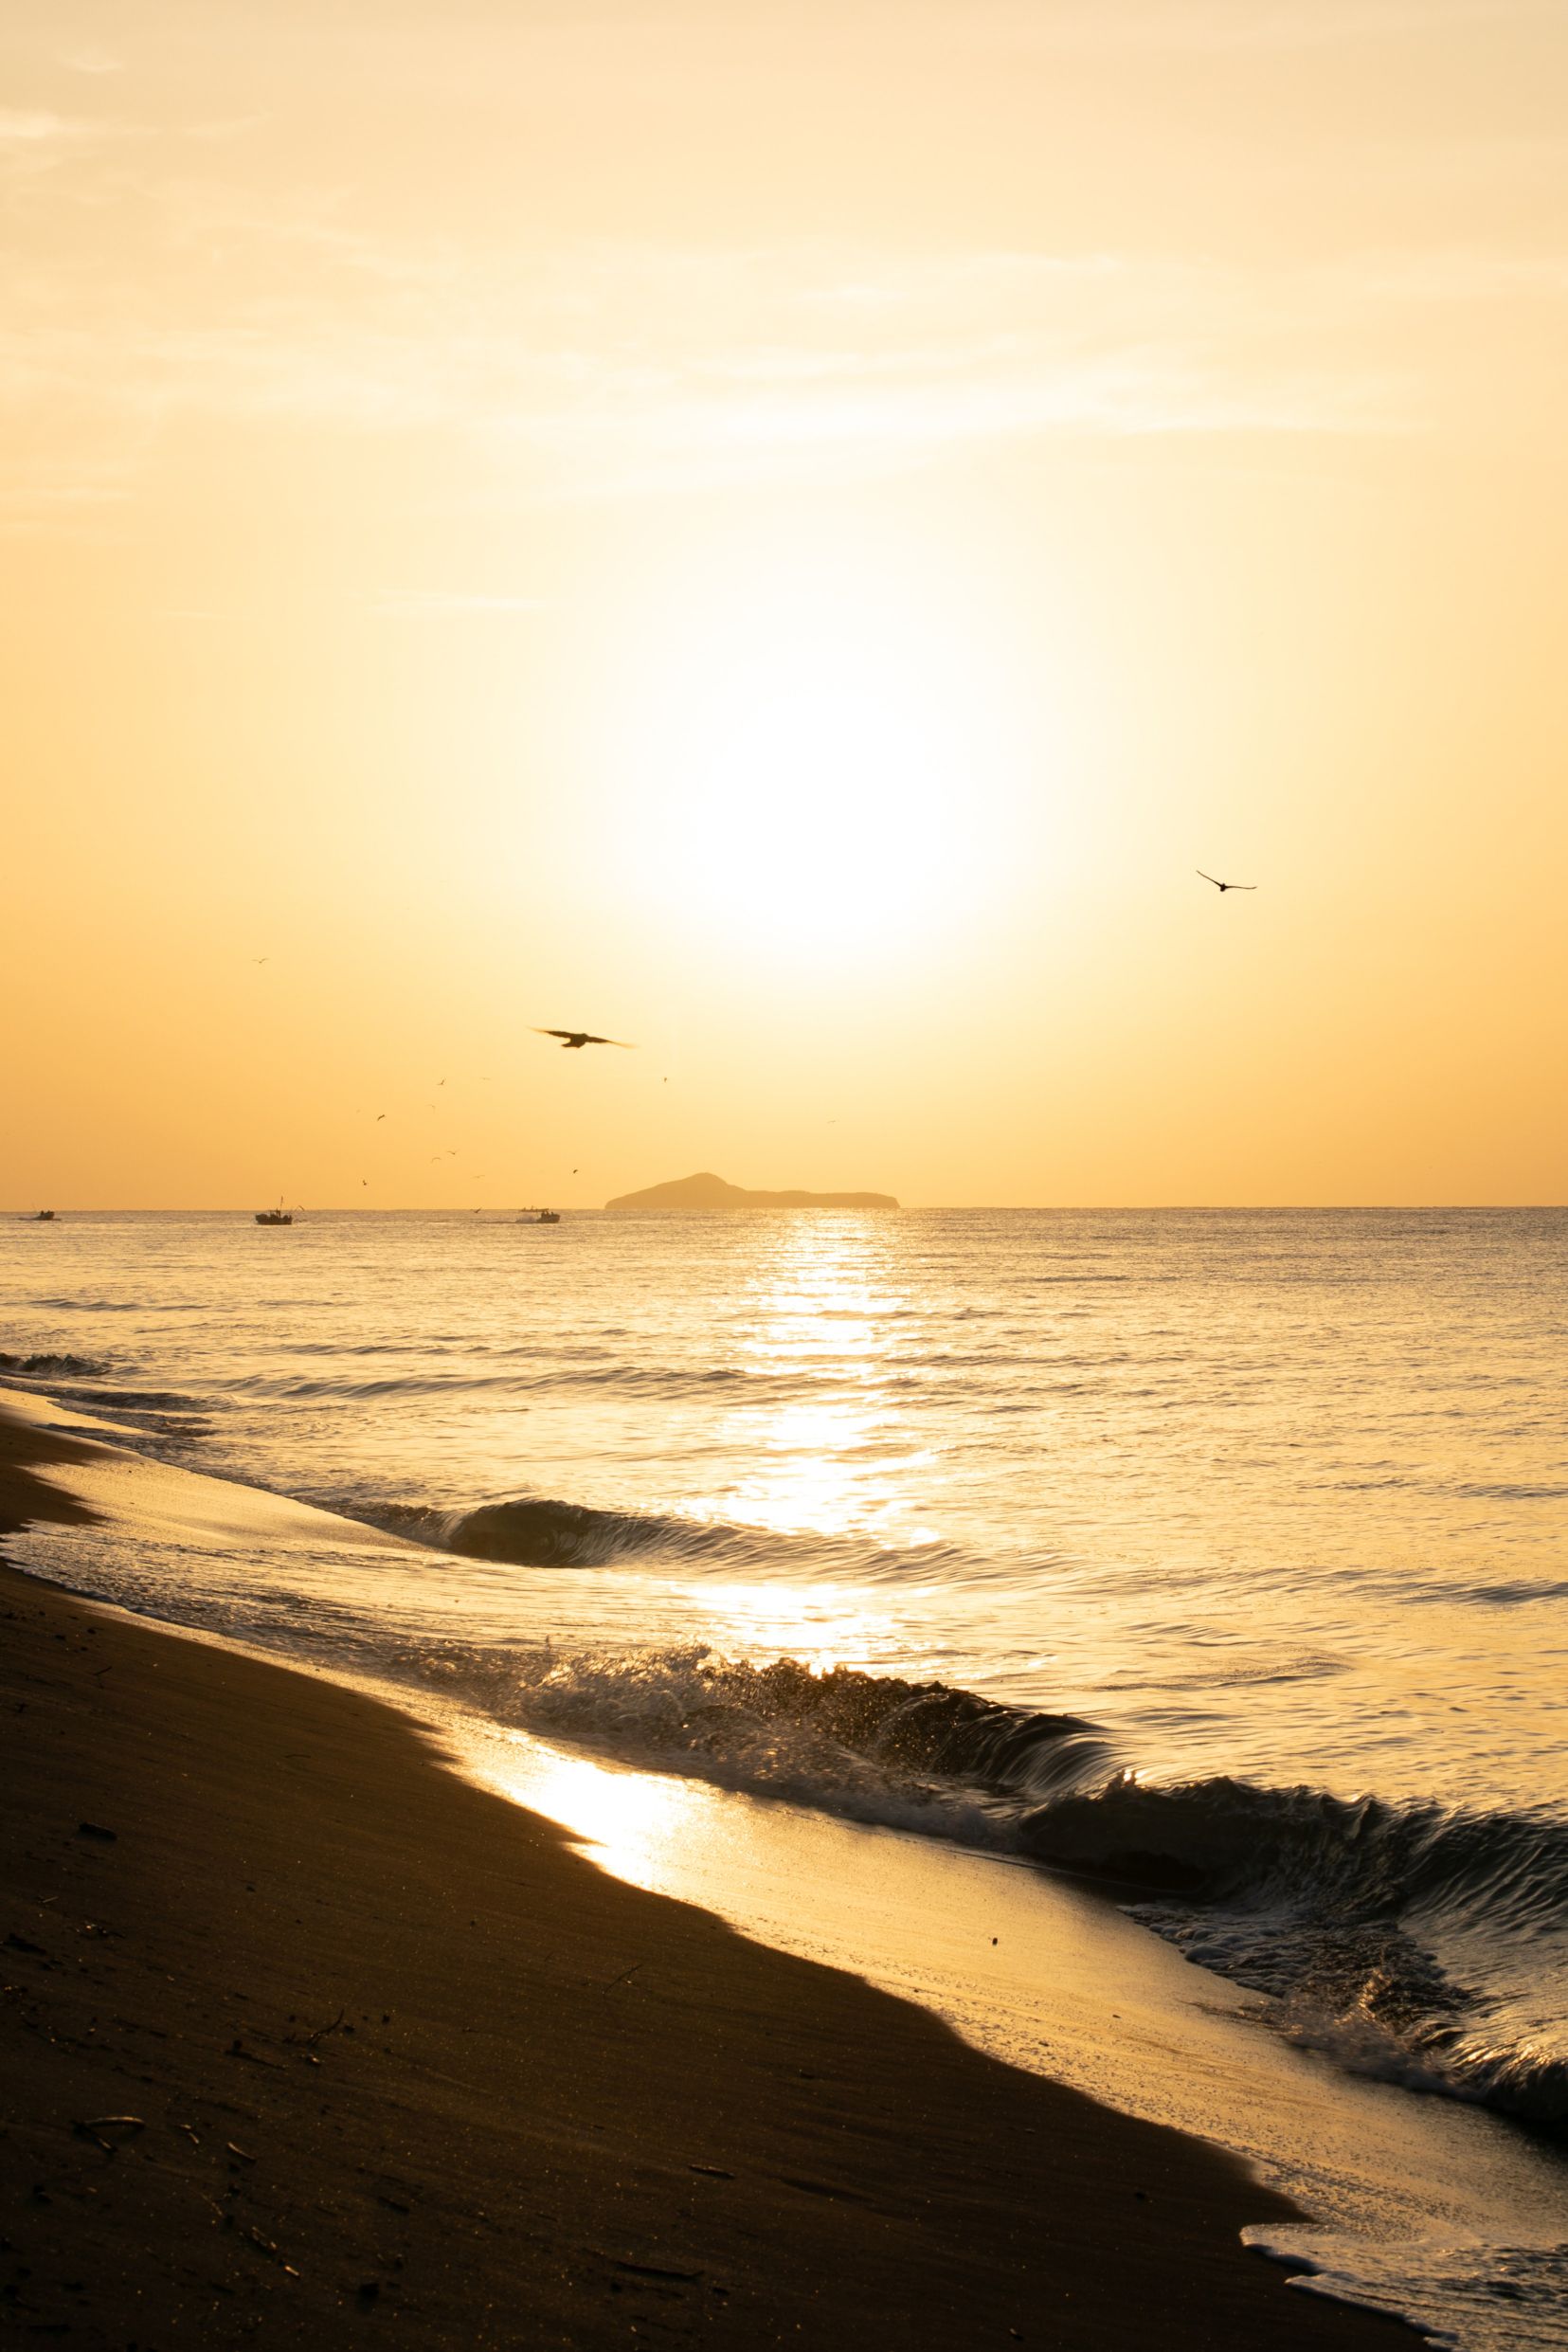
A JPEG image with a low dynamic range, before and after being graded down.
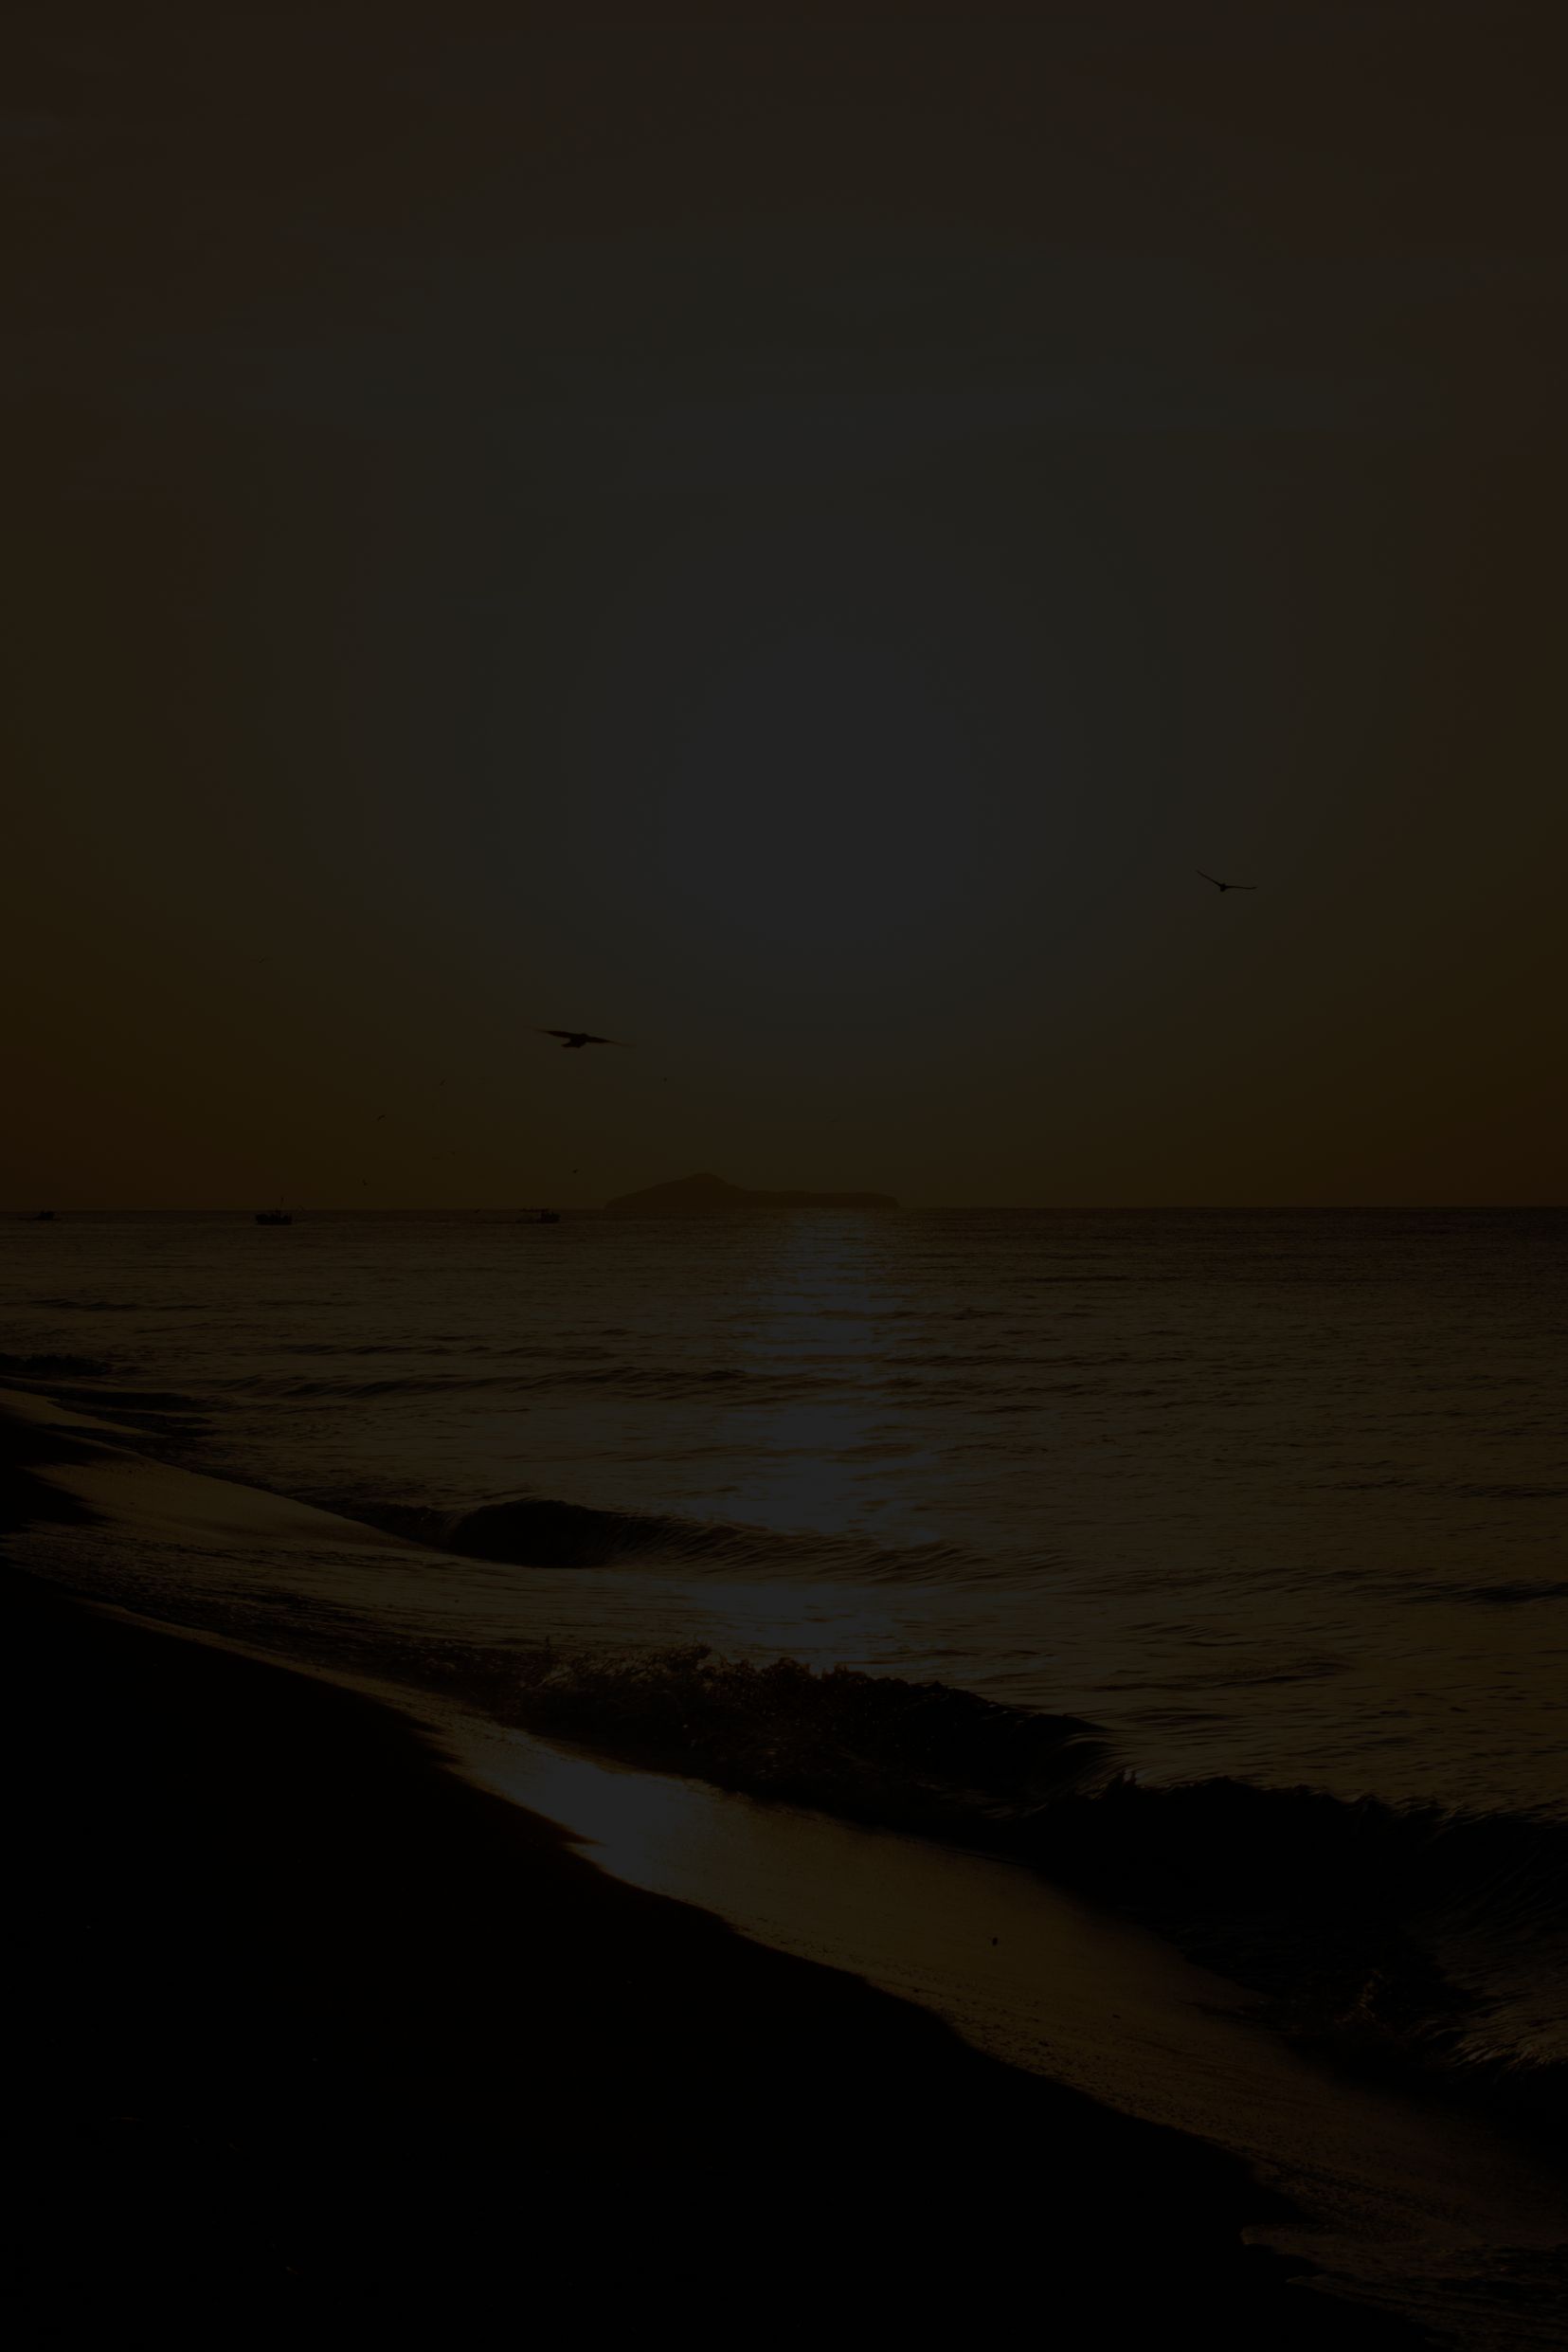
Instead, we can see that the sky and the sun's reflections are being clamped. For example, the large sun bloom is capping out at the maximum value in the image, and we don’t see the actual sun.
The pixel values should be much higher where the sun is, but they are being limited within a narrow dynamic range. In this case, the image is being clamped to values between 0 to 1, and most of the sky is at or near 1.
If you instead were to increase the Viewer Gain, you’d see less detail in the shadow areas of the low dynamic range image – compared to one with a higher dynamic range.
That’s because images with a higher dynamic range contain a lot more information to work with, and you can push and pull the grading much more without breaking the image.
For example, at first glance, there doesn’t appear to be much information in the shadows of this RAW image:
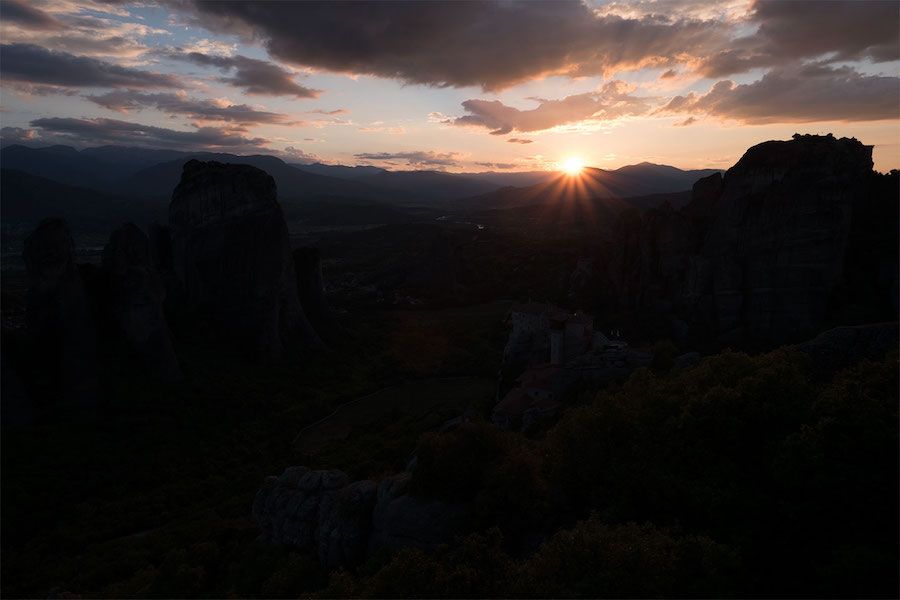
A landscape captured with a camera which has a high dynamic range.
However, when grading up the shadows, we can see that a ton of detail was actually captured:
The shadows in the RAW image graded up to reveal a lot of detail.
So, to retain a high dynamic range, you have to be using high fidelity image formats, for example 16-bit EXR – for both the input and the output images in the composite.
And the buck doesn't stop there.
Image Format → Display
Most of us don't have HDR computer monitors.
And when you're working on a shot on an SDR monitor (Standard Dynamic Range, i.e. a normal, non-HDR monitor), you're only seeing an approximation of the shot's dynamic range.
So it’s very important to gain up and down the Viewer in Nuke to make sure that you are matching the dynamic range of the scan you're working with. This is especially significant if you are delivering work for an HDR project, but it applies to really any compositing work.
A flat and clamped – or overly bright – element will really stick out in your composite when displayed on high dynamic range equipment.
And so if you for example download a JPEG image from Google and composite it into a scan with a wide dynamic range, you will likely have to adjust the values in the image for it to fit in properly.
More on that later.
Nits & F-Stops
The luminance of the things we can see is measured in units called candelas/square metre (cd/m2) – more commonly known as nits.
An iPhone 15 has a typical max brightness of 1,000 nits, for example.
And the greater the difference between the maximum and minimum brightness, the greater the dynamic range.
The real world has an extremely large dynamic range. At the low end, starlight can be as low as 0.000001 nit, while the sun emits over 1 billion nits.
That's a 1015:1 contrast ratio, or about 50 stops of dynamic range:
—In photographic terms, dynamic range is measured in f-stops – which marks the lens’ aperture, or the amount of light that’s entering the camera.
An increase of 1 stop equals a doubling of the amount of light. And each further increase of 1 stop is another doubling of the amount of light.
So an increase of 2 stops would equal 4 times the original amount of light, an increase of 3 stops would equal 8 times the original amount of light, and so on. (And vice versa, 1 stop down equals a halving of the light).
10 stops of dynamic range therefore equals about a 1,000:1 contrast ratio between the brightest and darkest values (210:1 = 1,024:1, to be exact).
Modern cinema cameras can reproduce over a dozen stops of dynamic range. For example, the RED V-RAPTOR XL has 16.5+ stops of dynamic range, or a 90,000+:1 contrast ratio.
And so, although we can't capture the full dynamic range of the real world quite yet, the footage we get out of these cameras does have a wide dynamic range.
And when you're working with footage which has a wide dynamic range, viewing that footage in Nuke poses a problem:
Viewer Limits
On a typical SDR monitor, values above 1 don't look any different to a value of 1.
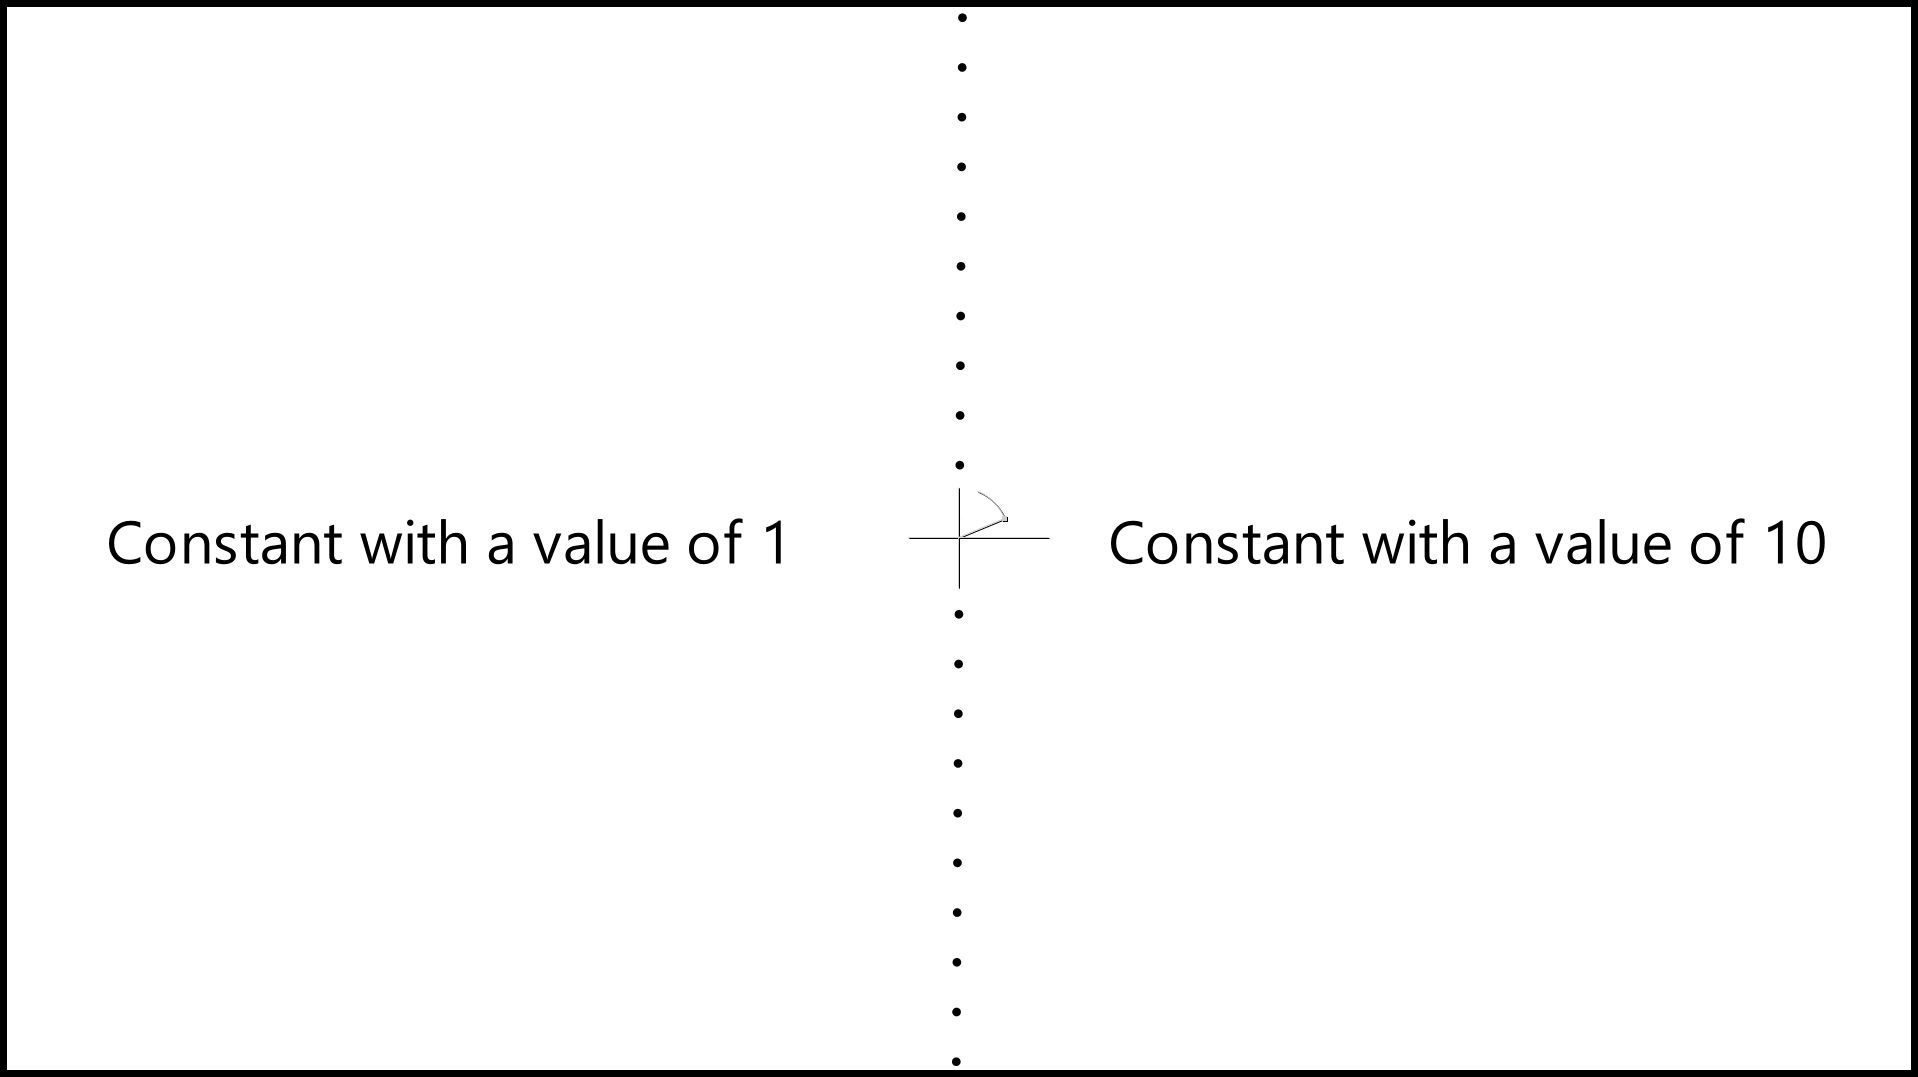
Wiping between two Constants with values of 1 and 10.
And also, values below 0 don't look any different to a value of 0.
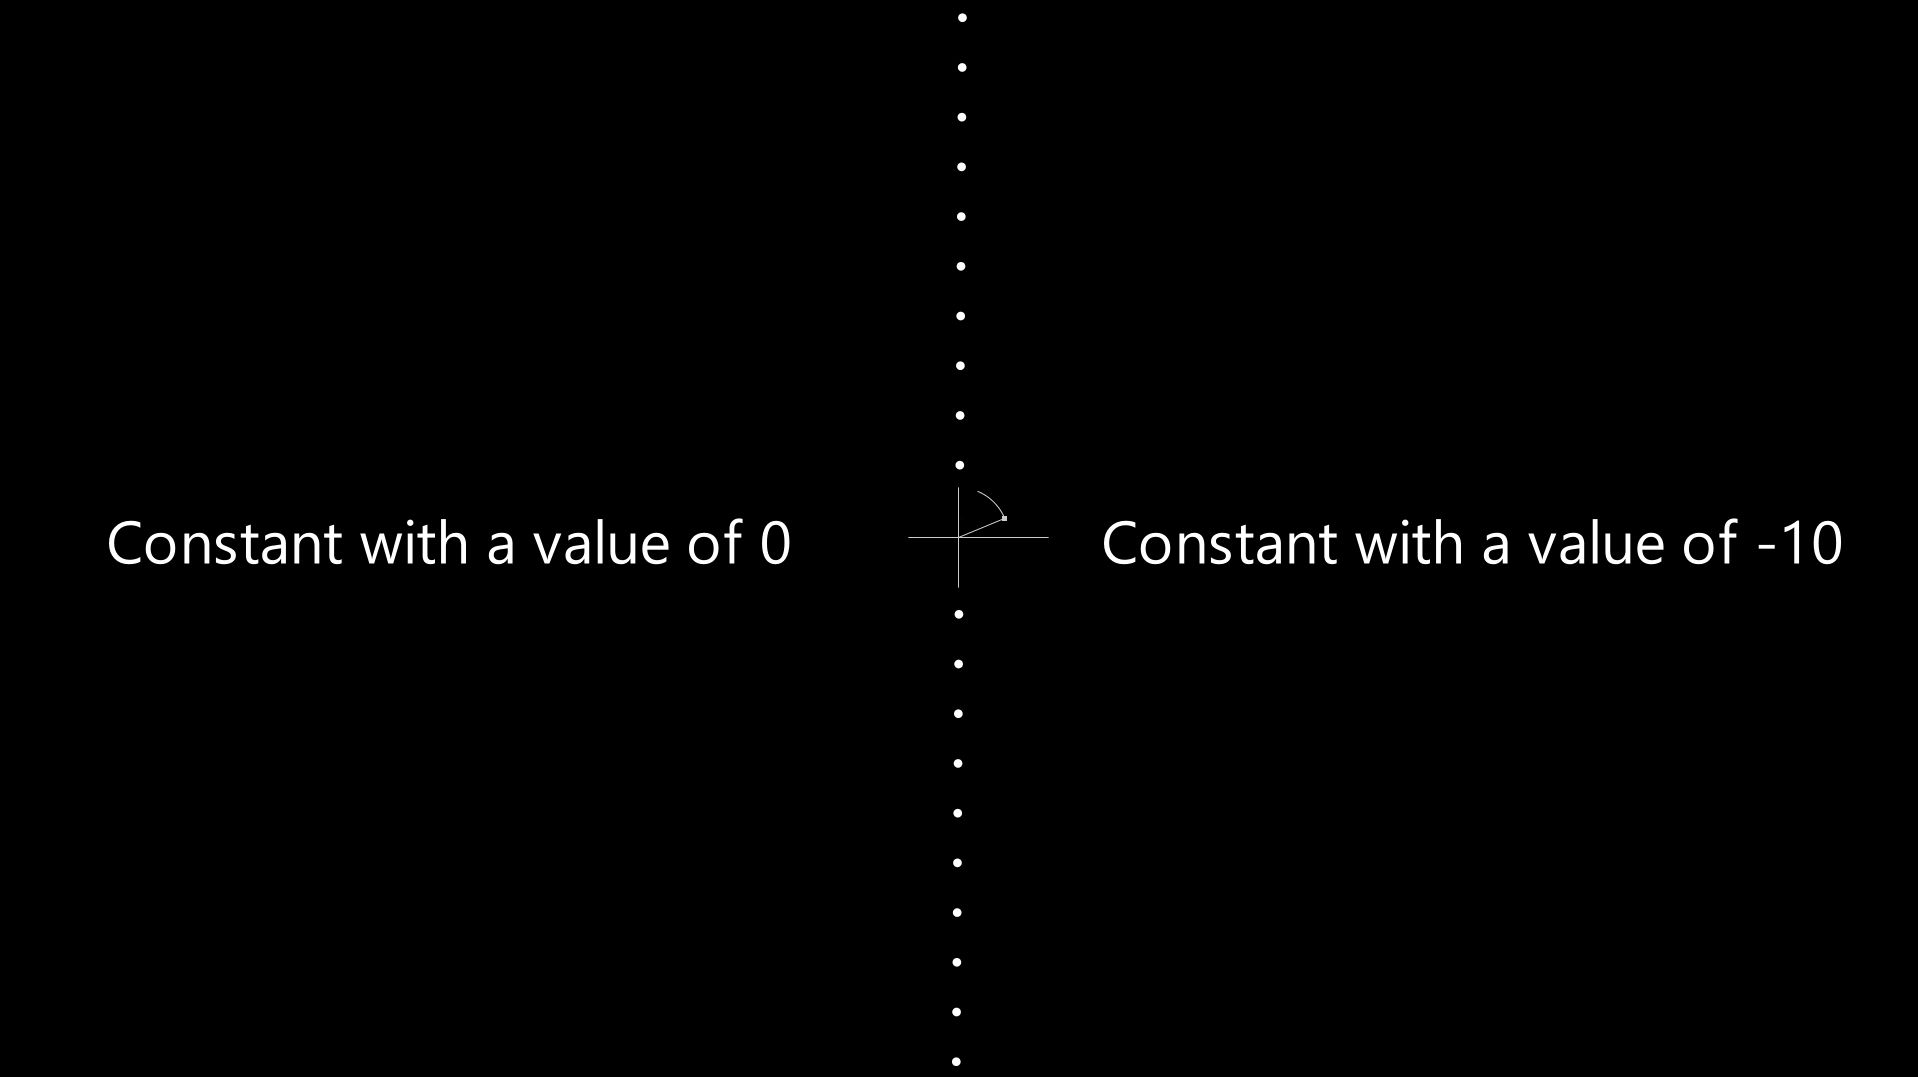
Wiping between two Constants with values of 0 and -10.
And so outside of the 0-1 luminance range, you're working sort of 'blindly' at the default Viewer exposure.
However, we can adjust the Viewer exposure to be able to take a closer look at these values:
Highlights
The images we composite commonly have pixel values well above 1.
And as mentioned above, when you composite renders or elements with your plate you should match its dynamic range.
When it comes to the highlights, gain down the Viewer to check that your composite is balanced.
If you're doing an iPad screen replacement, for example, the screen shouldn't be brighter than the sun. And a roaring fire wouldn't be duller than a street lamp, either.
Sample the brightest values of the scan with Ctrl/Cmd + Alt + Shift + Left-click-and-drag in the Viewer, and check what sort of values you should be matching to for your specular highlights and bright lights.
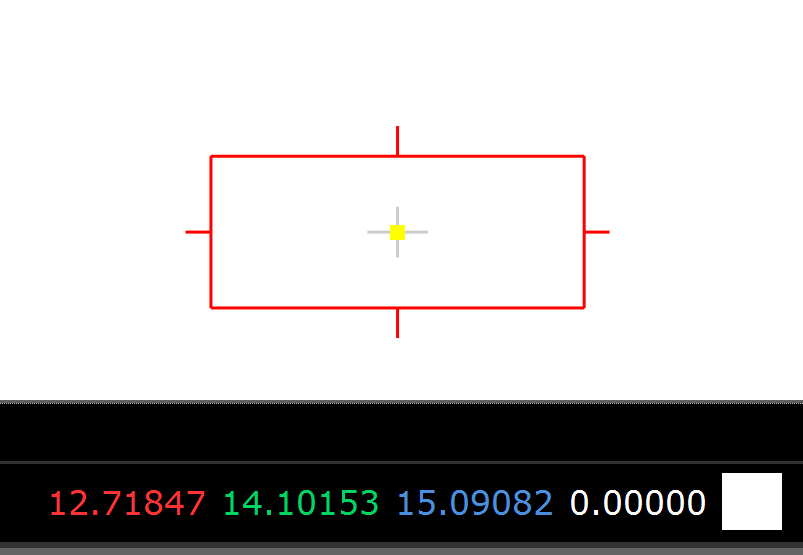
Sampling colour values.
Let's say that you are augmenting a fire by adding more CG or element plate flames to it. And the brightest part of the fire in the scan is for example maxing out at a value of around 54.
If so, you should aim to match that top end in your additional fire. It could have max values quite far above or below what's in the scan, and so you may have to grade up or down the additional flames, as needed.
Using a Grade node (Un-/Premult as needed), multiply the fire up or down until its brightest values match up with the brightest values in the scan.
You may have to mask the Grade by a luma key in order to only brighten up the core of the additional flames. That way you don't over-brighten the whole fire.
It may even help to do multiple grades, with tighter and tighter luma keys as masks, in order to build up a more realistic hot core in the fire.
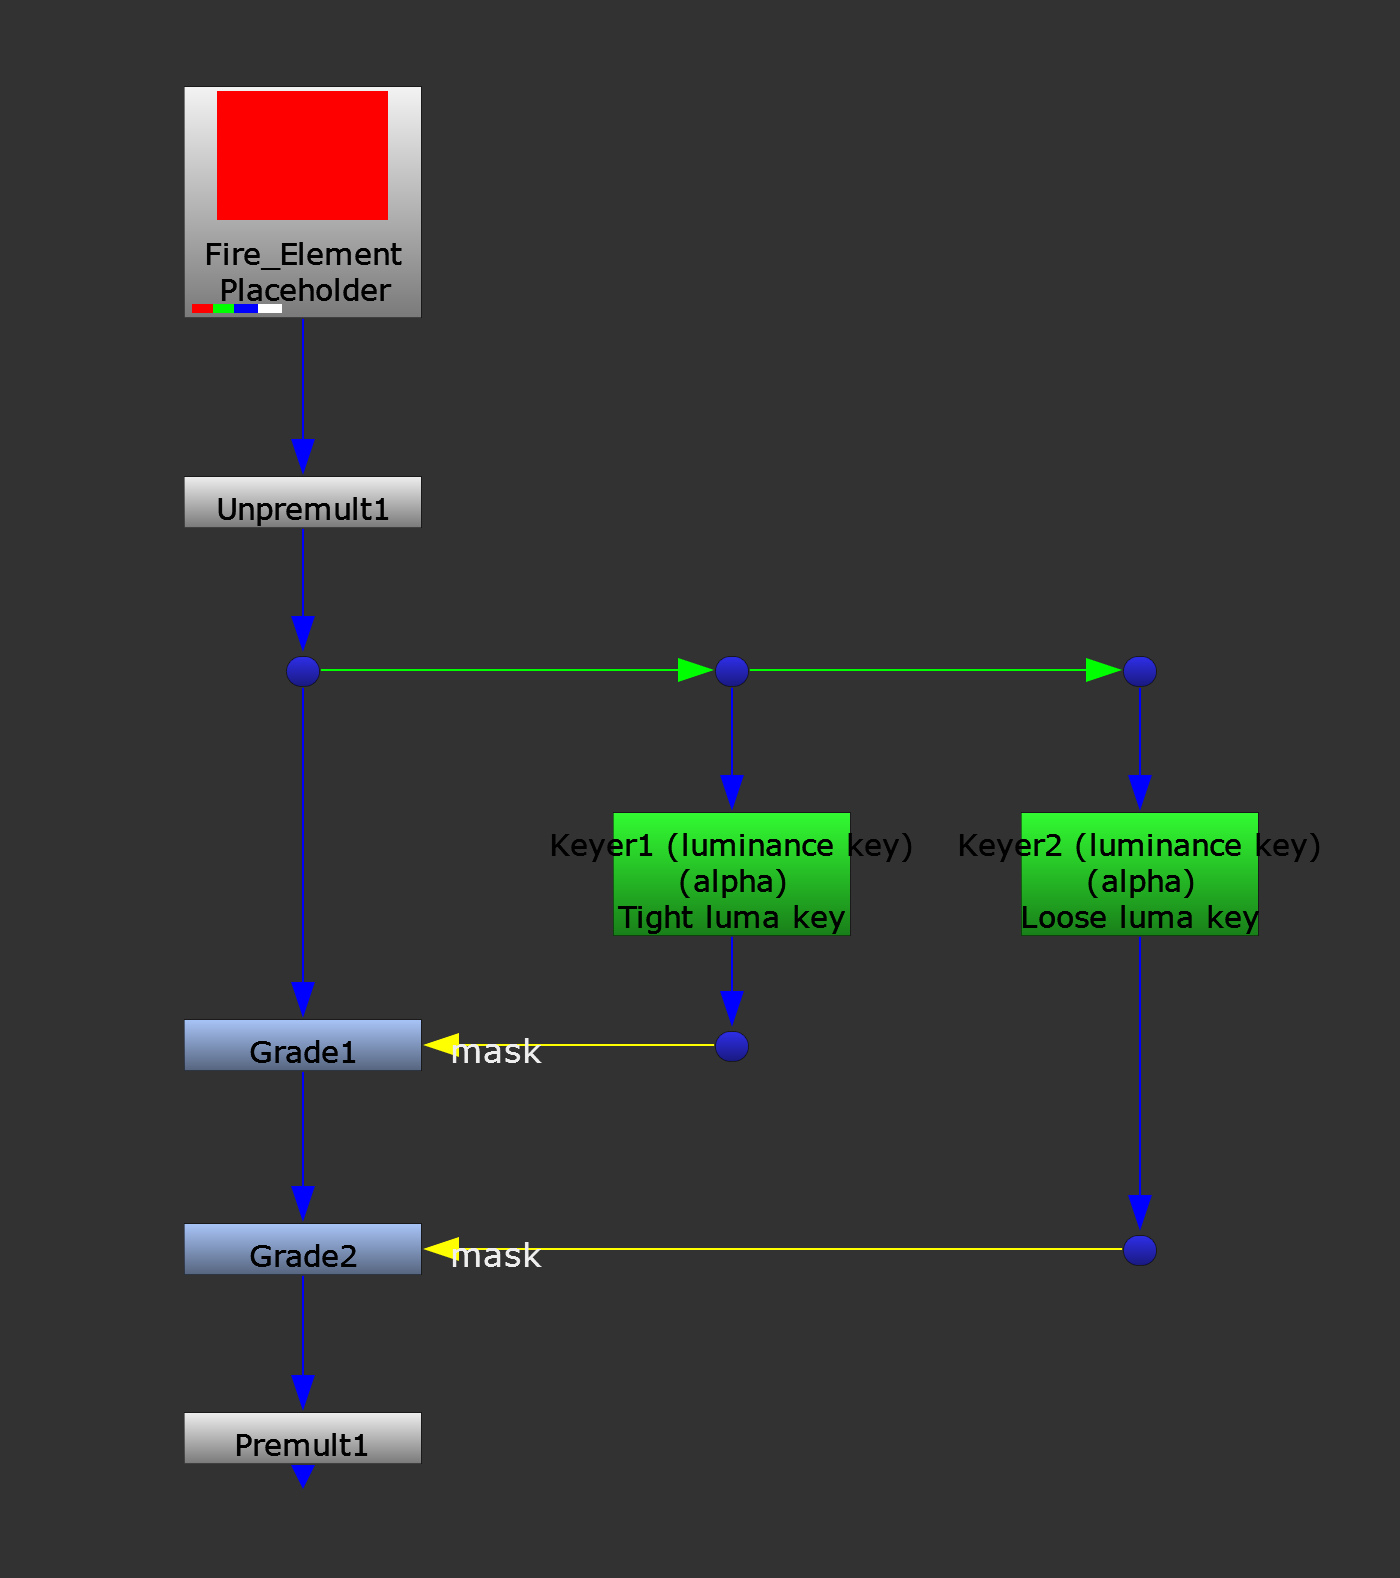
Grading up the core of a fire element.
If you're compositing something which will be the brightest thing in the shot, and there isn't anything very bright in the scan, you can look at other shots in the sequence for reference. Check which values other, similar scans clip at, and use that as your maximum.
Very often, it will be in the 50s or below. So if your CG fire has values up in the hundreds, or thousands, that should throw a red flag.
But avoid just clamping the values in your fire element. Instead, grade them down. You can also compress the element's dynamic range using a soft rolloff tool, like this one (copy/paste the code into your Node Graph):
set cut_paste_input [stack 0]
version 13.2 v2
push $cut_paste_input
Expression {
expr0 "limit * (1 - exp(-r/limit))"
expr1 "limit * (1 - exp(-g/limit))"
expr2 "limit * (1 - exp(-b/limit))"
name Soft_Rolloff
tile_color 0xff3fff
note_font_size 12
selected true
xpos -171
ypos -212
addUserKnob {20 User l Limit}
addUserKnob {7 limit l "Limit at" R 1 17}
limit 13.5
}
Adjust the limit knob to roll off the highlights and compress the dynamic range of your image (in a nicer way than how the SoftClip node does it).
In addition to the luminance values, also make sure that the colours of the highlights are matching up. Check your white point and match any tint there is in the scan.
Shadows
On the other end of the luminance spectrum, we've got the shadows.
And we’re often even more sensitive to mismatches in the darker areas of a composite than in the very bright. So it’s important to grade the black levels of your elements to match up with the scan.
Gain up the Viewer and lift your elements to fit the values in the scan:
If the scan that you received from the client contains negative values, you should keep them (i.e. don’t clamp them to 0), and deliver the comp back with the same range as the scan.
And adjusting the black levels should be the last thing you do in the grading stack. Because it's very easy to mess them up by adding further grading downstream.
When you’re brightening up the shadow areas of a scan, you usually have to be quite delicate. Grading up the dark areas too much can make the image look over-processed, and result in halos around parts of the image where the dark tones bleed into the light tones.
Lift Vs Toe
Increasing the lift/offset value in a Grade/ColorCorrect node raises the values in the entire image. And while it's mostly noticeable in the dark areas, it can sometimes affect areas you don't want to change.
If so, you can use the Toe node instead. It's like a lift/offset, but restricted to only affect the darks. It's for example great for integrating CG renders into areas of the scan which have clamped black levels.
Midtones
With the highlights and shadows in place, you’ll have matched each end of the dynamic range of your scan – but let's not forget the midtones of the image.
By altering the midtones, you can quite significantly change the look and feel of your shot.
Some footage will have a more hazy look, where the gamma is biassed toward the upper end. Others will have a more crunchy, contrasty look, where the gamma is biassed toward the lower end.
The former can be great for creating the look of a warm, hazy summer day, while the latter can be used for creating a more dramatic atmosphere, for example.
Lifted gamma versus more crunched gamma.
Adjust the midtones by changing the gamma knob in the Grade node. Keep in mind that when you adjust the gamma, you’re also affecting the saturation. Which means that you may have to compensate by using a Saturation node.
When you lower the gamma, you increase the saturation of the image. And when you boost the gamma, you reduce the saturation of the image. Using a Saturation node, you can counter this shift as needed.
If your shot feels too lifted/flat or too crunchy after matching the white and black points, then adjust your midtones to compensate.
Exposure
While we've talked a lot about all of these things regarding dynamic range, it’s also important to keep exposure in mind when you composite your shots.
A piece of footage can have a high dynamic range, but it will usually only be exposed for a section of that range. Meaning, parts of the frame will fall comfortably into our view, while others will be too bright, or too dark for us to see what’s going on there.
With high dynamic range footage, you can grade those bright and dark areas away from being overexposed and underexposed, and bring them into the exposed range (also known as tone mapping). However, like mentioned above, you’ll have to be careful to not make the image look over-processed.
Let’s for example take an interior scene of a living room that has windows with a view of the outside. By exposing for the interior, the exterior (which is much brighter) will typically be overexposed in the footage:
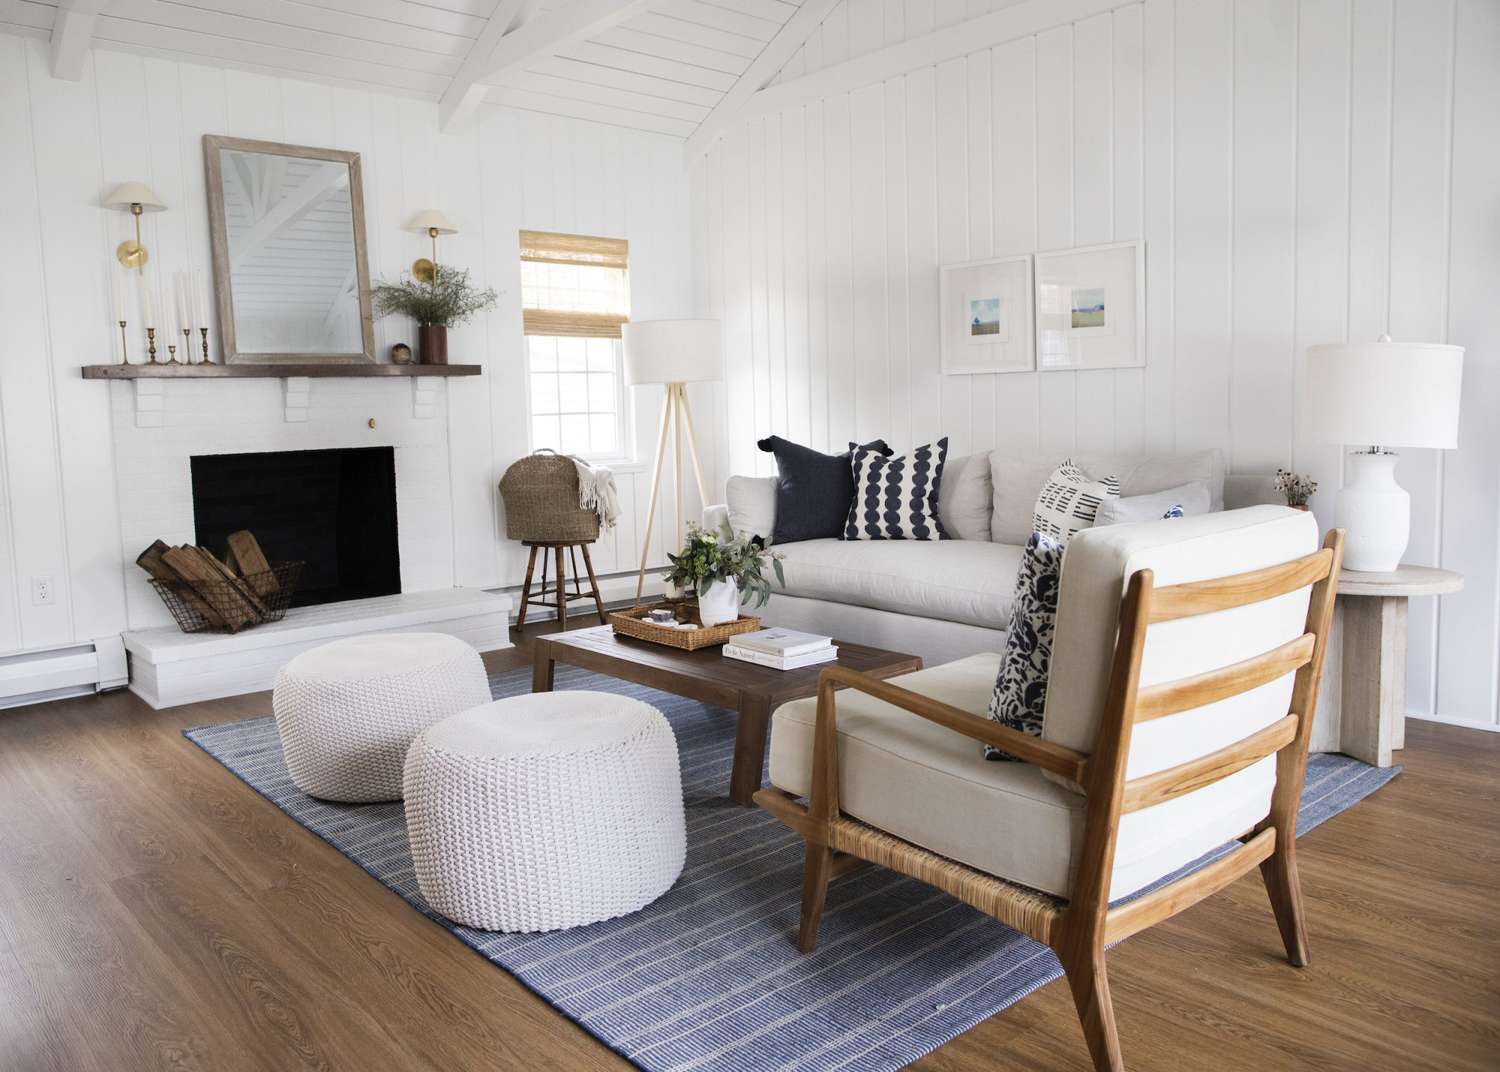
When exposing for the interior, we can often barely see anything outside.
A high-quality cinema camera would be able to capture detail in both the interior and exterior with its high dynamic range. And you could grade down the exterior in comp to be able to see more outside of the windows. But generally, the outside would be overexposed in a realistic image.
Let’s instead say the living room was on a set, and the view outside the windows was just a blue screen. To make the composite look realistic, you would likely have to overexpose the footage that you composite into the exterior to match what it would have looked like had you filmed it exposed for the interior.
Advanced Grading Tools
Below is a couple of useful grading tools with additional functionality beyond the standard Grade or ColorCorrect nodes:
- LUE (Python 3 version in the comments)
I hope you found this tutorial useful. For more Nuke tips & tricks, see Nuke.


