Grade Stacking In Nuke
⭐ If you need to remove a distracting highlight, make a sunny scene flat and overcast, or grade a shot day-for-night, here is a very useful grading technique...

⭐ If you need to remove a distracting highlight, make a sunny scene flat and overcast, or grade a shot day-for-night, here is a very useful grading technique...
This article contains a Companions Exclusive Tutorial at the end
Day-For-Nightmare
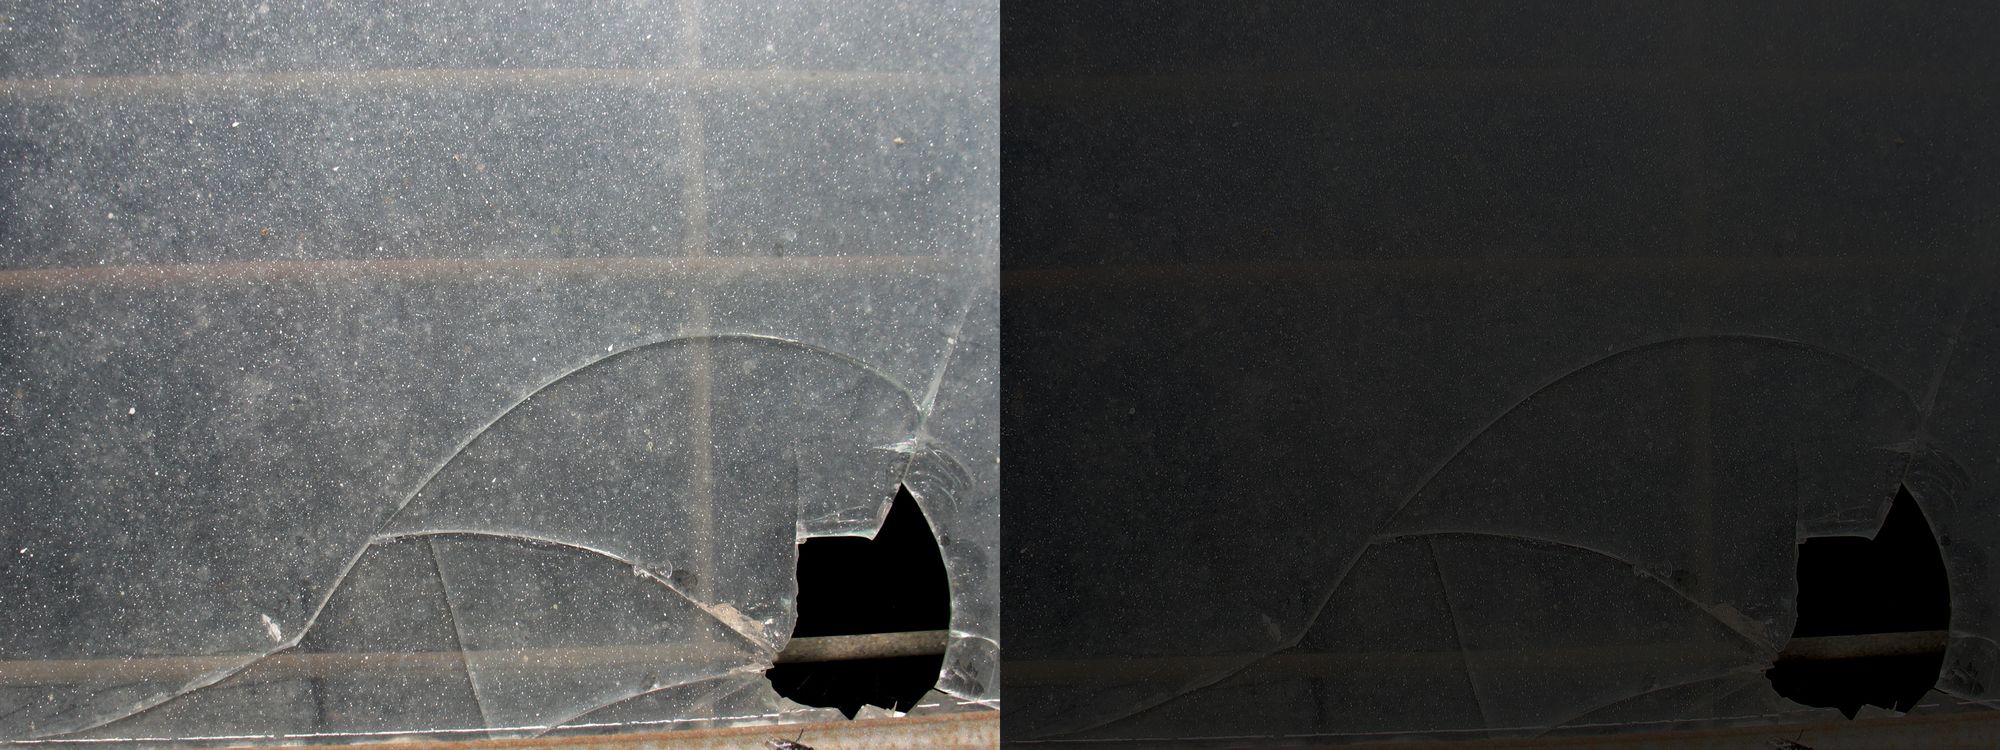
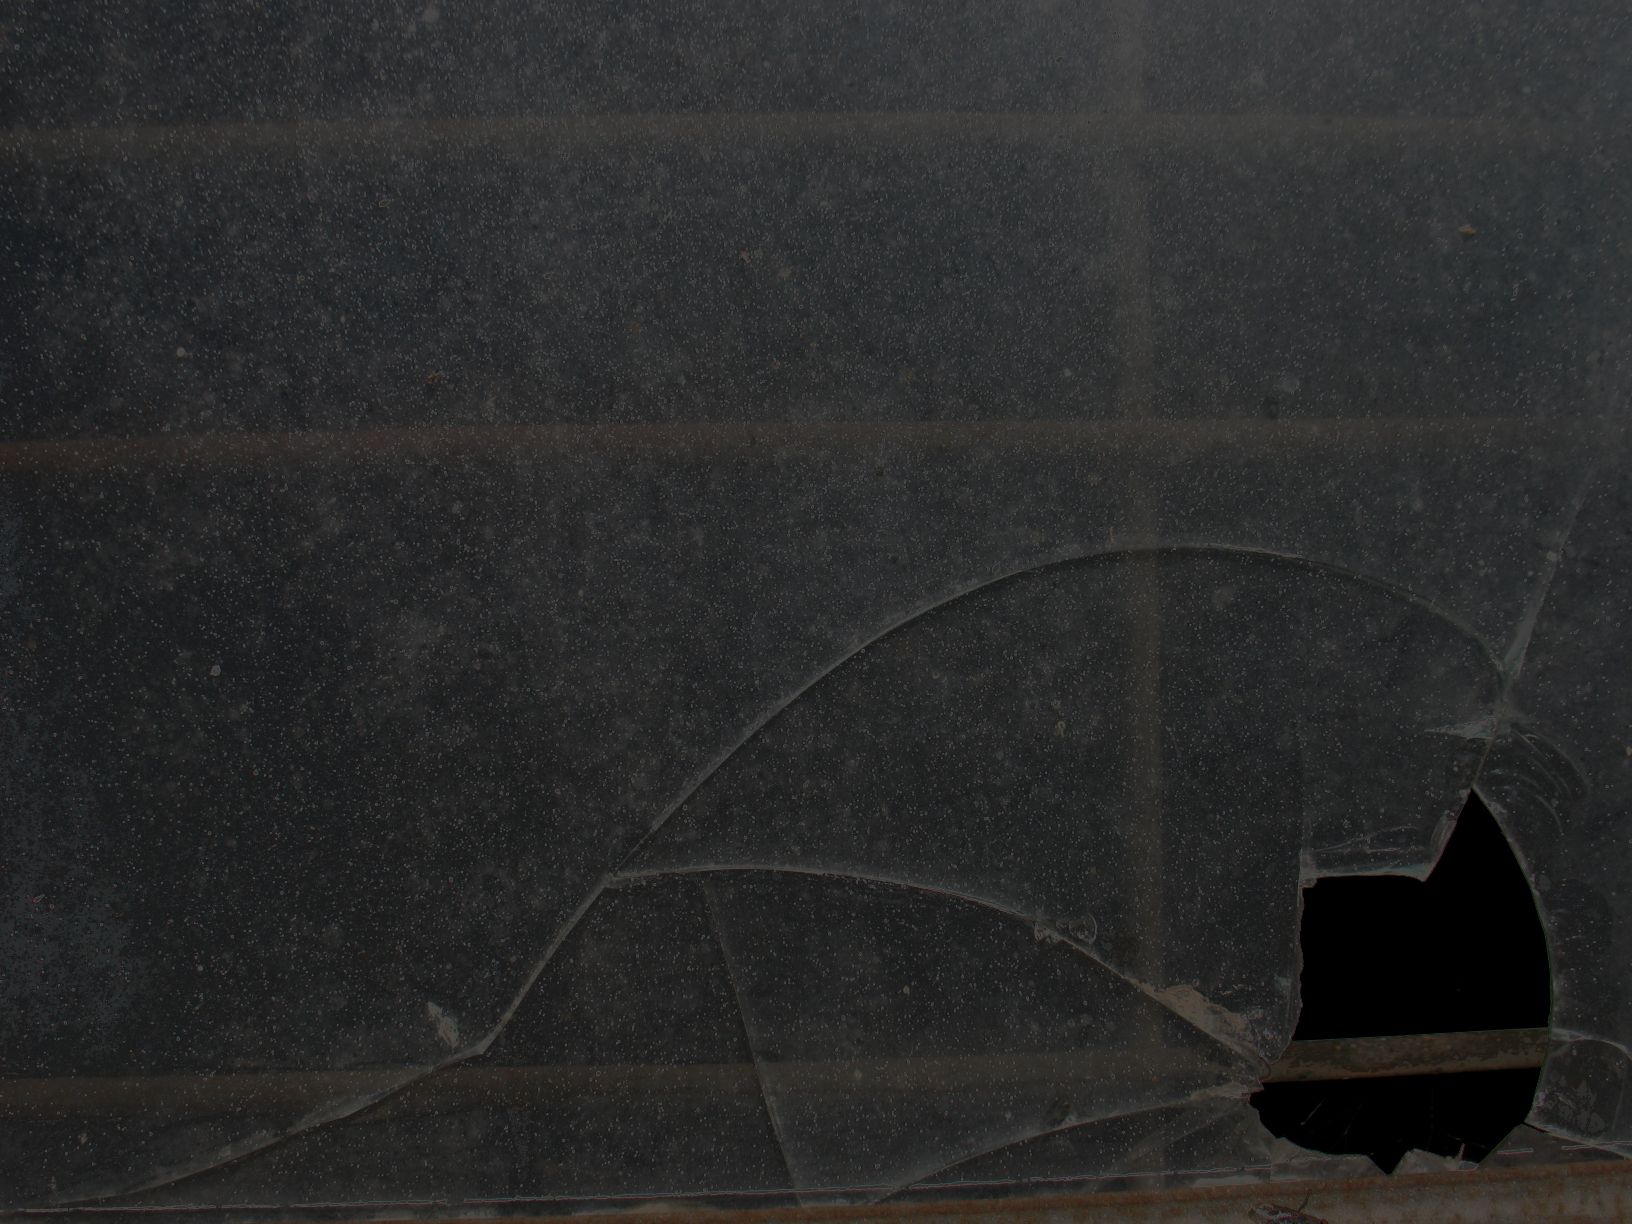
Let’s take the image on the left above. We want to kill the highlights, flatten the image, and grade it down to use it for a night time scene. The goal is to achieve a result like on the right above, with no pinging highlights or harsh directionality to the light.
In situations like these, it can be tricky to avoid artefacts and clamped-looking images using conventional grading techniques.
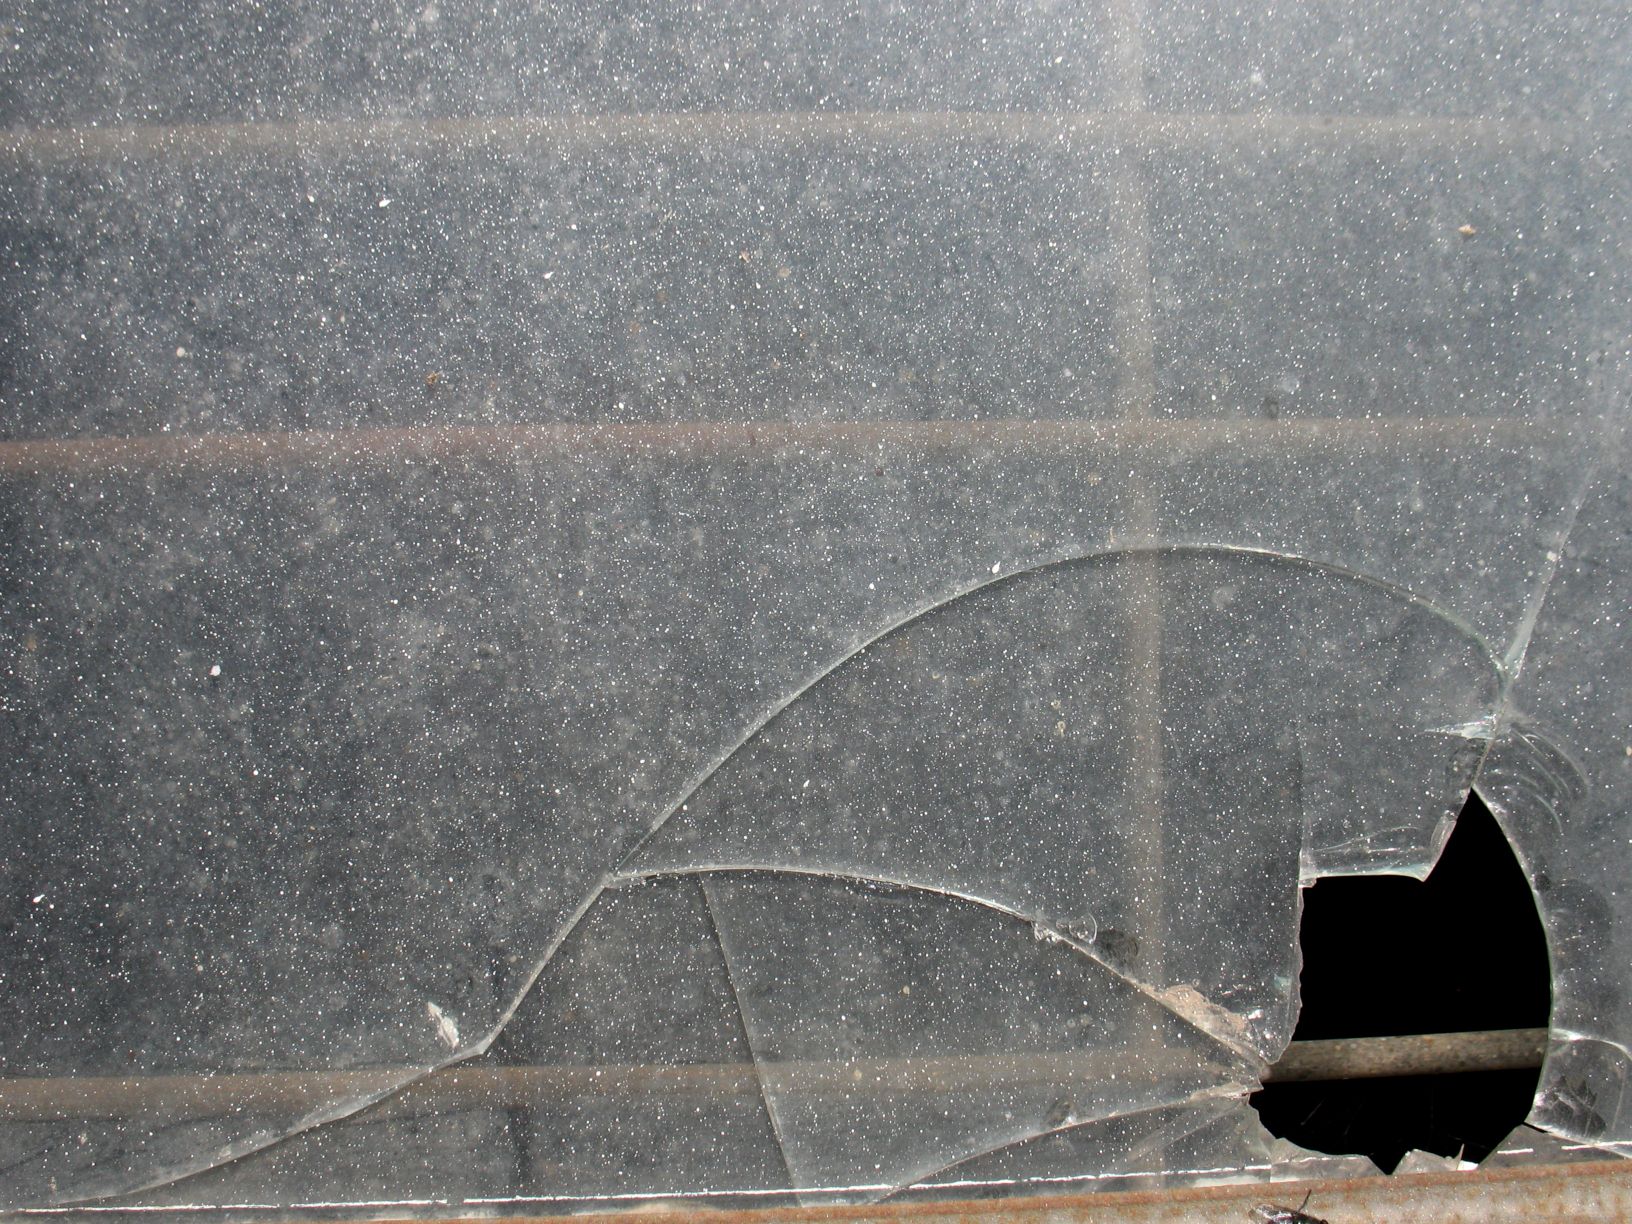
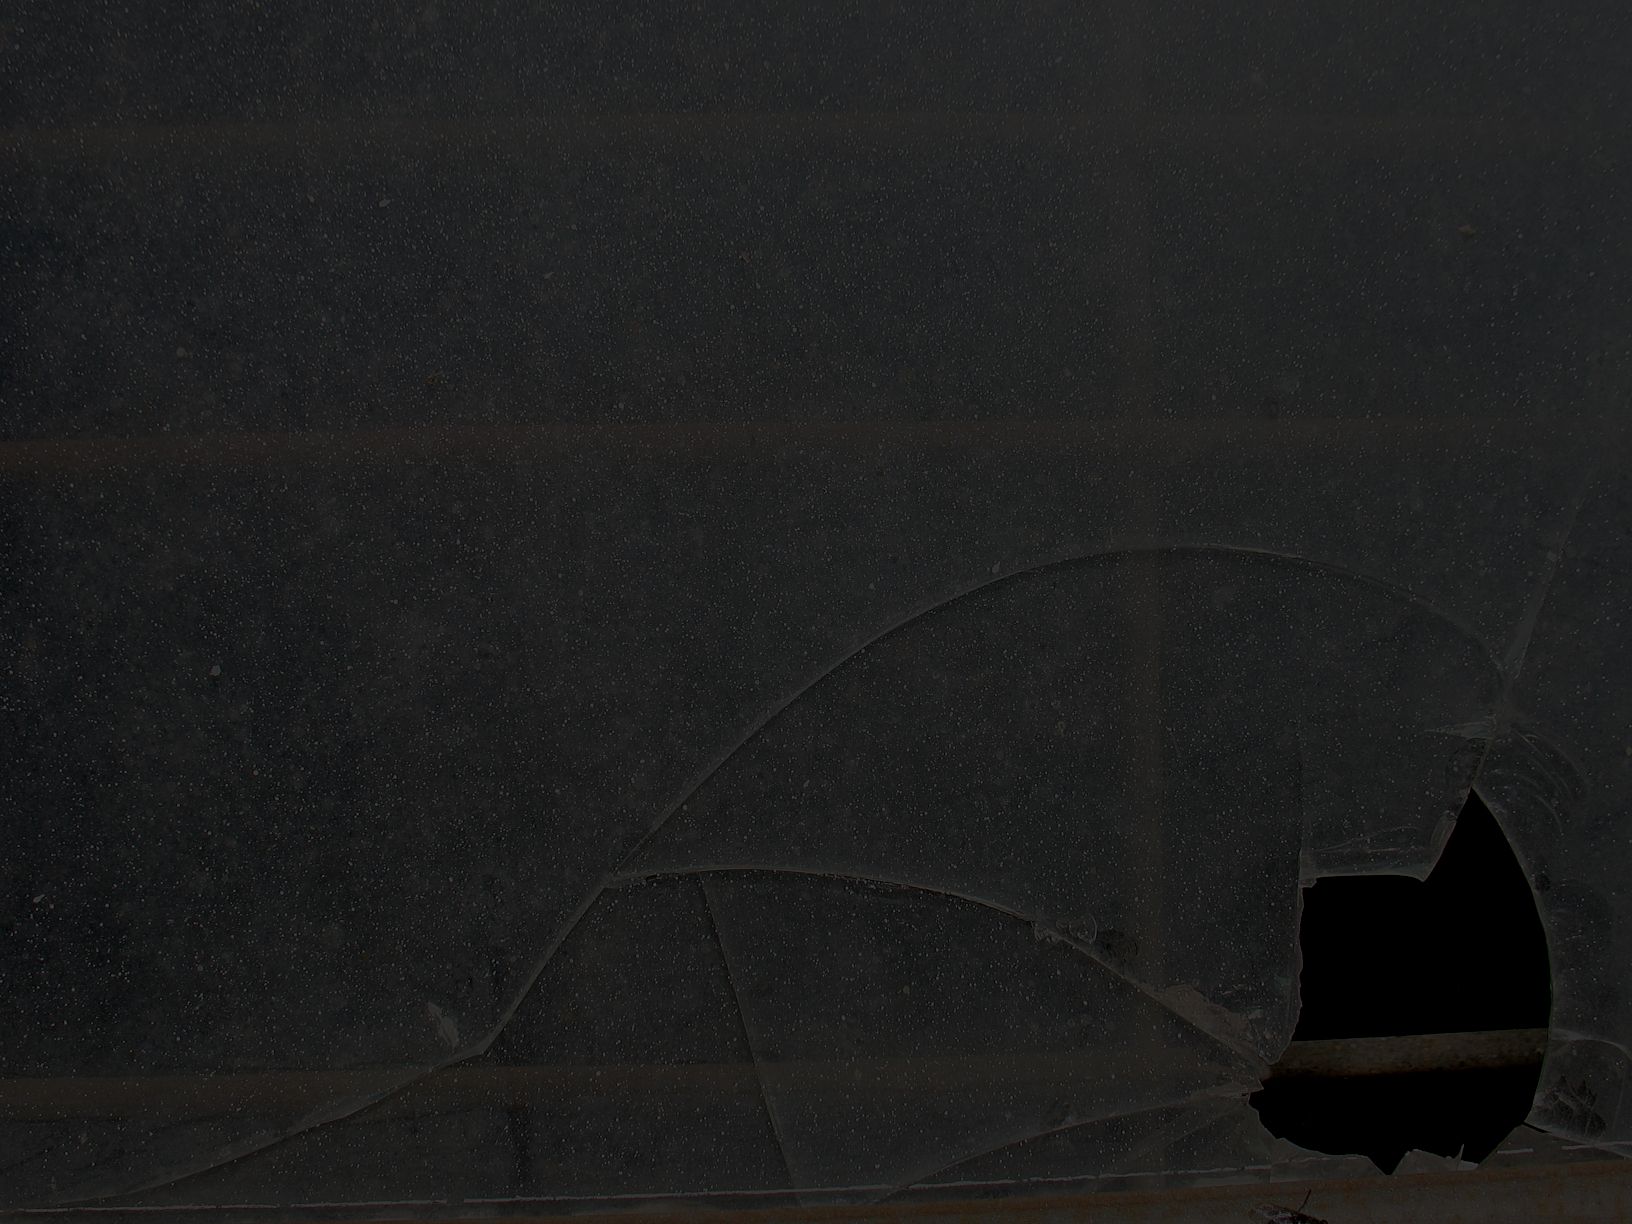
Original image to be graded into a night time scene.
Simply grading the image down doesn’t change the proportion of highlights versus shadows all that much, it just makes everything darker overall. It still kind of looks like a lit scene, just weirdly darkened down. This is a pretty common issue when grading images day-for-night.
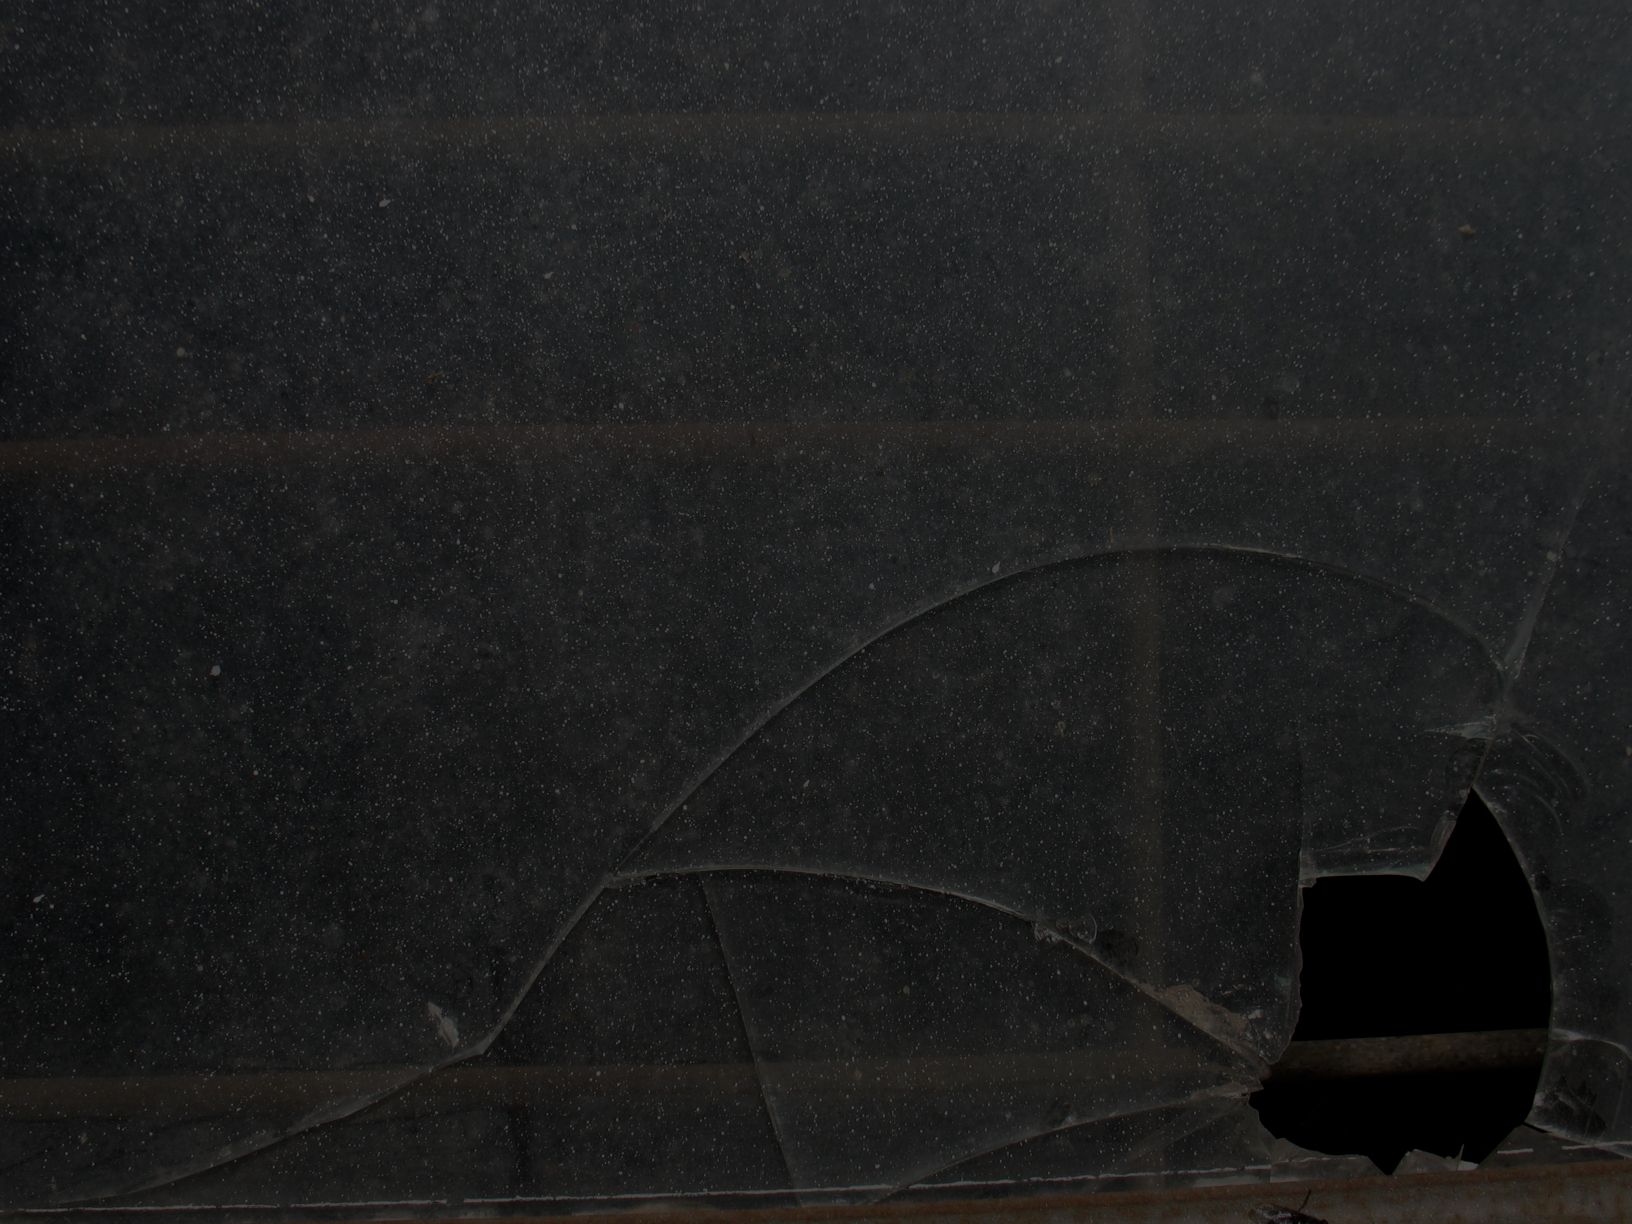
Original image graded down using only the gain.
Grading down the image using a roto or a luminance key as a mask can be better, but there is a limit to how far you can push it before it breaks and you end up with nasty artefacts. Often, there just isn't much, or enough, room to work with.
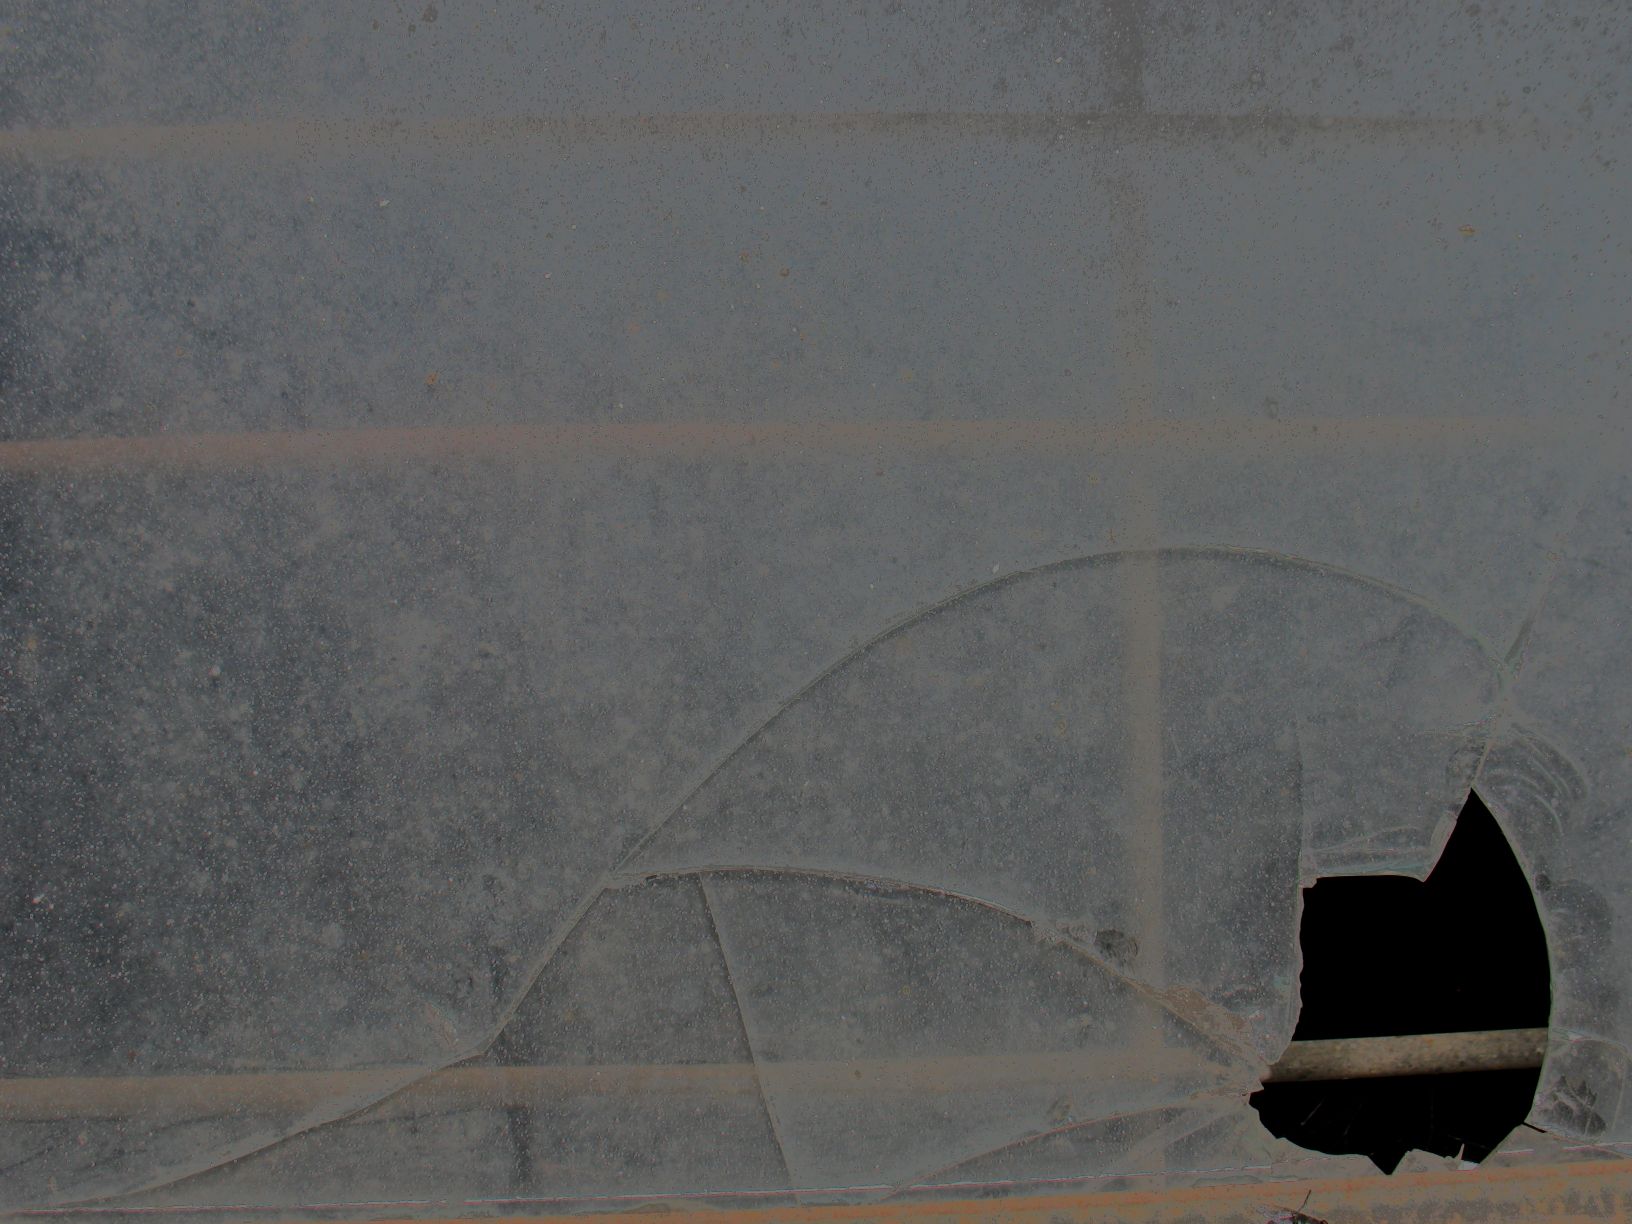
An exaggerated luminance key is used here to show the clamping artefacts that can happen when having to push the luminance key.
The same is true for the ColorCorrect node. You can adjust the highlights, midtones and shadows separately, and tweak the curves defining them, but ultimately the node is still limited if you need to make significant changes.
Grading down the image using a ColorCorrect node, tweaking the highlights and midtones. If you zoom in closer, there is a whole bunch of artifacting happening, especially on the cracks in the glass, but also on most of the small specks. The result is indeed flatter, but not all that much different to just grading down the whole image.
Enter Grade Stacking
The idea behind the Grade Stacking technique is that you take the whole spectrum of values in your image and scale/compress it down just slightly using the bottom-end values as the anchor point. Then, do the same again to this new spectrum of values. And then again. And again, over and over, until you have relatively gently flattened out the image.
Here is how to do it:
Step 1
We are going to make use of multiple luminance keyers, so first convert your image to log space as it’s better for keeping detail and getting a good matte when luminance keying. You can use several nodes to do this, for example Log2Lin, Colorspace, PLogLin, OCIOLogConvert, or OCIOColorSpace. For this example I will just use a Log2Lin node. Connect the Log2Lin to your image, and in its properties set the operation to lin2log.
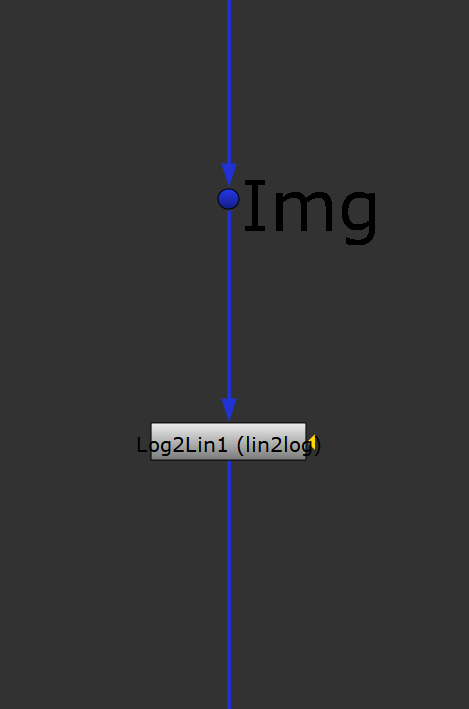
Step 2
Make a copy of the Log2Lin node and connect it to the first one. Change the copy’s operation to log2lin. This should return you to the original image. Open up some space between the two Log2Lin nodes, because all the next steps will happen between them.
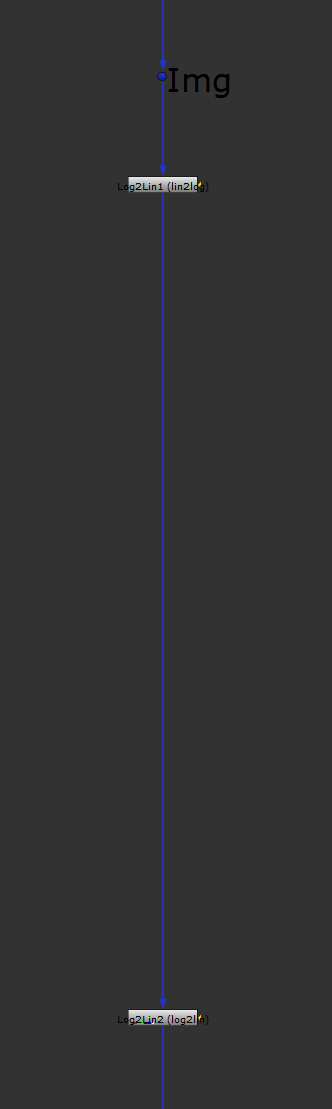
Step 3
Add a Grade node and mask it by a Keyer node with the operation set to luminance key. Set the gain in the Grade node to 0.95 (we can adjust later as necessary). In the Keyer node, leave the default values as they are, i.e. A = 0 and B = 1. This little setup will slightly grade down the top-end values in the image but not affect the low-end values by much.
Step 4
Then, copy these two nodes and connect them below. In the copies, expression link the gain value from the original Grade node, and the A and B values from the original Keyer node. This is so that we only have to adjust each value once for all the nodes when we need to make changes.
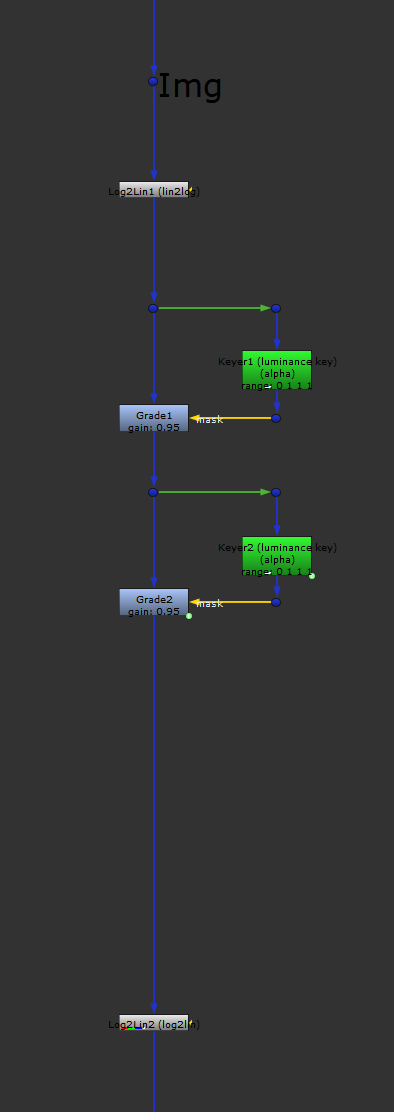
Step 5
Next, duplicate the expression linked copies and attach them below. Keep doing this until you have a total of 20 each of the Grade and Keyer nodes. This is usually enough, but you can add or remove as many as you want later on. Because you are making a fairly small change with each iteration, you will usually have to stack the setup quite a few times to make enough of a change to your image.

Step 6
That’s the general setup complete, but let’s add a few final things to make it even better.
First, right after the last Grade node in the stack which is masked by a Keyer, add another Grade node and a ColorCorrect node (with no masks connected) to be able to tweak the overall grading at the end.
Next, within the two Log2Lin nodes, wrap a Divide/Multiply frequency separation setup around the whole stack of Grade nodes, and also include the ColorCorrect node. That way you can restore a touch of detail after flattening your image, making the final image look better.
To do that, add a Blur node (set the size to 5 for now) just below the first Log2Lin node, before the first Grade node. Next, off to the side from the pipe, create a Merge (divide) node and connect its A input to the Log2Lin node, and its B input to the Blur node. Then, create a Merge (multiply) node and connect its A input to the Merge (divide) node, and its B input into the stream after the ColorCorrect node.
Finally, add a Sharpen node just before the last Log2Lin node. Set the size to 2 for now, we only want a very gentle sharpening.
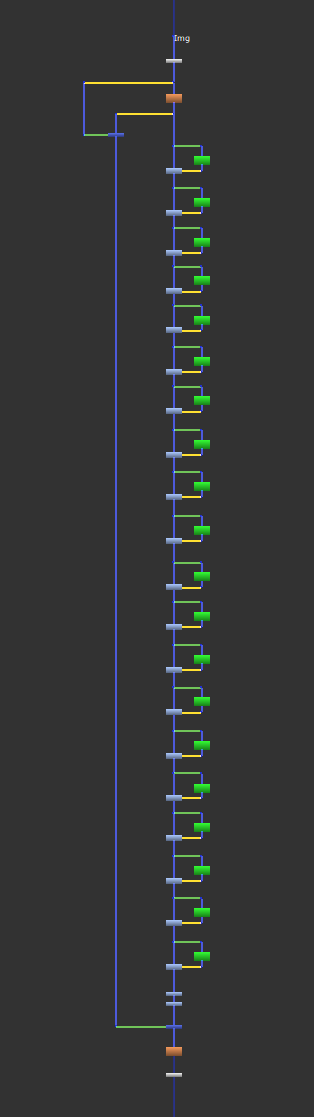
The final setup.
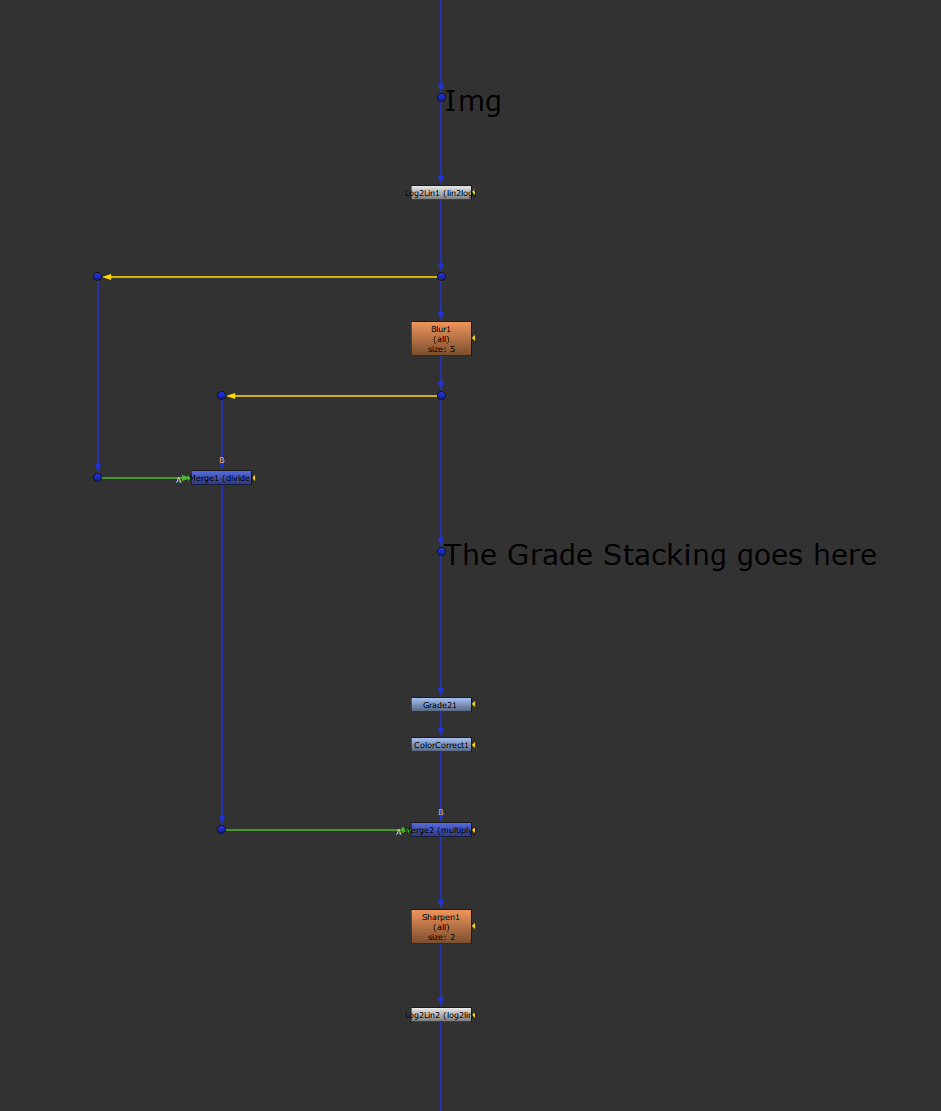
To show step 6 a bit better, here is the final setup without the Grade Stacking.
Using The Setup
With the whole setup complete and connected to your image, adjust the gain value in the first Grade node as needed to flatten out the image. You can also adjust the A and B values in the first Keyer node but that is usually not necessary. Next, adjust the grading in the final Grade node and the ColorCorrect node to taste. Lastly, adjust the Blur value to bring back just enough detail.
Grade Stacking results in an overall much flatter image suitable for a night time scene.
💡 You can also use the Grade Stacking technique to go the other way; to ping out highlights more. Just adjust the first Grade node’s gain value to go above 1. It is very sensitive in this direction, though, so a value of 1.02-1.03 is usually plenty.
I hope you found this tutorial useful. For more Nuke tips & tricks, see Nuke.
Companions Exclusive Tutorial: Luminance Swapping
As a thank you to all Companions, I have added a bonus tutorial below.
There is another technique with a far simpler setup which can yield superior results to Grade Stacking. I call it Luminance Swapping.
The idea behind the Luminance Swapping technique is to flatten the image by converting it to log space, and then separate and transfer the resulting flat luminance back into the original image, keeping the original colours. Essentially, you are swapping the luminance between colour spaces.
Here is how to do it:


