Painting Motion Blur In Nuke
How to surgically add motion blur to problematic areas of your render or scan…
How to surgically add motion blur to problematic areas of your render or scan.
How It Works
You can paint motion blur in your image by smearing a set of unique coordinates with a RotoPaint node, subtracting that from the original ones, and passing the result to a VectorBlur node.
Like this:
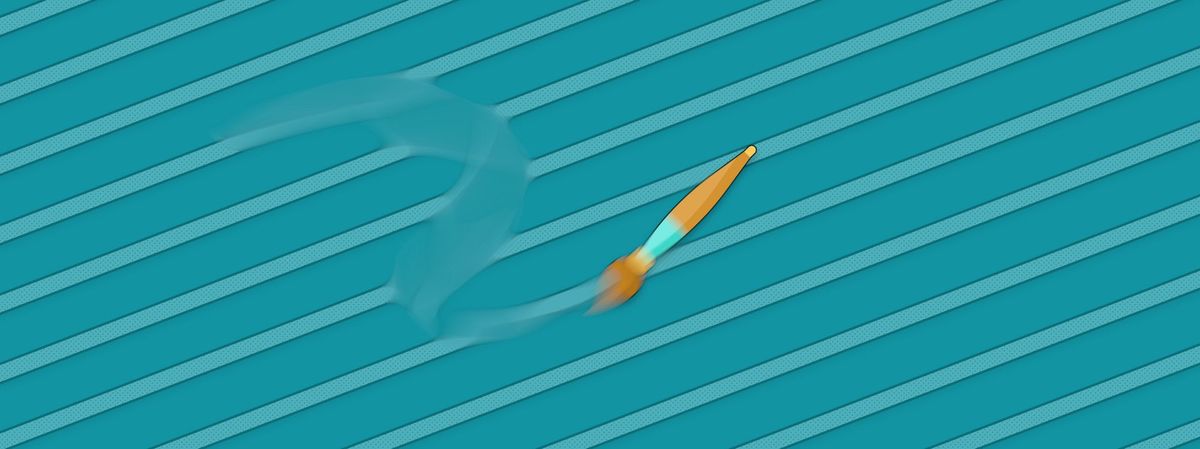
Painting motion blur.
This can be very useful when you need to strategically paint motion blur in specific areas of your render or your scan.
For example, on a former project some of the edges of the FX fire were looking unnaturally sharp. The inner part of the flames looked great – the problem only occurred in specific areas on the outer edges. Applying more motion blur overall, or overall to all of the edges, made the fire look mushy and soft. We needed to add motion blur only to the specific problem areas.
Below is a setup which does the trick:
Painting Motion Blur
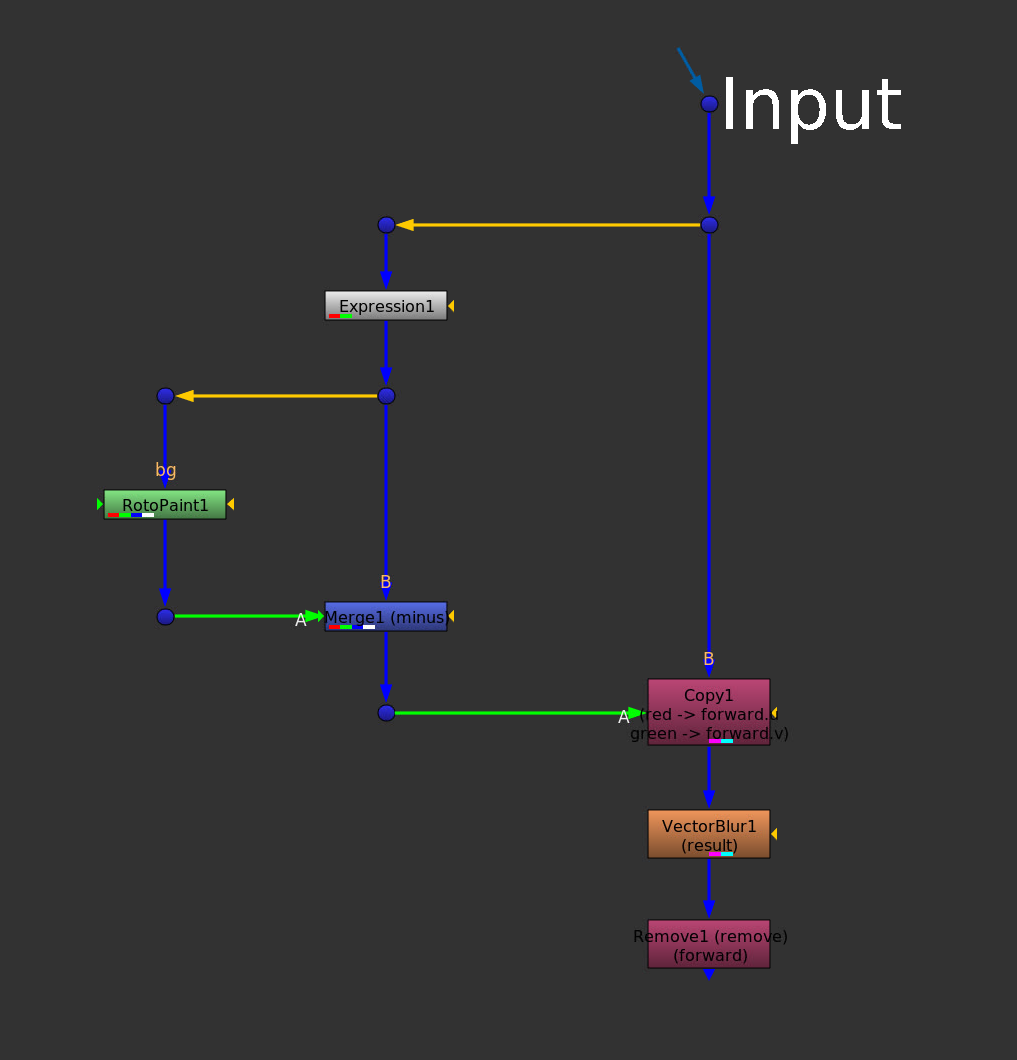
The setup for painting motion blur.
Start by connecting an Expression node to your image and filling the red and green channels with unique coordinates. You can do that by typing x and y in the expressions for the red and green channels, respectively:
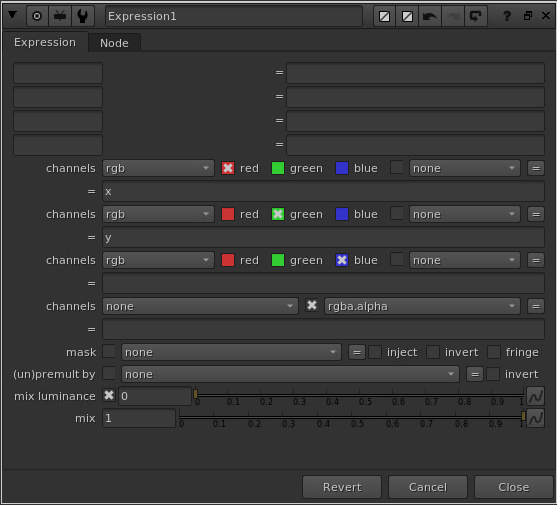
Adding unique coordinates to the red and green channels.
X will simply output the x coordinate value per pixel. So, if an image is 4K UHD (3840 x 2160), the leftmost column of pixels will have a value of 0, and the rightmost column of pixels a value of 3840.
And similarly for Y, the bottom row of pixels will have a value of 0, and the top row of pixels a value of 2160.
The pixels in between will linearly receive values within that range. That means, every pixel will have a unique red and green value combination, corresponding to its X and Y coordinates.
For example, the pixel which is 5 pixels to the right and 10 pixels up from the pixel in the bottom left hand corner will have a value of 5 in the red channel and 10 in the green channel.
Next, connect a RotoPaint node to the Expression node, and then subtract it from the Expression node using a Merge (minus).
💡 When you use the Smear tool in the RotoPaint node, you shift the coordinates around. And when you subtract that from the original coordinates, you are left with only what has changed. Anything untouched will have a value of 0 (and therefore not affect the motion blur).
Copy the result of the Merge (minus) node into the B-pipe. I’ve used the red → forward.u and green → forward.v channels, but you can use any non-rgb channels.
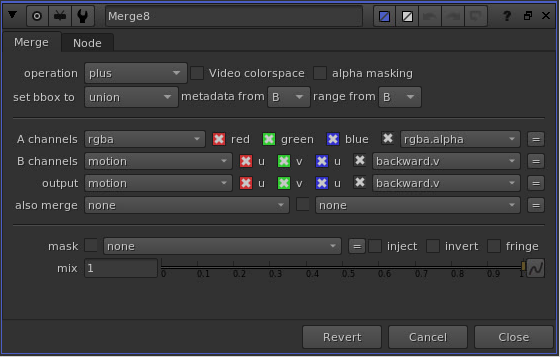
Then, connect a VectorBlur node. Below are the settings I used:
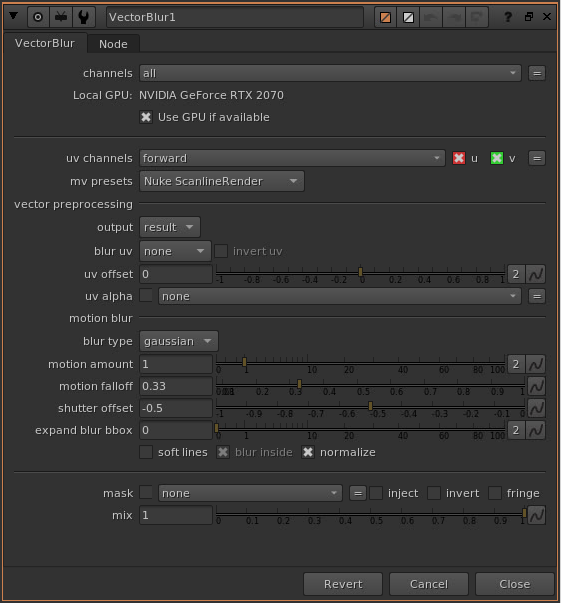
The VectorBlur settings.
Lastly, I removed the forward.u and forward.v channels to keep the B-pipe tidy.
Using this simple setup, you can paint motion blur directly where you want it in your image.
You can adjust the strength of the motion blur by changing the opacity of each stroke in the RotoPaint node, or by changing the motion amount value in the VectorBlur node.
💡 Adjust the brush spacing value in the Stroke tab in the RotoPaint node if you’re seeing stepping.
Revealing Generated Motion Blur
There is another method which also works really well for accomplishing the same goal.
You can either take the motion vectors from the CG render, or generate your own using a VectorGenerator like below, and reveal the vectors only in specific areas using a RotoPaint node. When you pass the vectors to the VectorBlur node, it will only add motion blur where you revealed the vectors.
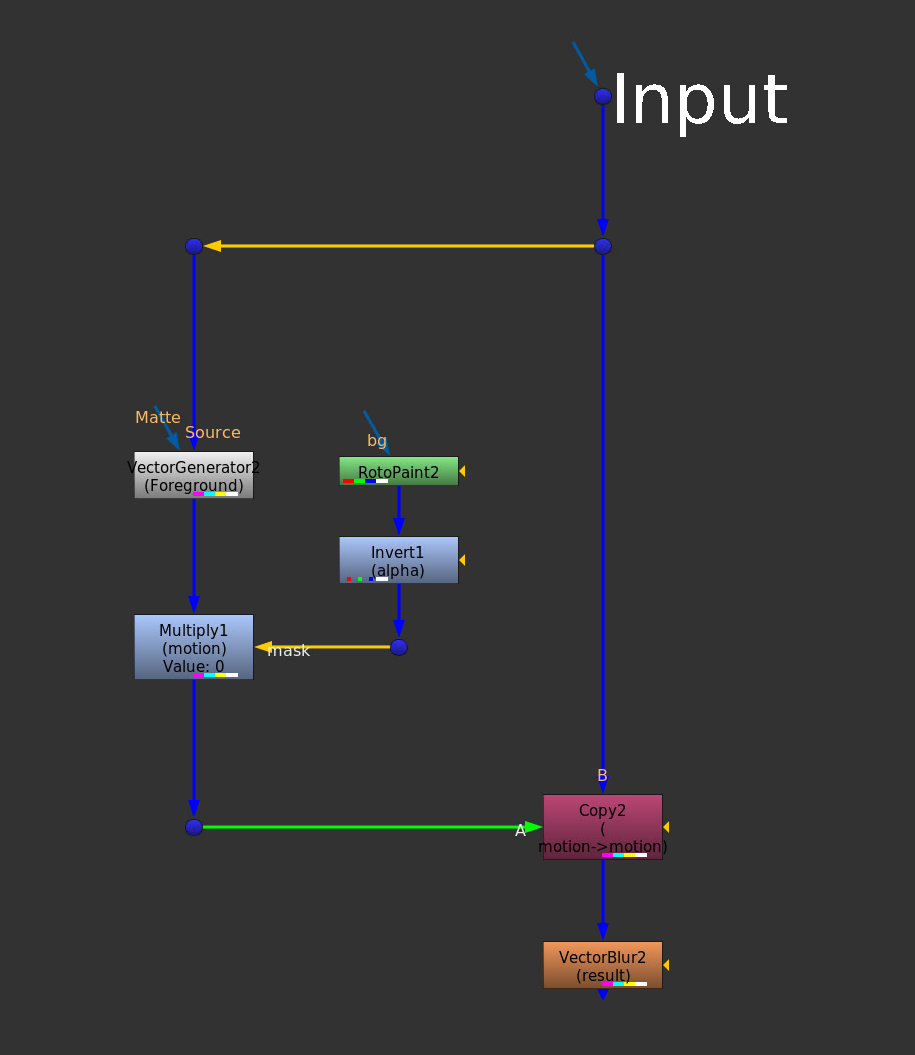
The setup for revealing generated motion blur.
Start by either shuffling out the motion vector pass from the CG render, or by connecting a VectorGenerator to your image.
Then, connect a Multiply node with the channels set to motion (or your rendered motion vector pass, if different), and the value set to 0.
Next, connect a RotoPaint node, with an Invert node attached, to the mask input of the Multiply node.
💡 By painting using the Brush tool with the alpha set to white (1) in the RotoPaint node, you will now reveal the motion vectors only where you paint.
Similar to the previous setup, copy the vectors into the B-pipe. This time, I copied the motion layer using the Layer Copy.
I used the same settings in the VectorBlur node as before, except for changing the uv channels to motion instead of forward. And finally, I tidied up the B-pipe by removing the motion layer.
The benefit of this method is that you can reveal correctly calculated motion vectors and make your motion blur look more realistic.
The disadvantage of this method is that when your motion vectors are inaccurate – which sometimes happens when generating them – your motion blur can look wrong.
Mix And Match
If you want even more control, you can combine both of the approaches above.
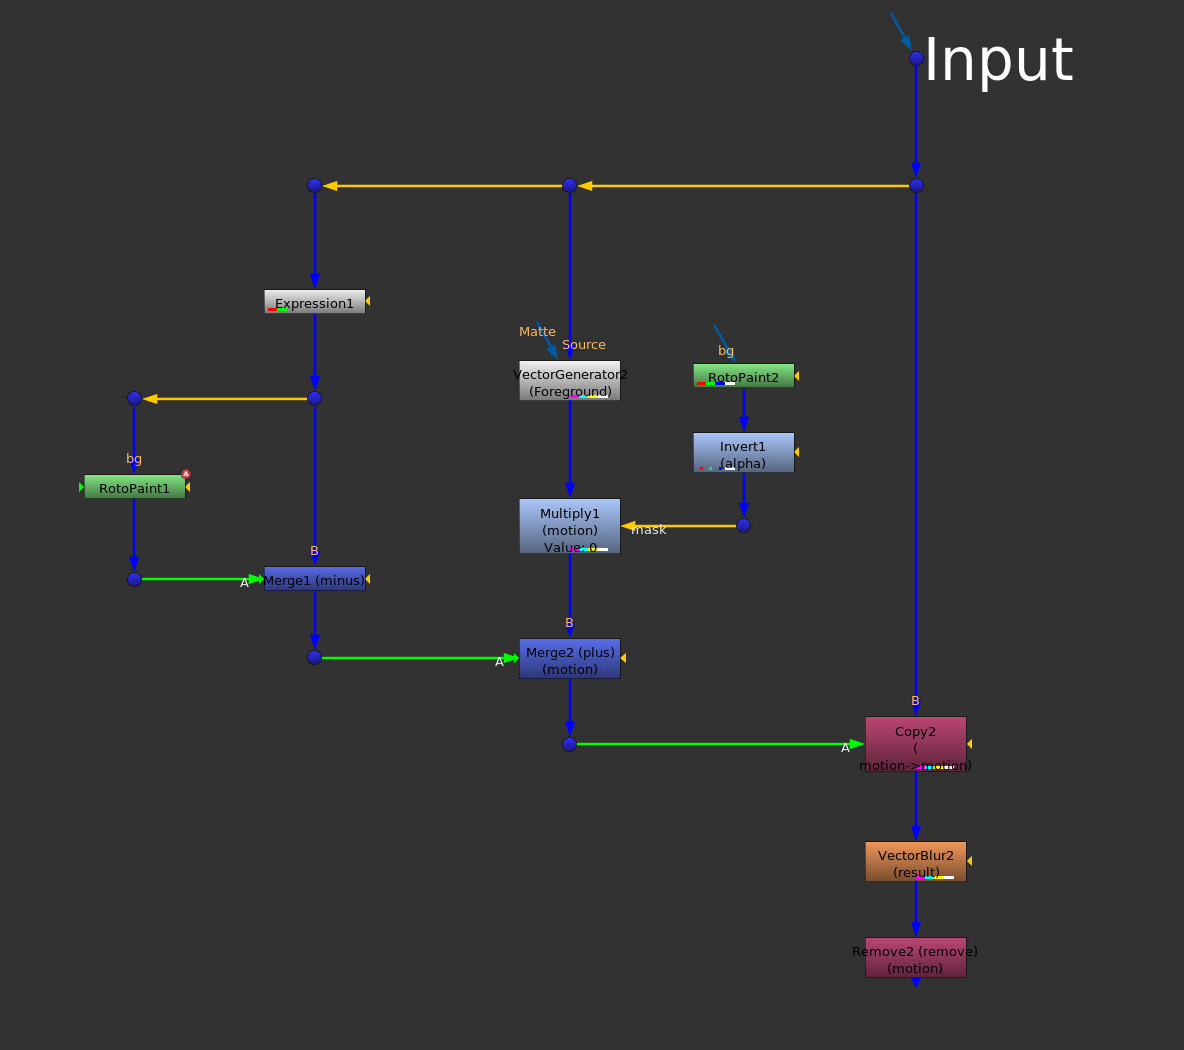
Combining the two methods.
To do that, you just have to merge the vectors together using a Merge (plus):
Here, I’m merging rgba from the A-input with motion from the B-input, and outputting motion.
That way, you can reveal the generated vectors where they are accurate and working well, and paint your own vectors where they’re not.
💡 “Why not just blur the problem areas with a mask?”, you might ask. Motion blur tends to keep a sense of detail which normal blurring doesn’t. It often makes the image look better than by just using a Blur, i.e. streaks vs. smudges.
I hope you found this tutorial useful. For more Nuke tips & tricks, see Nuke.


