Combining Projections In Nuke
Get complete object coverage and avoid texture stretching by combining multiple projections together…
Get complete object coverage and avoid texture stretching by combining multiple projections together…
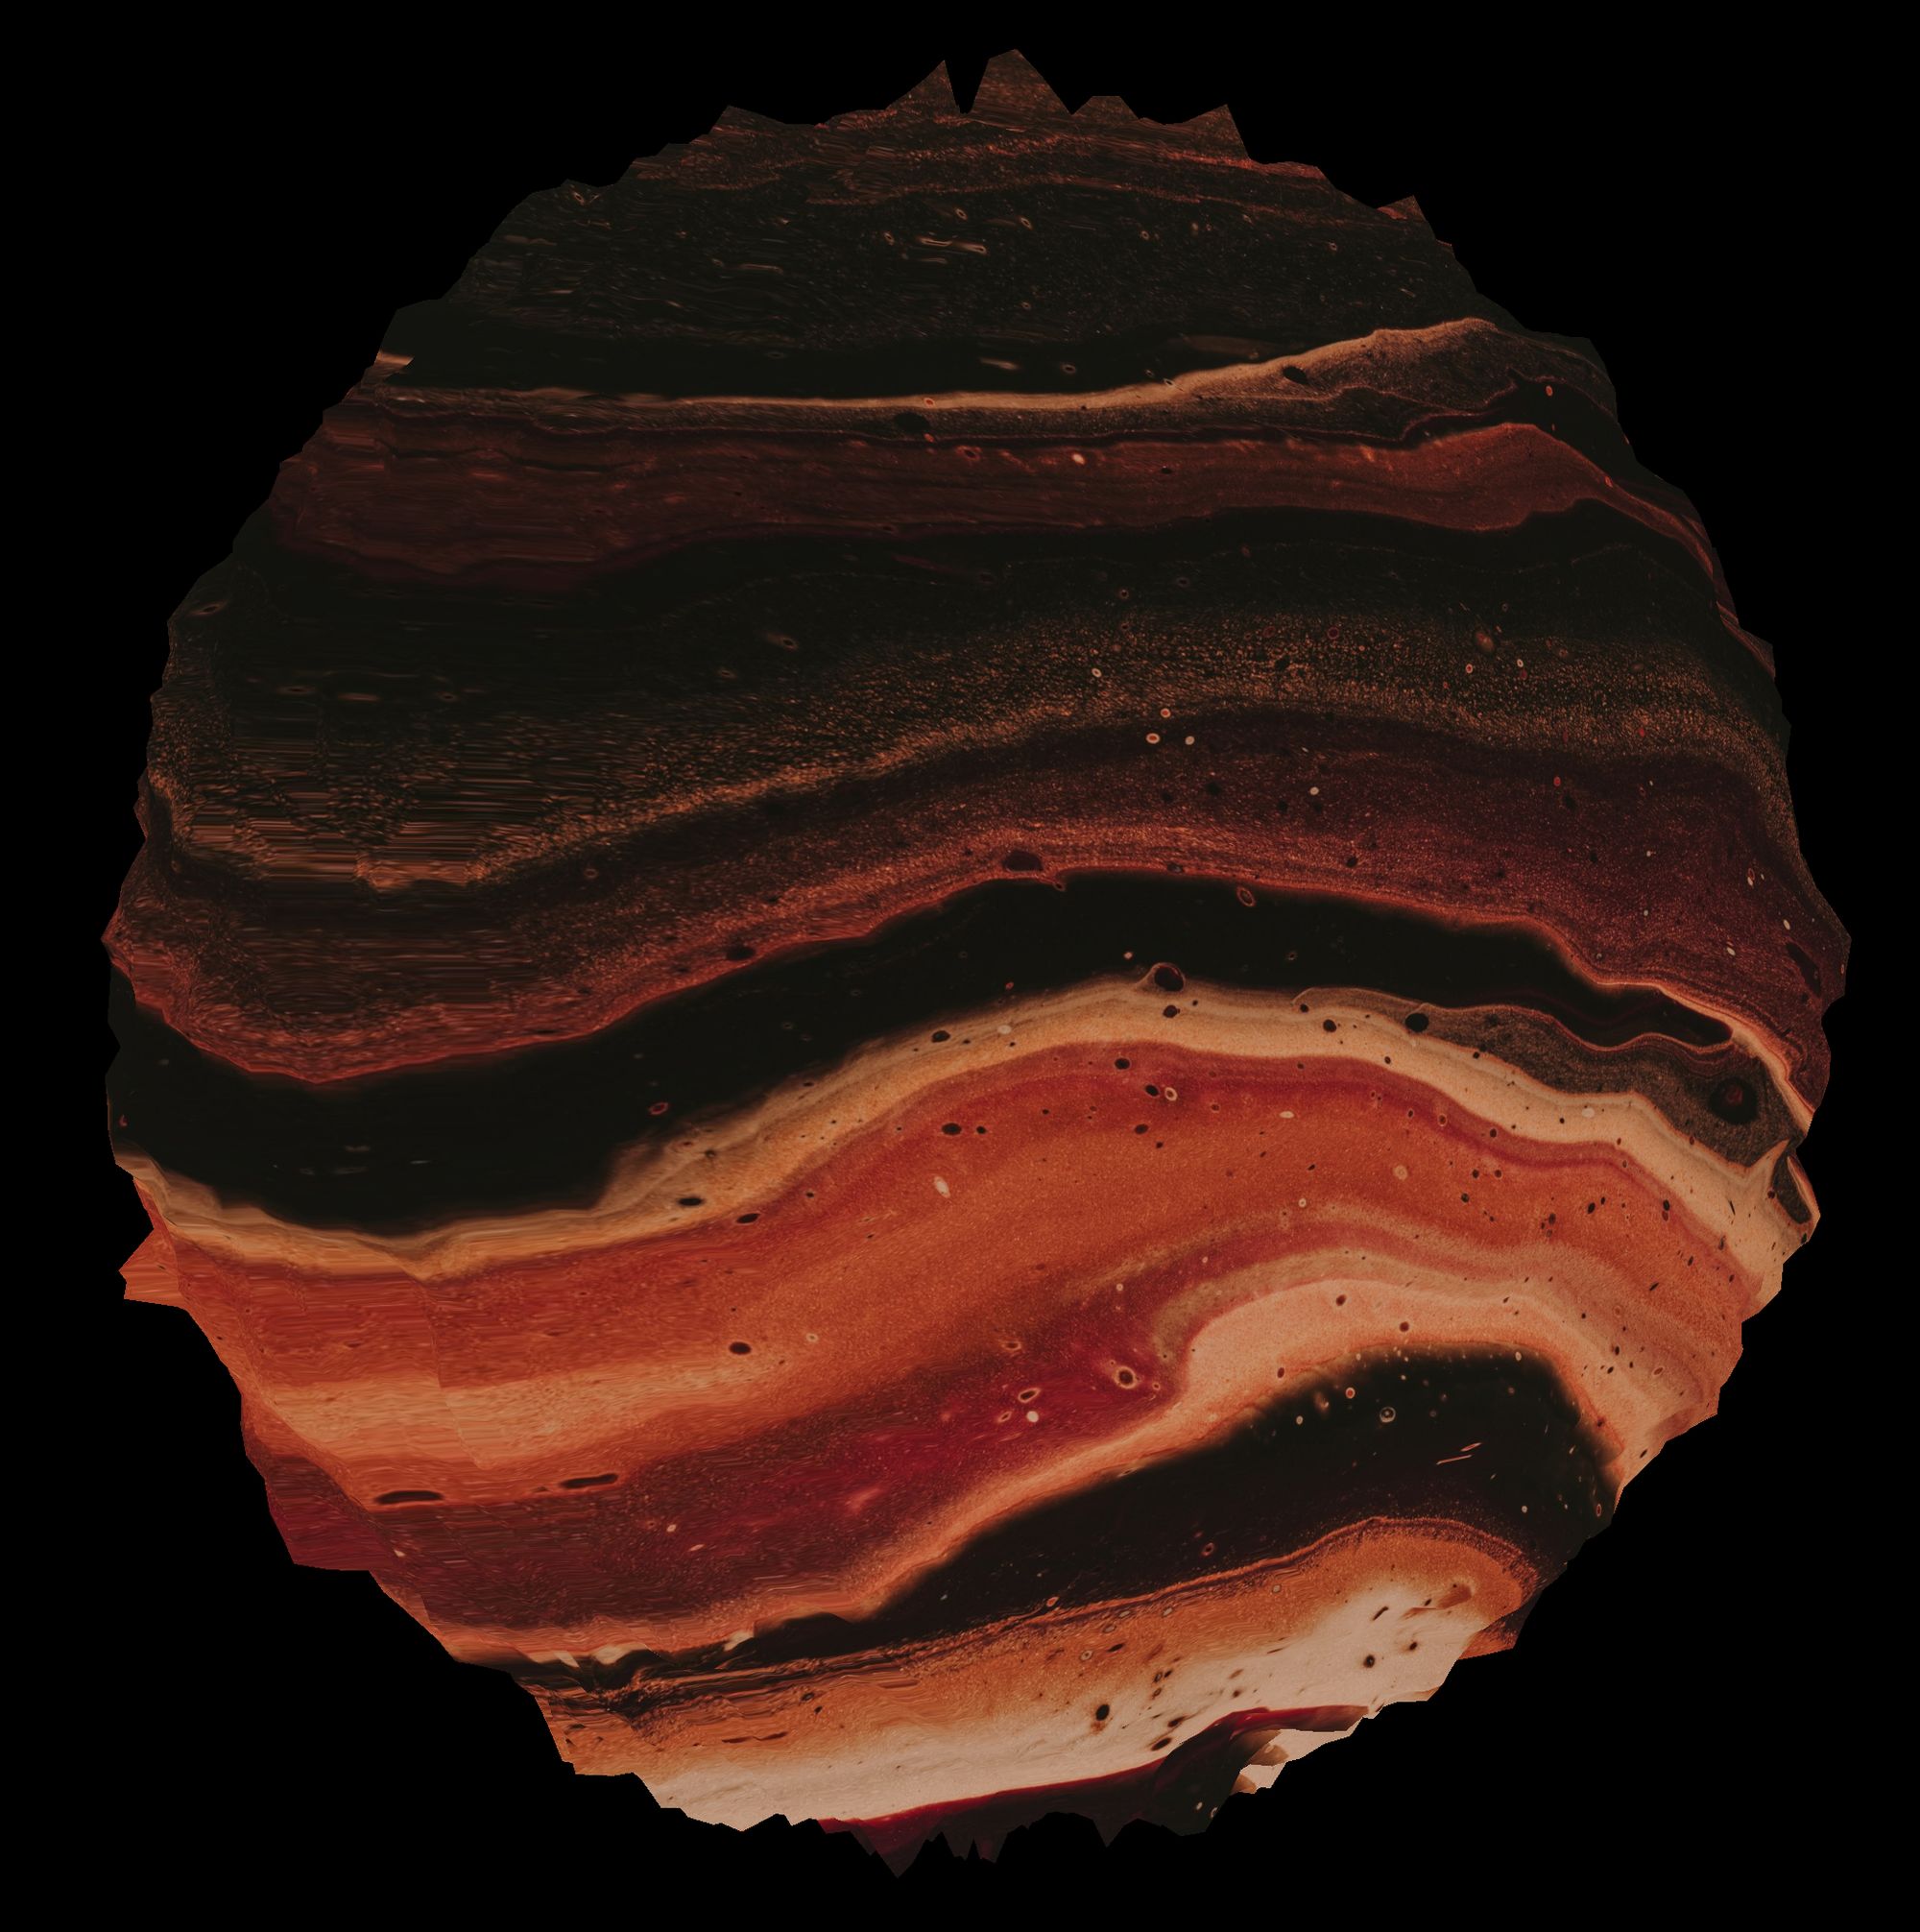
Two projected textures combined together with no stretching pixels.
Stretched Projections
The problem with projections is that they're only 'perfect' when viewed from the perspective of the projection camera.
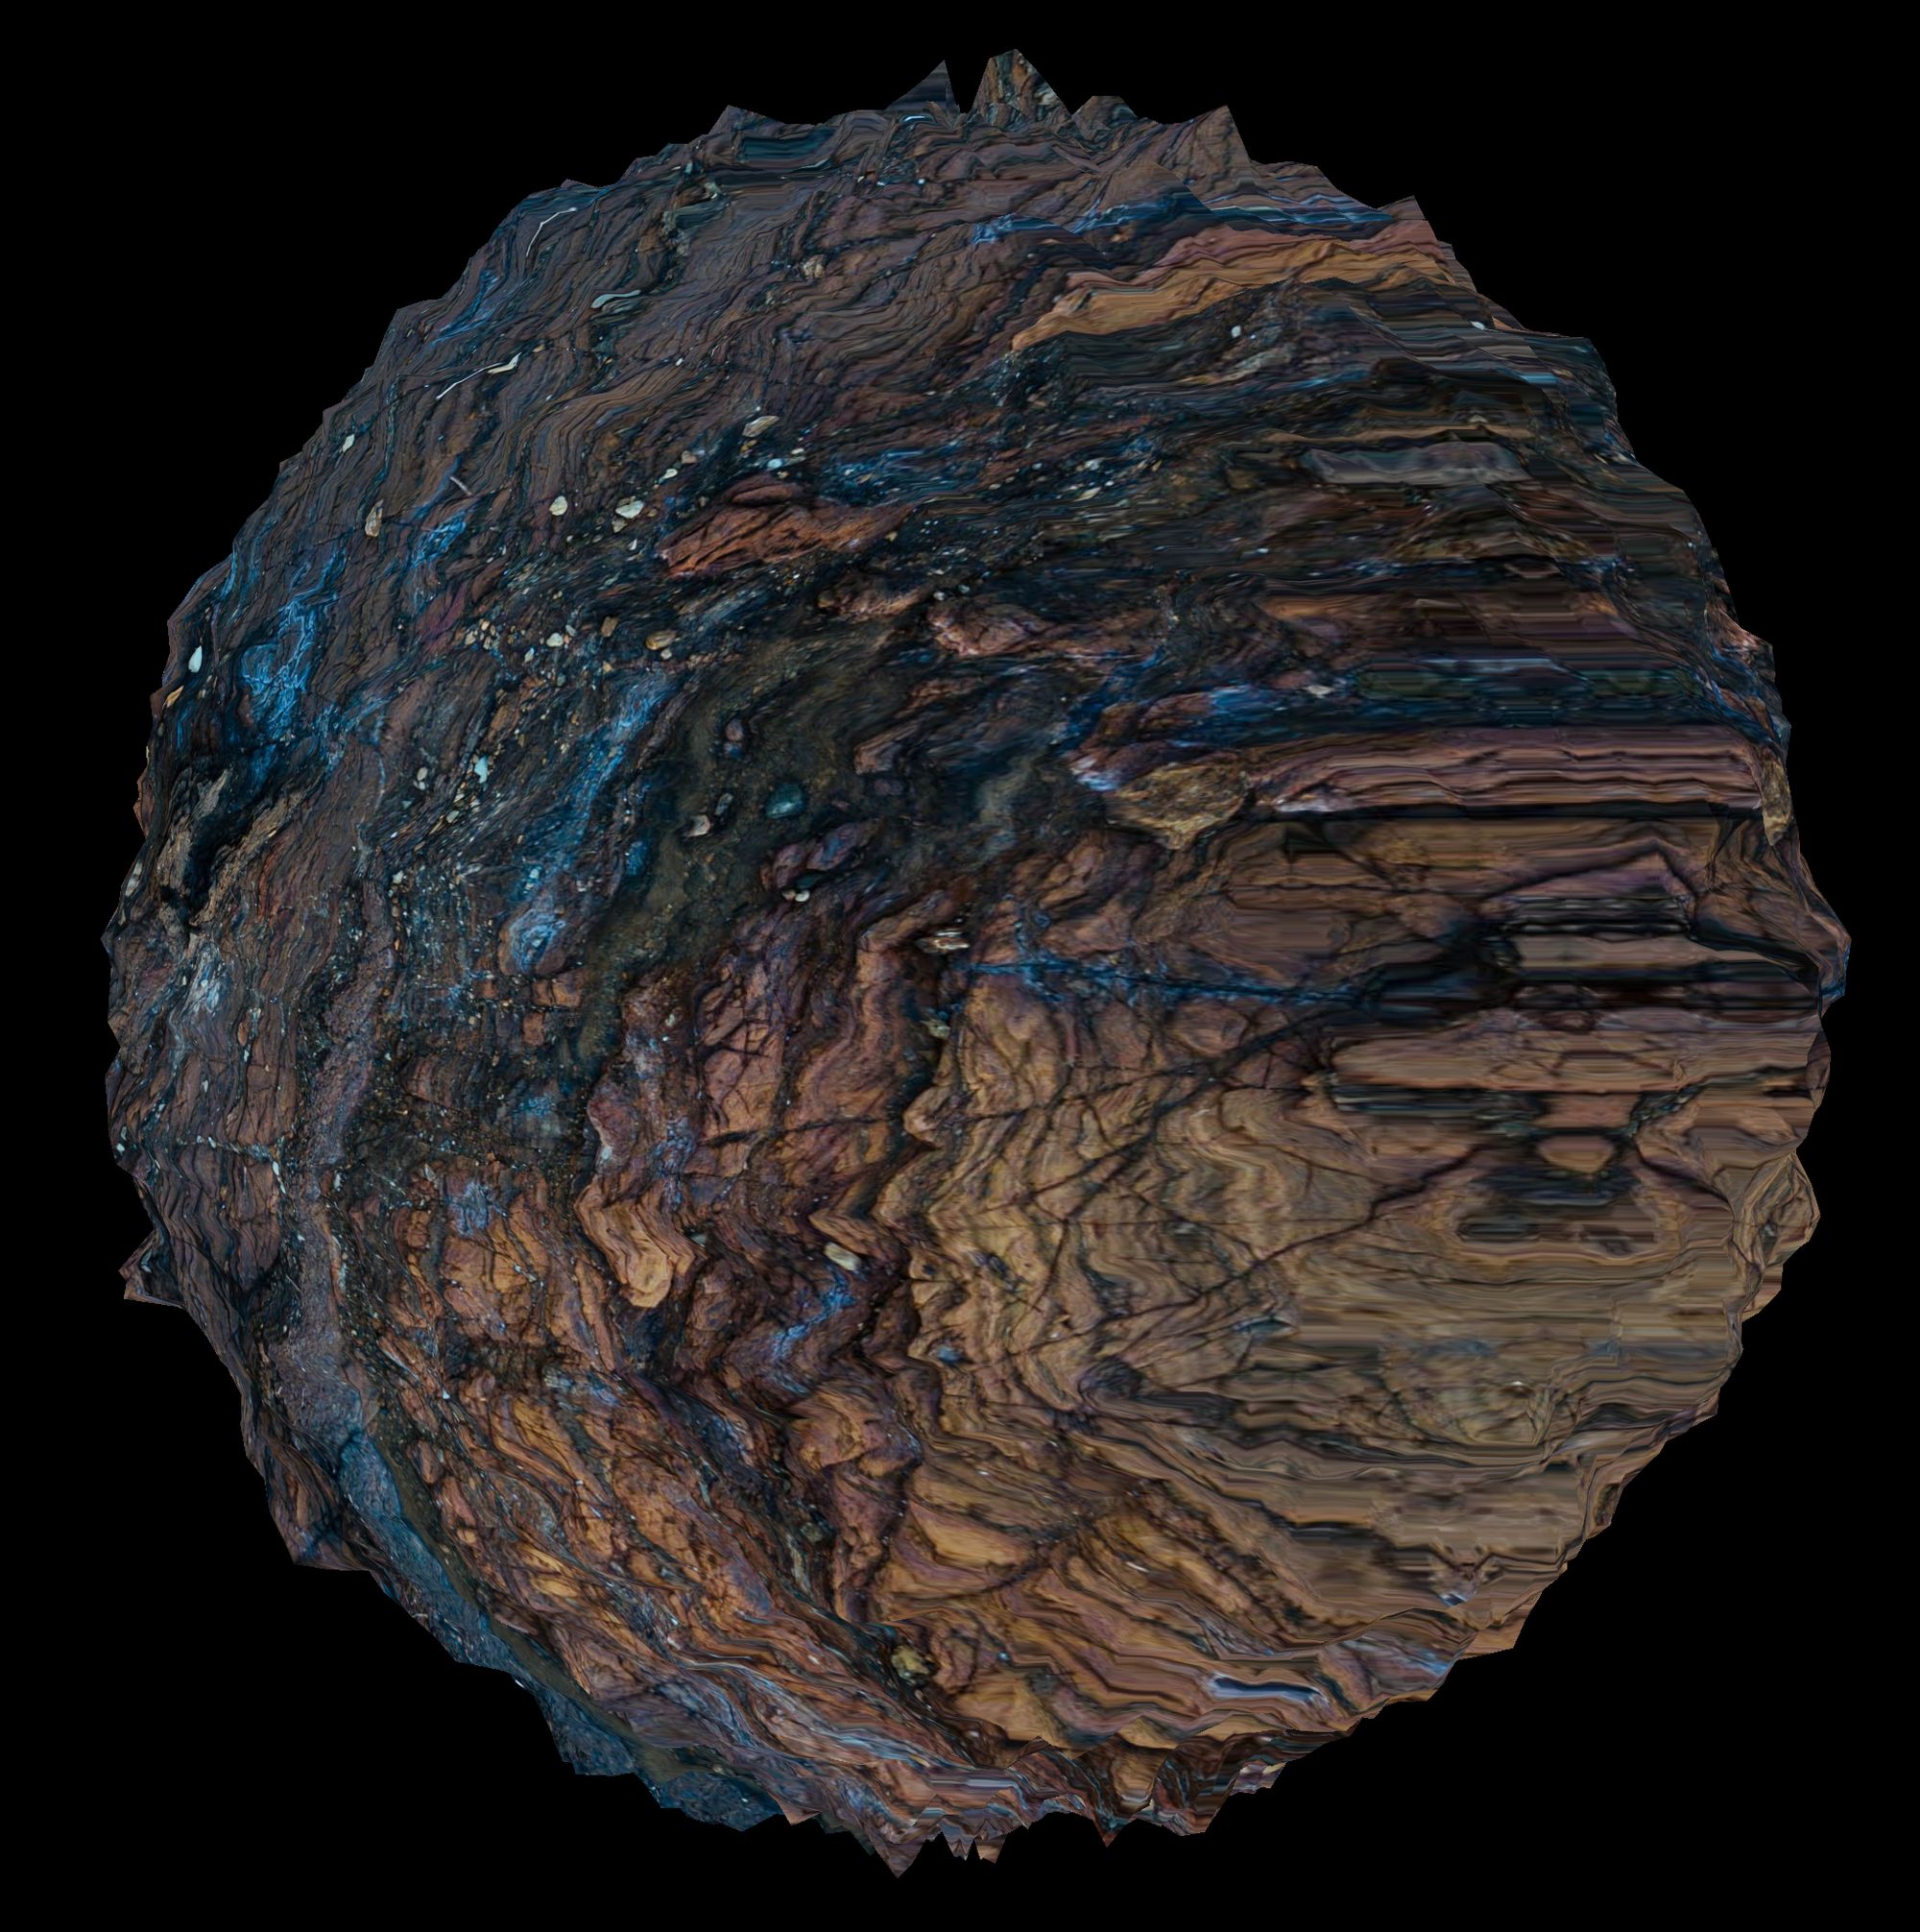
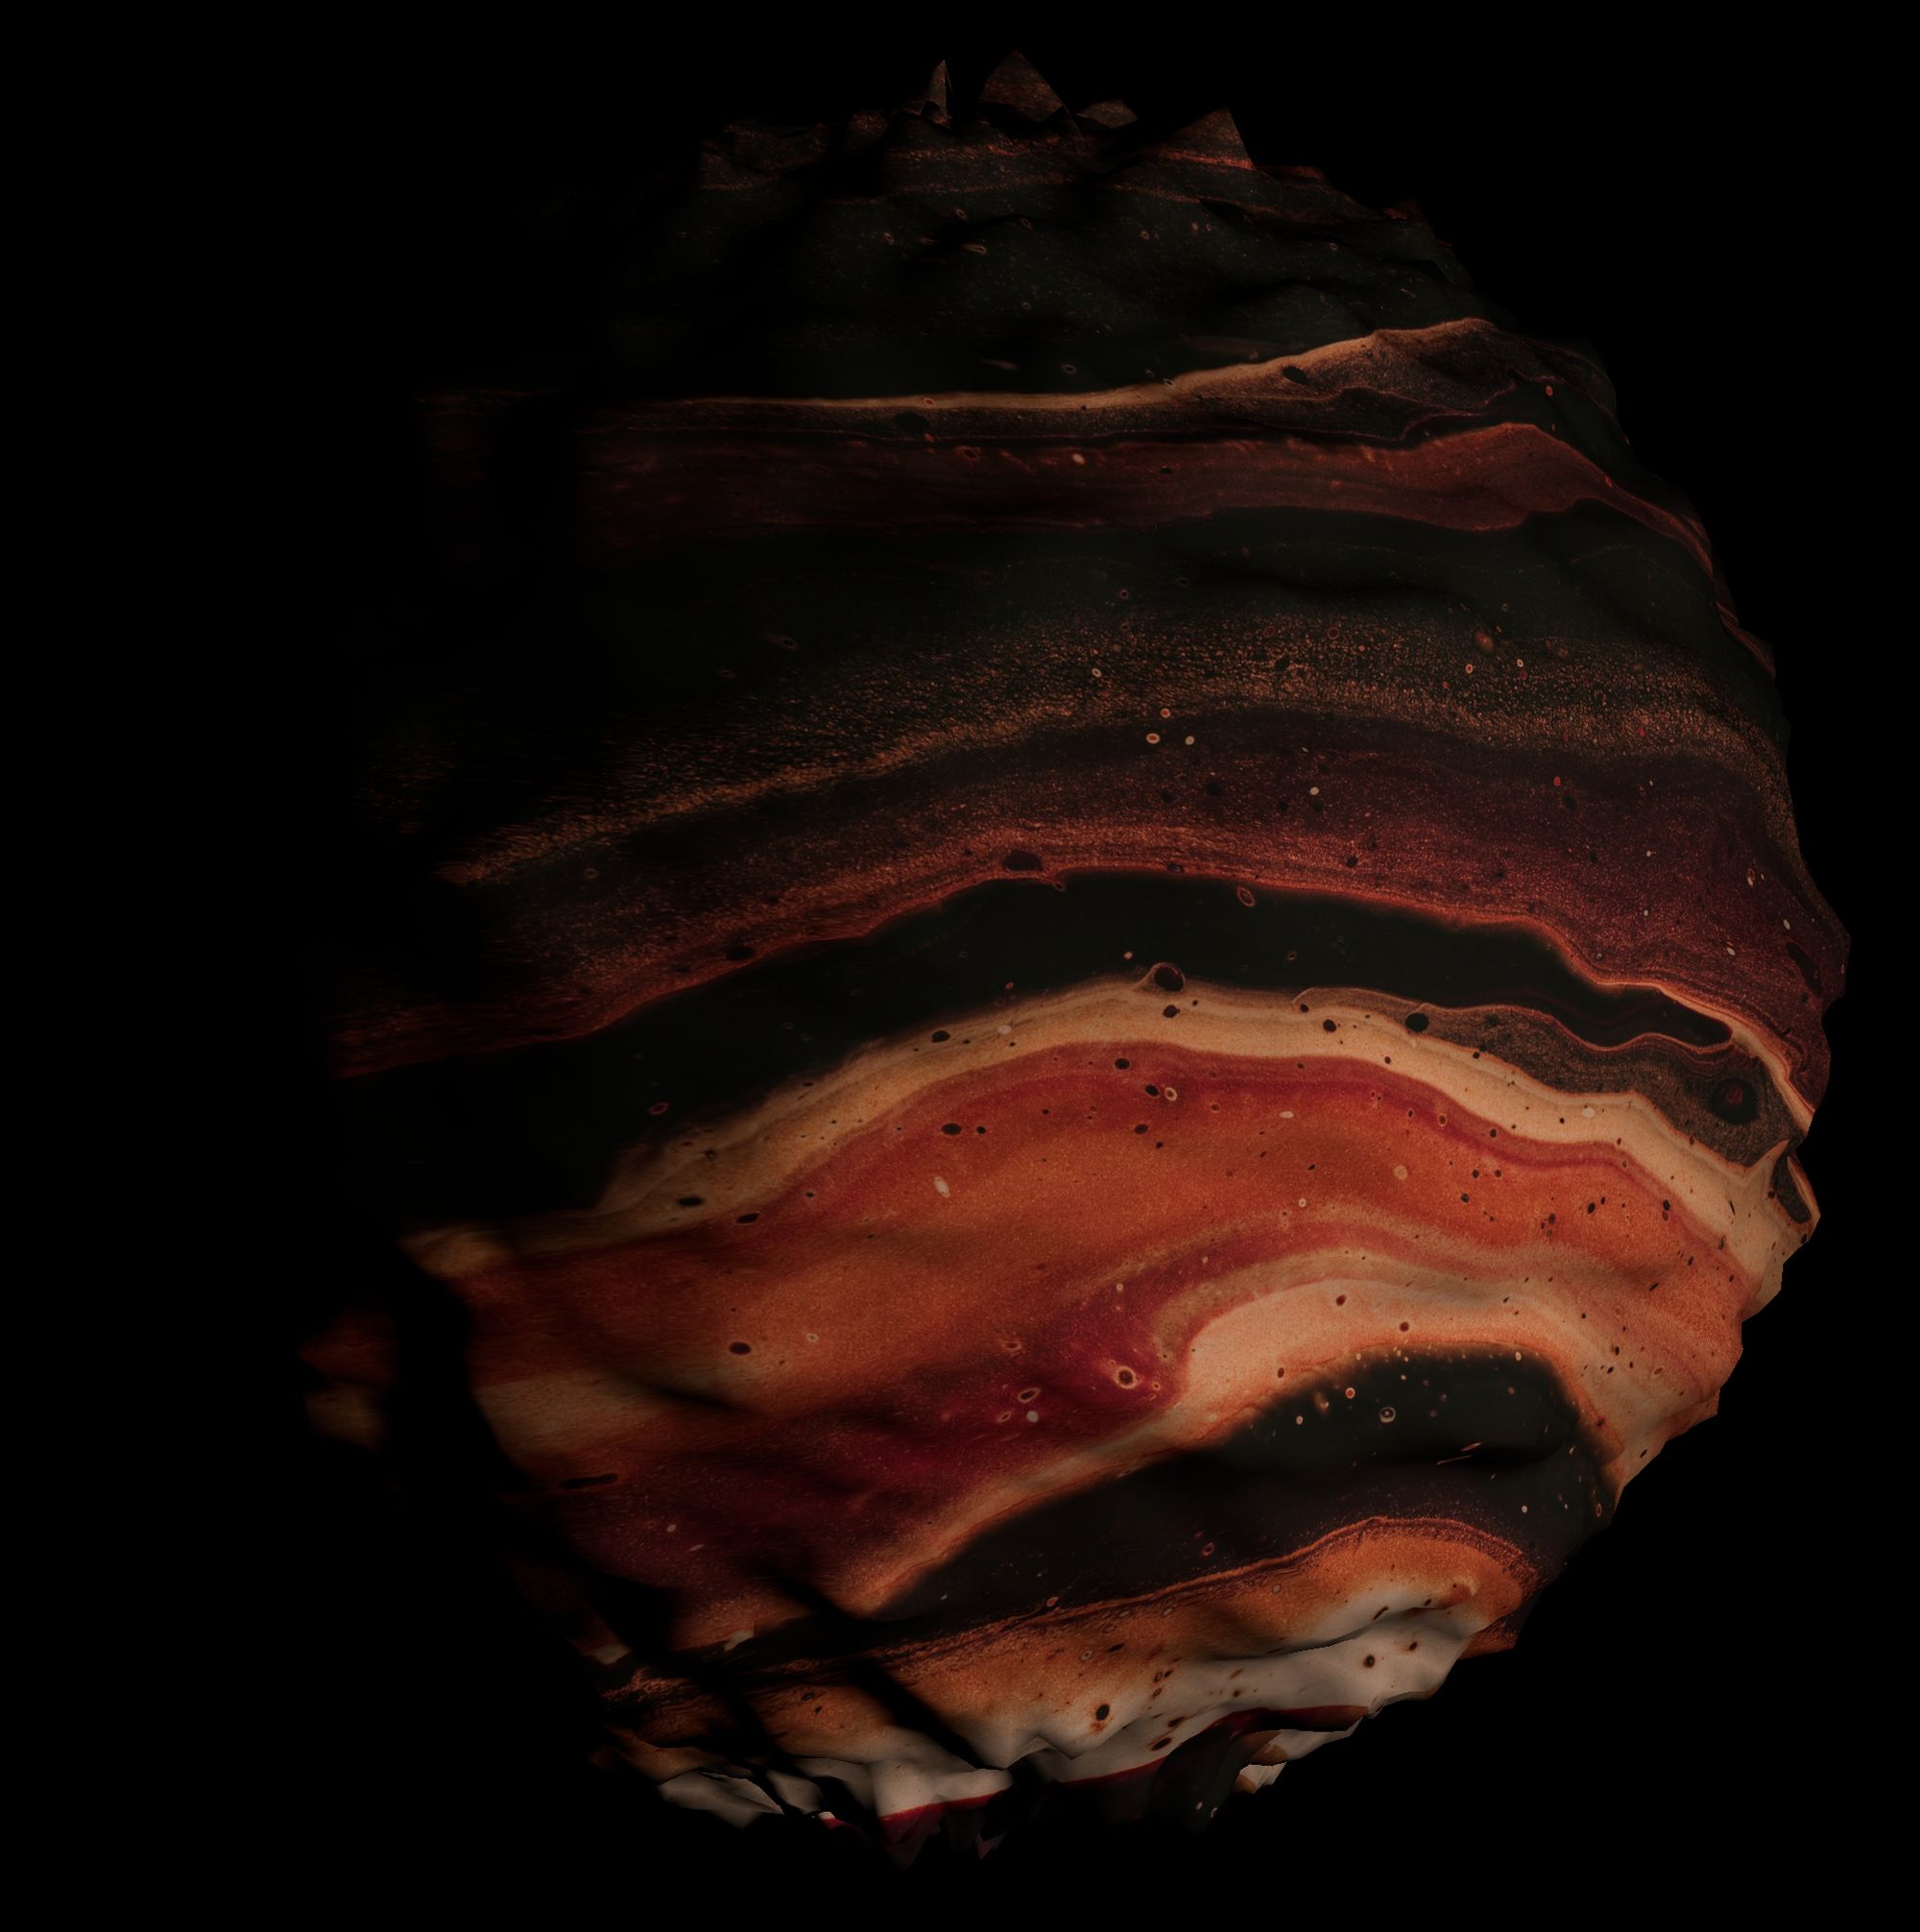
A projected texture being stretched along the sides of a sphere.
The further your render camera moves away from the projection camera, the more texture stretching you will start to see. A render camera that is perpendicular to the projection camera would pretty much only see stretching pixels on the object that is receiving the projection.
So, if you have a significant camera move in your shot, remember your projections will start to break the further away from the projection camera you go.
Contaminated Projections
To combat texture stretching you can combine multiple projections together from different angles, increasing your object coverage with clean projections from the different angles.
However, each individual projection will still be stretched along the sides of the object which are not directly facing the projection camera. And this stretching will contaminate the other, clean parts of the projections when merged together:

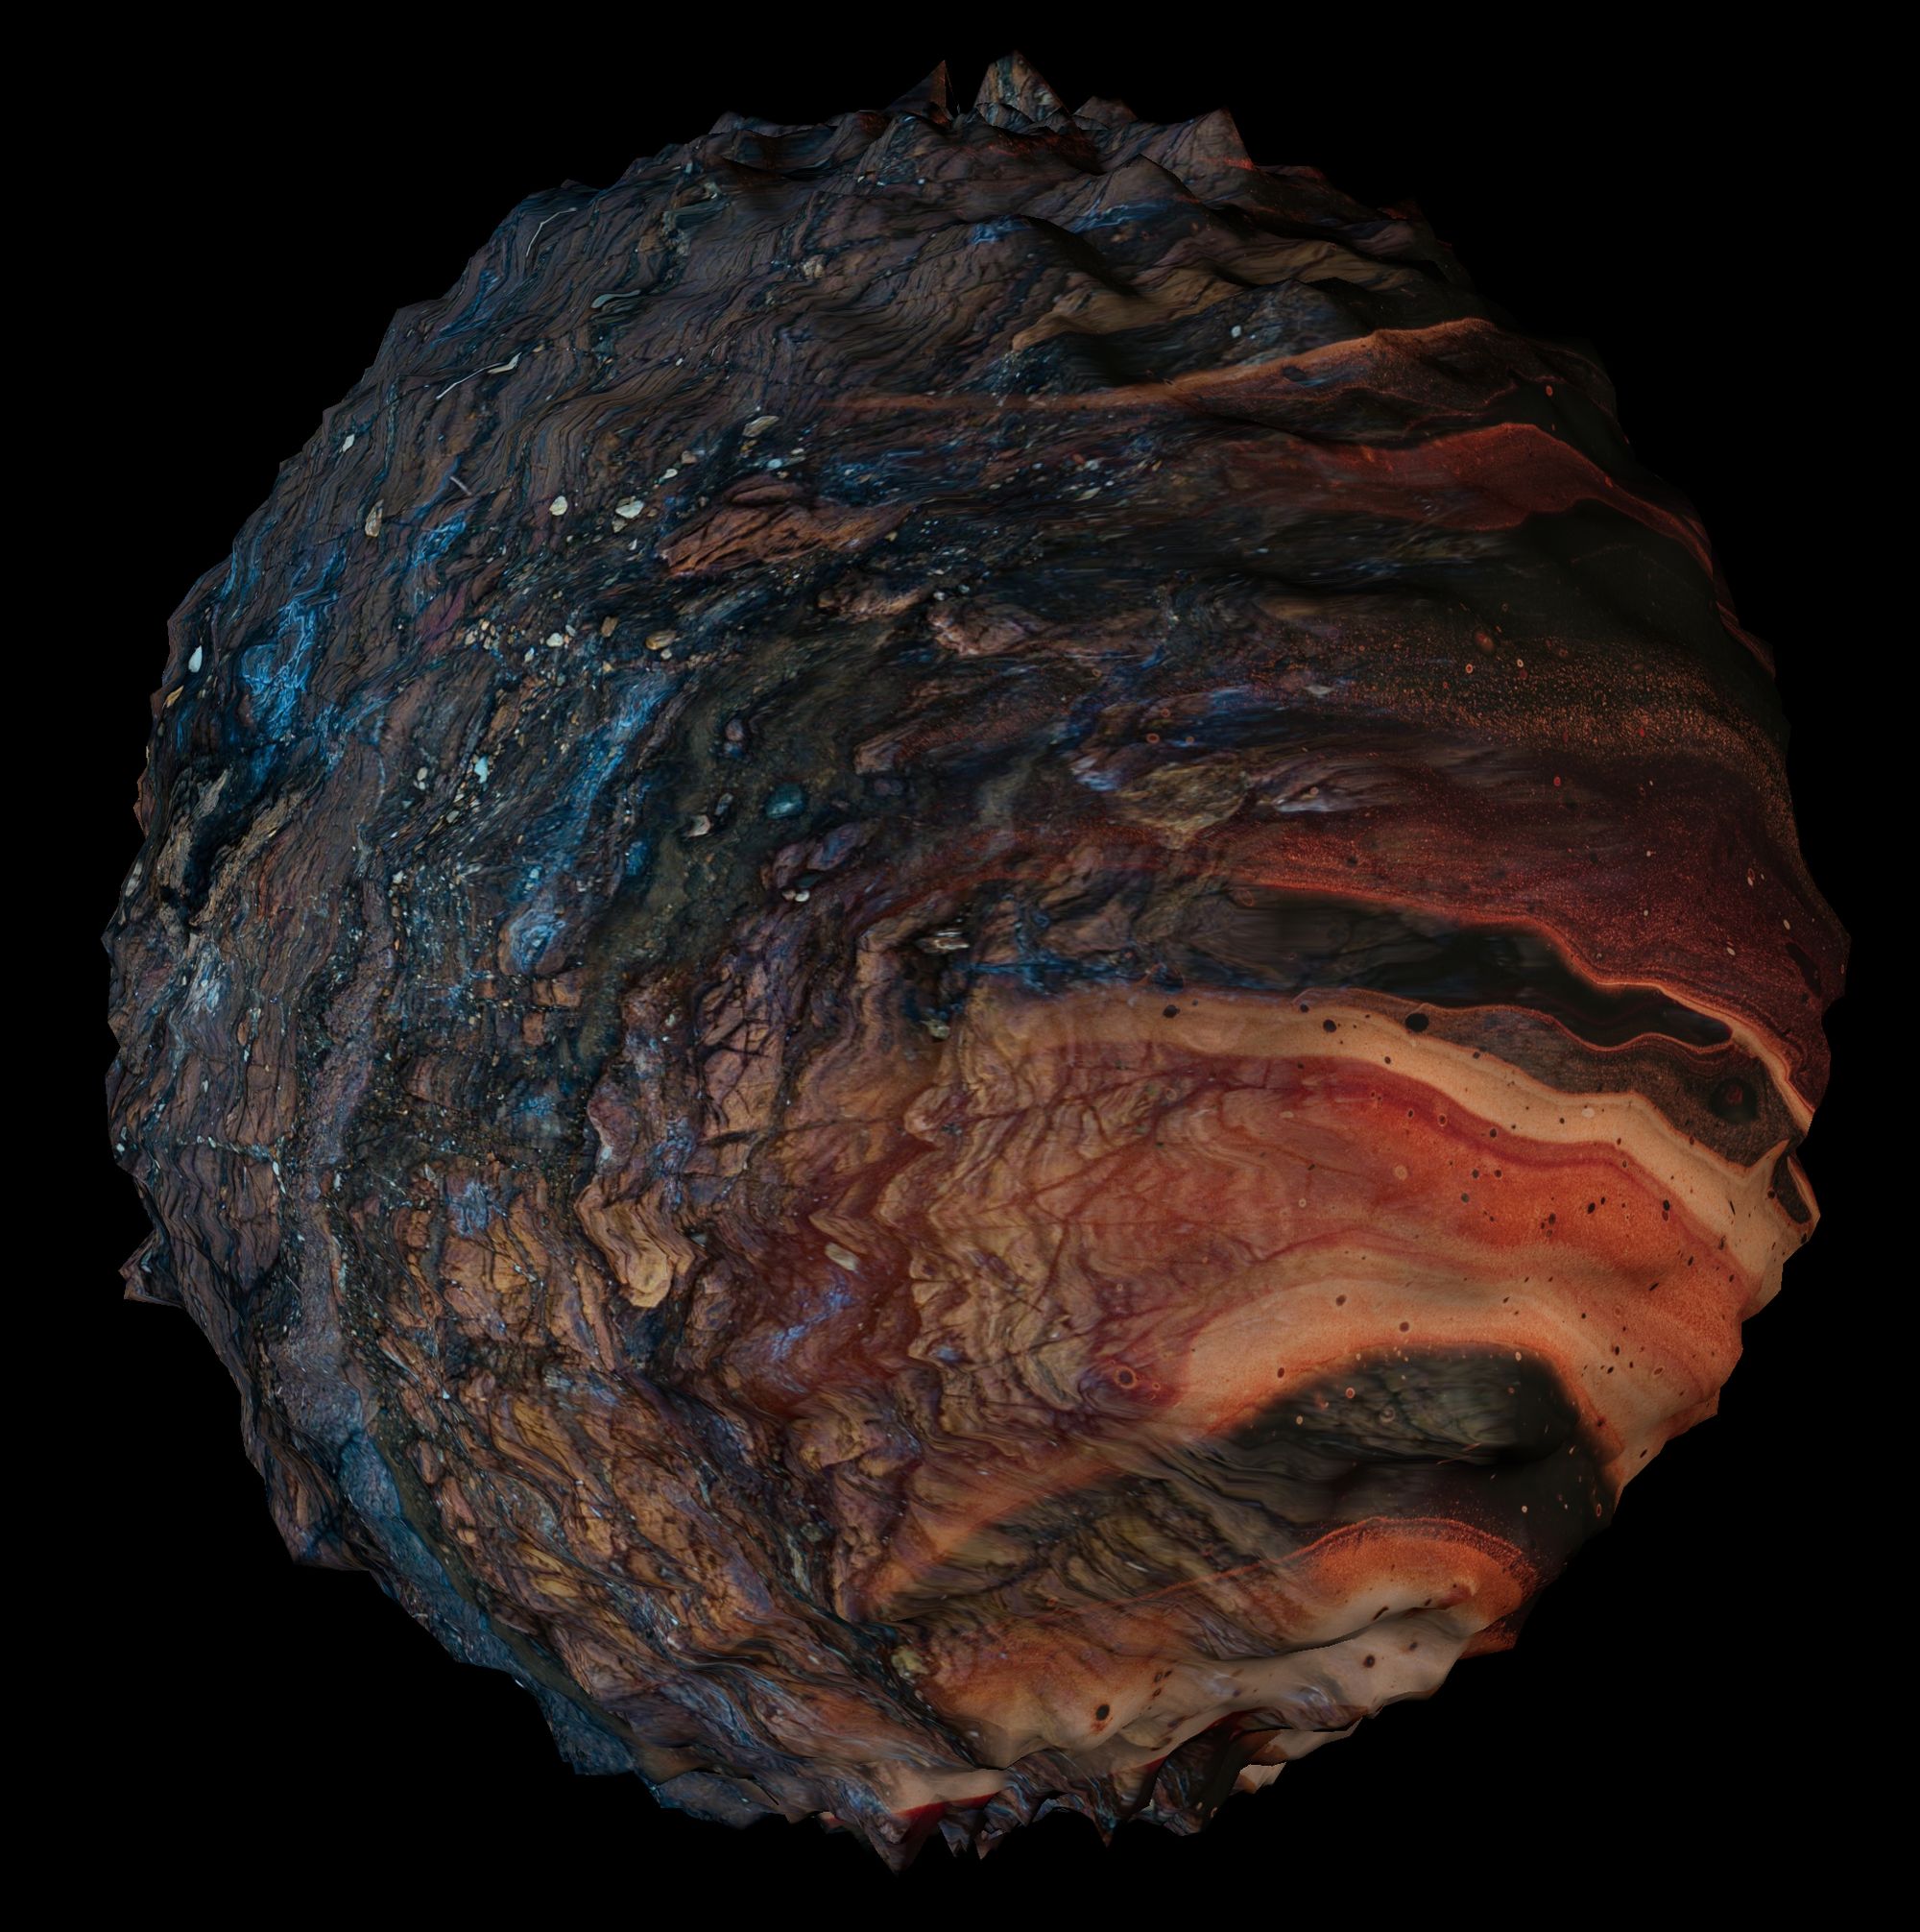
The clean parts of the projections are contaminated by stretched pixels of the other projection.
We need a way to isolate the clean parts of the projection that we want to keep, to separate them from the stretched parts that we want to remove.
Facing Ratios To The Rescue
Similar to how we created the Fresnel effect in Nuke, we can use a Light locked to the projection camera to create a facing ratio matte.
That is, a matte for the parts of the geometry which are directly visible to the projection camera on the projection frame.
We can then mask the projection using this matte, and cut out the stretched pixels. After that, it's just a matter of rinsing and repeating the same process for all of the projections, before merging them together.
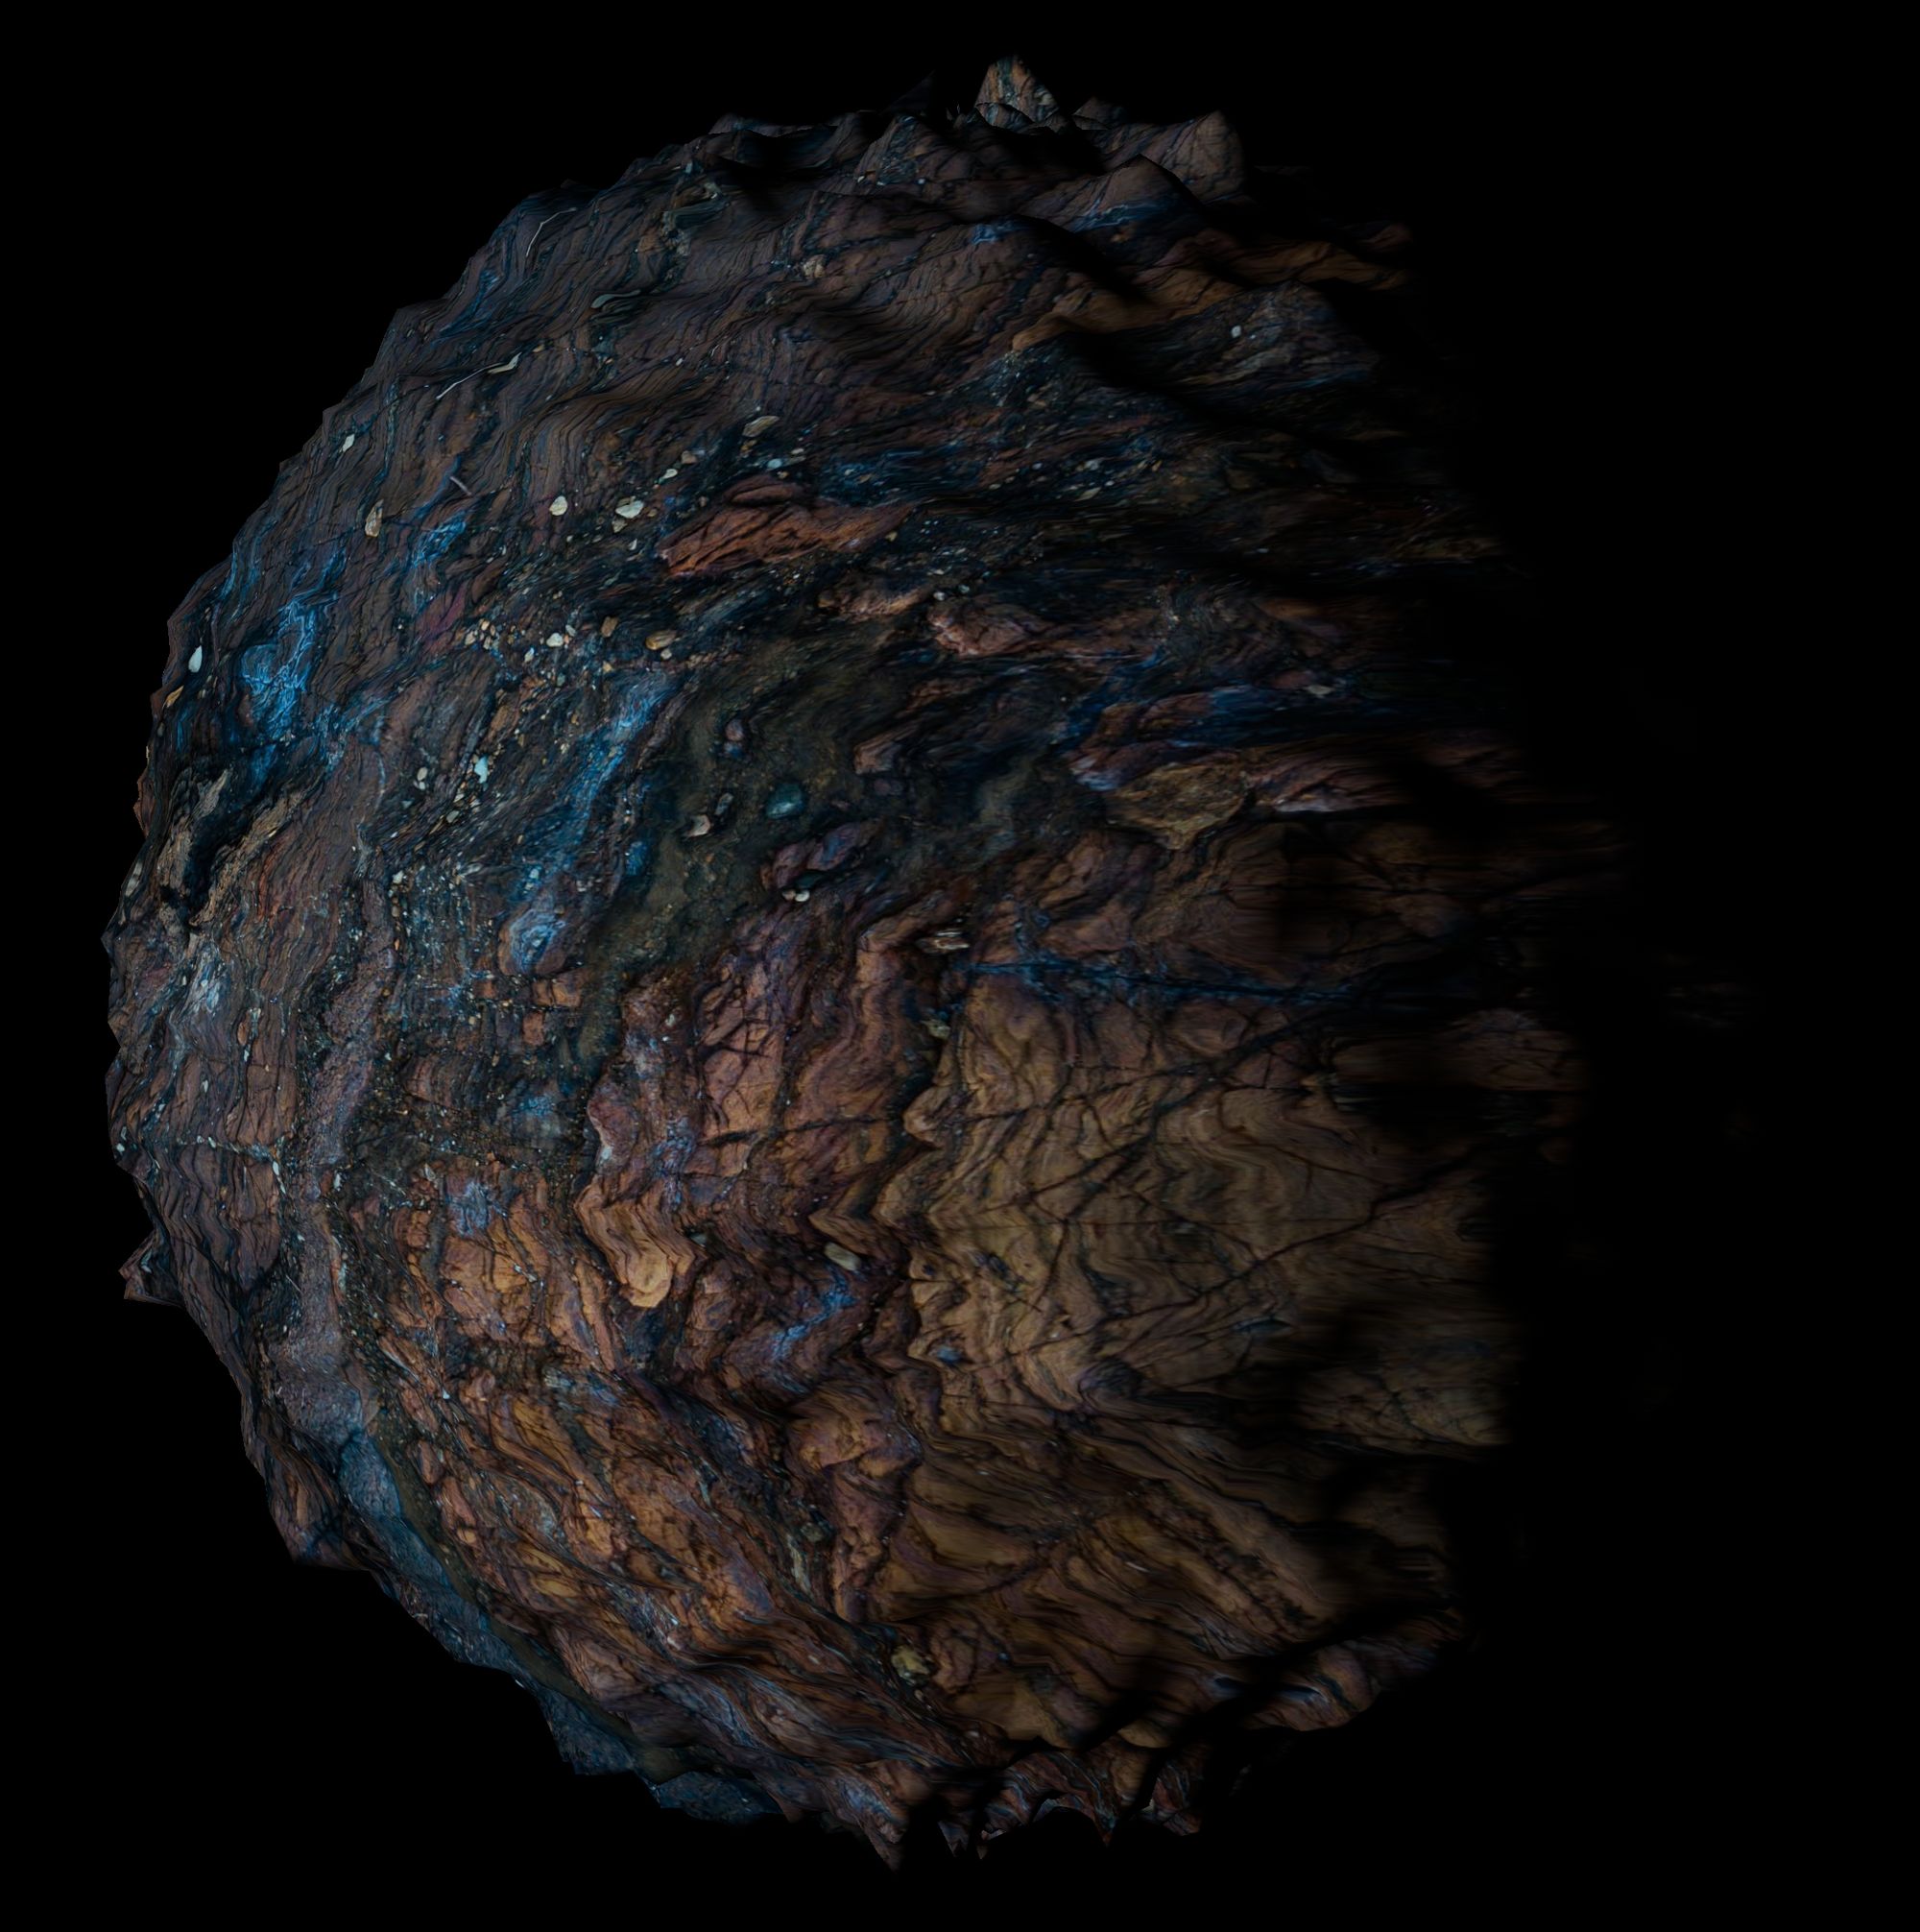
The first projected texture, both with and without the facing ratio holdout. Notice the severe stretching on the right hand side of the sphere without the holdout (first image).
The second projected texture, both with and without the facing ratio holdout. Notice the stretching on the left hand side of the sphere without the holdout (first image).
Both of the textures merged together, with their holdouts applied. Each texture covers the (previously) stretched areas of the other, getting the best of both worlds.
So, how do we actually do this?
The Setup
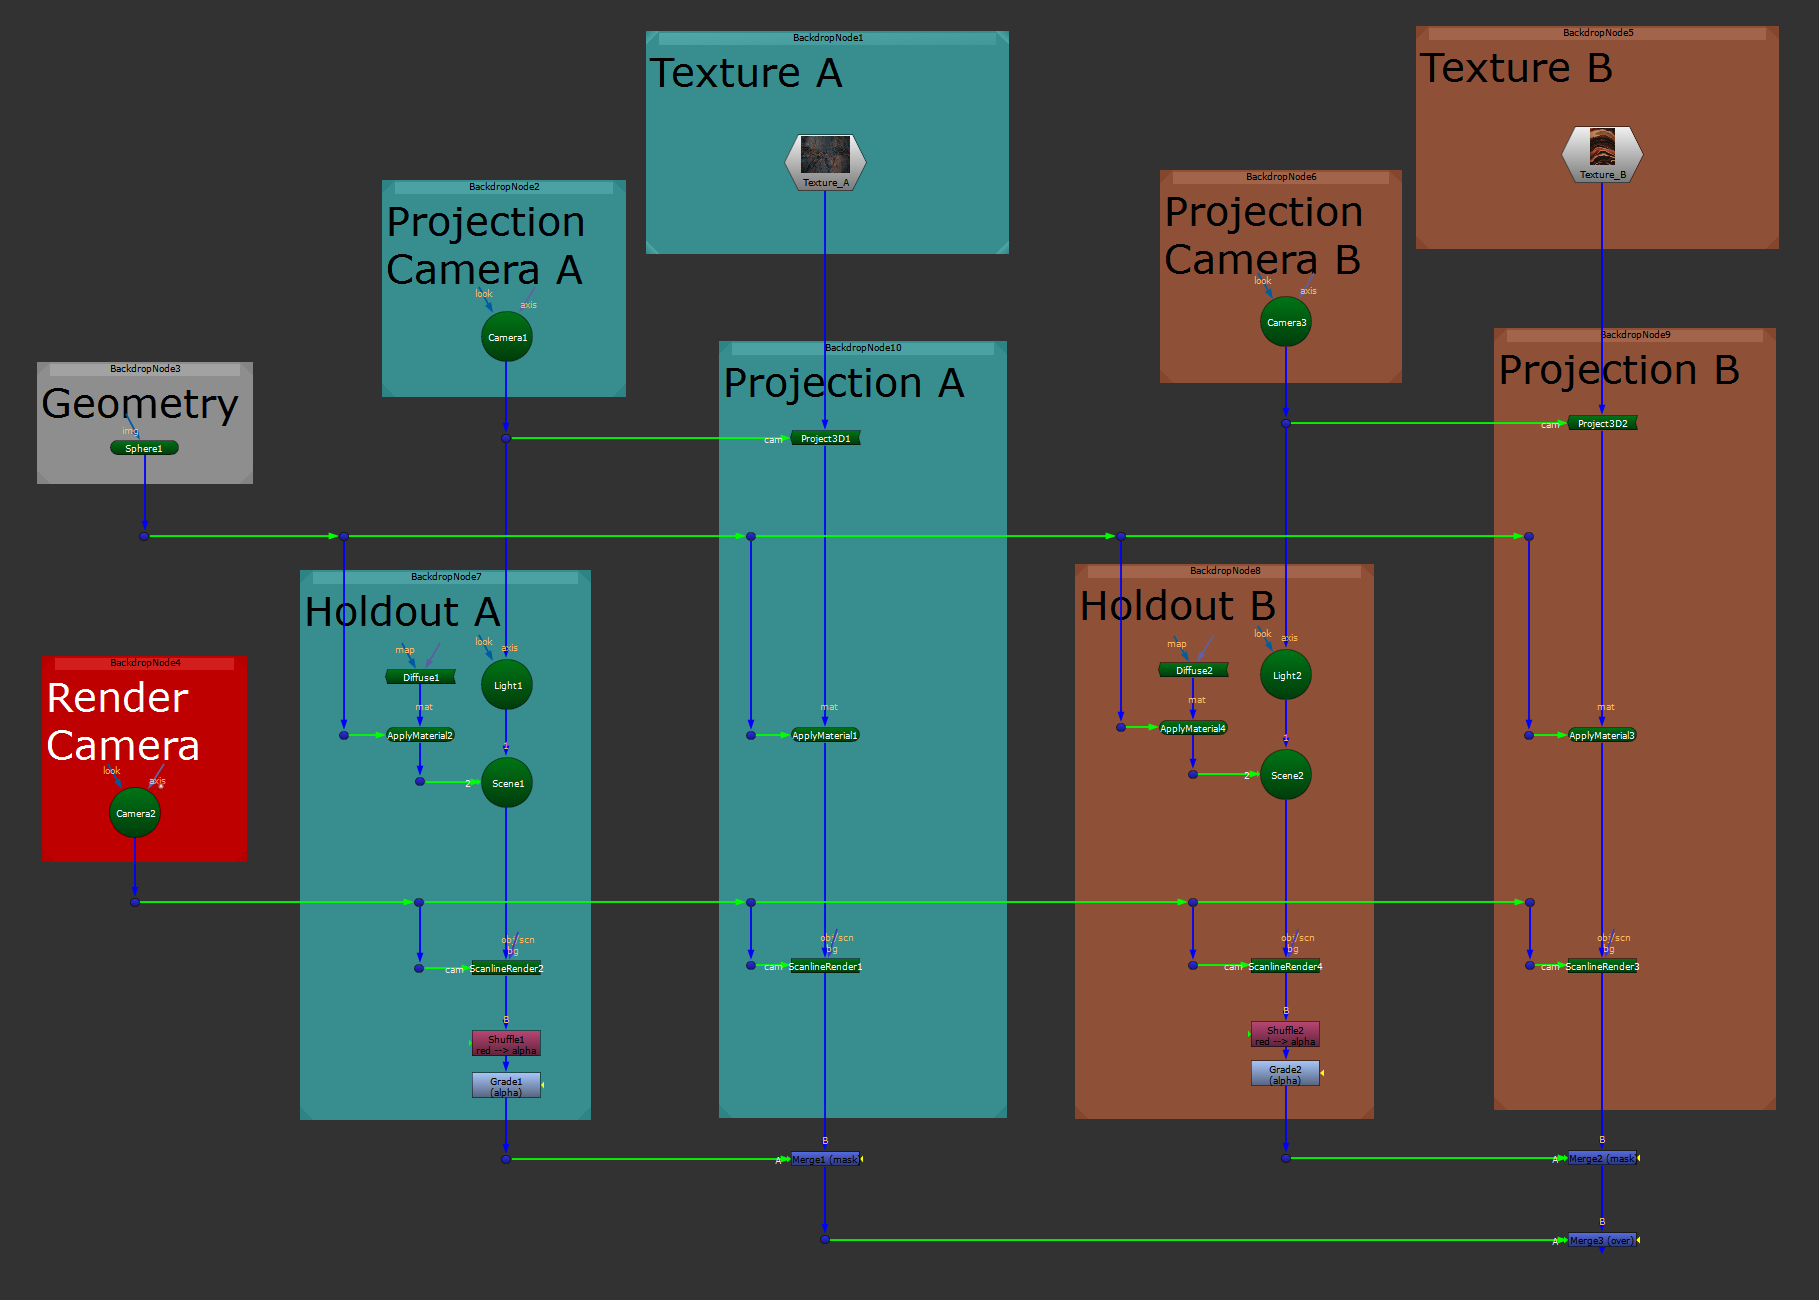
The setup for merging two projections.
Let's start by setting up the first texture projection, A, which you can find in the teal coloured section in the picture above.
Projection
First, project your texture A onto your geometry using your projection camera A. (This is a completely standard projection using a Project3D node).
If you’re not familiar with the ApplyMaterial node, it does exactly what it says on the tin. I have used it here so that I can reuse the same geometry for multiple projections.
That means I avoid having to copy the geometry several times across the script, which would slow things down (especially with heavier geometry). And it means I would only have one source to update should the geometry change.
Render projection A using a ScanlineRender node and your render camera.
Next, let's make the holdout, which is the key to this whole setup:
Holdout
Create a Light node, leave the default settings as they are, and connect its axis input to projection camera A. That will snap the Light to the position of the projection camera in 3D space.
Then, create a Diffuse node and leave the default settings as they are. Using an ApplyMaterial node, apply this diffuse shader to the geometry. Next, connect the ApplyMaterial node and the Light node together in a Scene.
The light will now shine from the projection camera onto the geometry and create a facing ratio matte. Render this using another ScanlineRender node and your render camera.
Since the resulting holdout matte is in the RGB channels, shuffle the red channel into the alpha channel. Then, add a Grade node and set it to affect the alpha.
You can now gamma down the alpha to remove more stretching, or gamma up the alpha to include more of the projection. Remember to clamp the matte by ticking black clamp and white clamp in the Grade node.
Finally, hold out the projection by the facing ratio matte using a Merge (mask).
That’s projection A sorted.
Additional Projections
For the second projection, B, copy all of the first setup.
Swap the first texture, A, with the new texture you want to project, B.
Then, change projection camera A to projection camera B, which should be positioned somewhere close to, and angled in a similar way as, the other extreme position of your render camera's motion range. That way, you get a good, clean texture coverage from that angle, too.
Merge the two held out projections using a normal Merge (over), and you’ve now got coverage from both extreme angles of the render camera’s motion range.
Copy/paste the setup again as necessary, and add as many projections from as many angles as you need. Keep going until you cover the object enough to hold up to the camera move in your specific shot.
I hope you found this tutorial useful. For more Nuke tips & tricks, see Nuke.


