Fresnel Reflections In Nuke
How to create more realistic reflections in Nuke…

How to create more realistic reflections in Nuke.
What Is The Fresnel Effect
The fresnel effect describes how the intensity of the specular reflections changes depending on the viewing angle to the surface normal of an object.
When you look at a surface of an object that’s facing directly towards you, the viewing angle is close to zero and there will usually be very little specular reflections visible.
As the viewing angle increases, the amount of specular reflections increase.
In the example image below, there is not much specular reflection on the surface of the water close to us. That’s because we’re looking down at a shallow angle to the surface normal of the water surface. The further out on the lake you look, the more the viewing angle increases, and the more intense the specular reflections get.
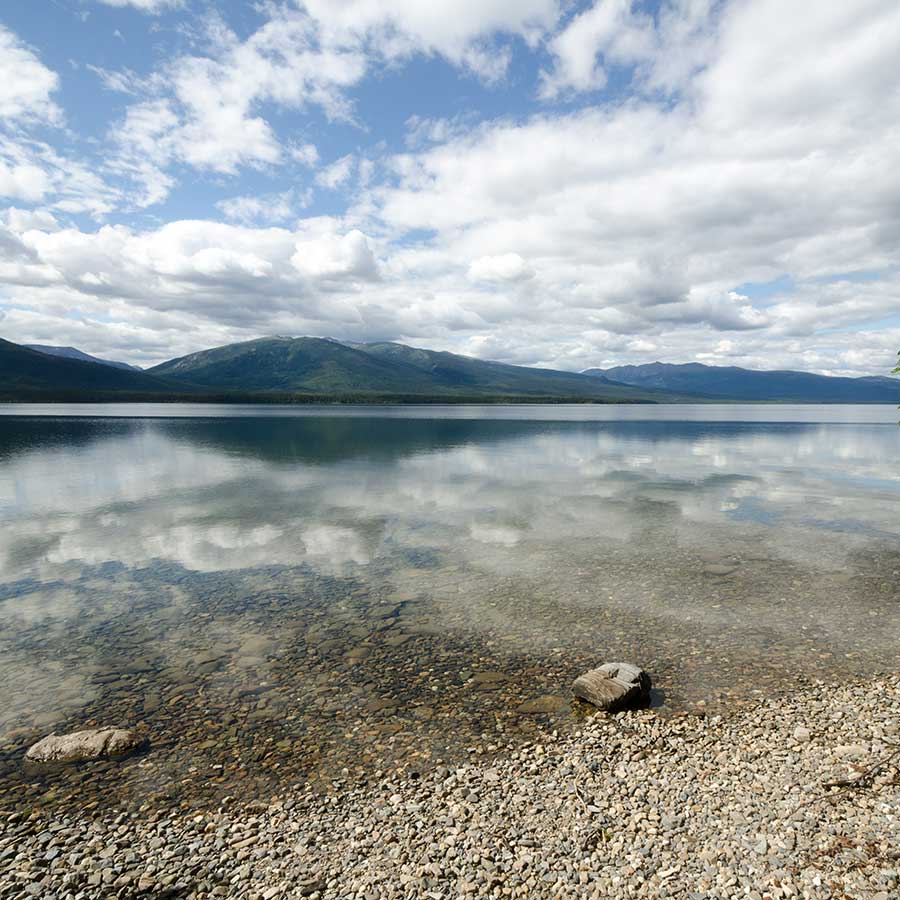
An example of the fresnel effect.
💡 You can try it at home: look at a table from directly above. Then, lower yourself to get closer to eye level with the table and notice the change in the reflections.
Creating The Fresnel Effect In Nuke
You can get fresnel reflections in Nuke by creating a fresnel matte and multiplying it with your reflections:

From left to right: (1) An even reflection across the whole of a sphere, (2) a fresnel matte made for the sphere, (3) the two multiplied together with a Merge (multiply), resulting in a fresnel reflection.
Then, add these fresnel reflections to your object:

From left to right: (1) A textured sphere with no reflection, (2) the same fresnel reflection created above, (3) the two added together with a Merge (plus).
So how can we do this? Let’s look at a method for creating the fresnel matte:
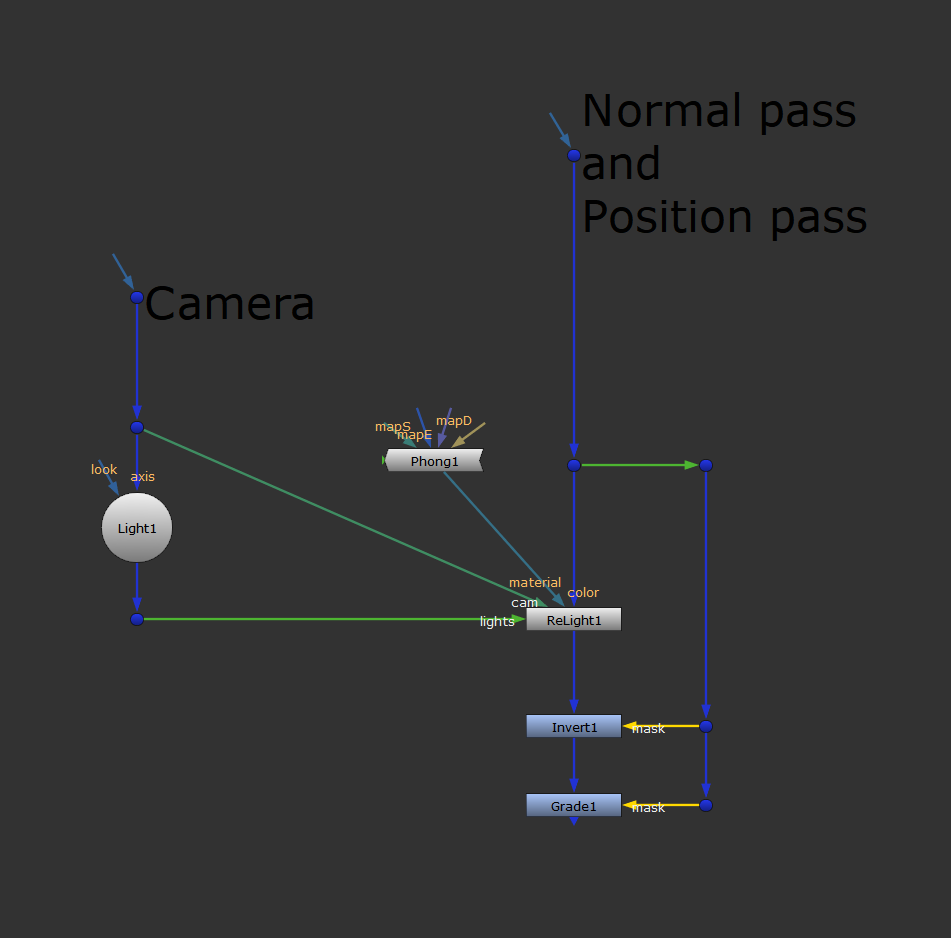
A setup for creating the fresnel matte.
Start with your CG render which has channels containing a normal pass and a position pass.
Connect the color input of a ReLight node to your CG render. In the ReLight node, select your normal and position passes in the dropdown menus (which may be named differently than N and P):
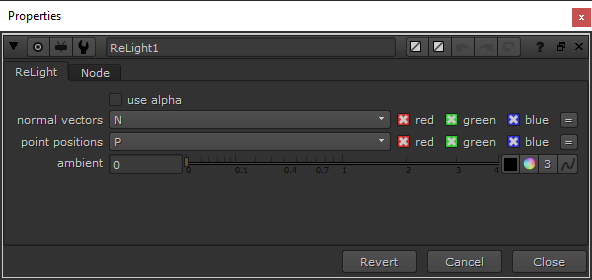
The settings in the ReLight node.
Next, connect the material input of the ReLight node to a Phong node, with the following settings:
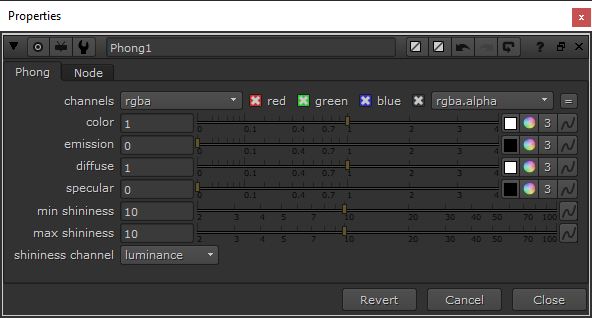
The settings in the Phong node.
By setting the diffuse to 1 and the specular to 0, we get the nice, soft lighting that we’re after in this fresnel matte.
Next, connect your camera to the cam input of the ReLight node.
Then, create a Light node and set the light type to point:
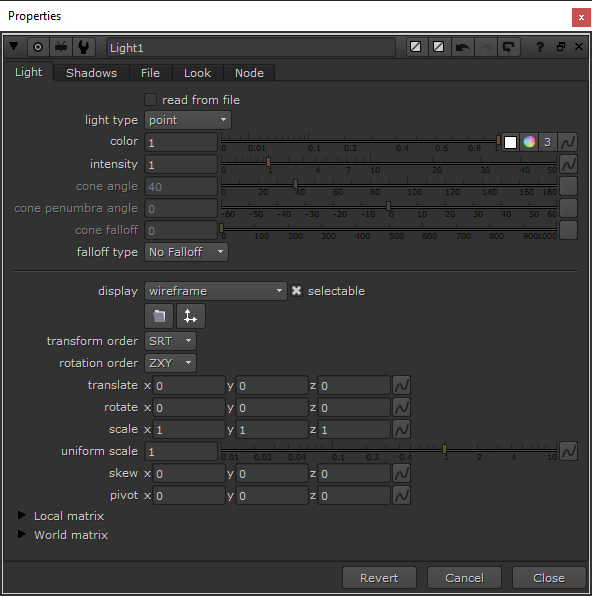
The settings in the Light node.
Connect the axis input of this Light node to your camera. This point light will now follow your camera around, and shine a light on the scene from the camera’s point of view. That means, surfaces facing the camera will always receive direct light. Surfaces which are angled more perpendicular to, or facing away from, the camera will receive much less or no light.
Connect the lights input of the ReLight node to the Light node.
The output of the ReLight node will now be a version of your CG with direct lighting on the surfaces facing the camera. However, for the fresnel effect, we want to make a matte which does the opposite: it should be brighter where the surfaces are facing more perpendicular to the camera, and darker where they are directly facing the camera.
To do that, just connect an Invert node and mask it by the alpha of your CG.
Finally, to be able to adjust the matte, add a Grade node, also masked by the alpha of the CG. A good starting point is to set the gamma to 0.5, which will darken the matte where the surfaces are facing directly towards the camera. Adjust the gamma and gain as needed. Make sure to clamp the black and white levels by ticking the checkboxes.
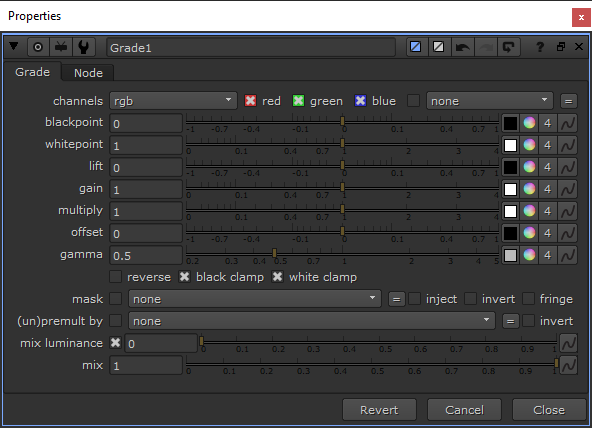
The settings in the Grade node.
Now you have a working fresnel matte. Merge (multiply) it with your reflections to get fresnel reflections, and then Merge (plus) those with your CG.
💡 If you have been following the newsletter or the website for a while, you might remember this article about facing ratios. That method creates the same output as we have done in this article, a fresnel matte. Which means, you can use the method in that article to get fresnel reflections, or you can use the method in this article to create a facing ratio pass. Two different ways of achieving the same result – which can be useful for different things.
I hope you found this tutorial useful. For more Nuke tips & tricks, see Nuke.


