Alpha Density – Matte Control Tool For Nuke
A Nuke tool for controlling the density of your alphas…

A Nuke tool for controlling the density of your alphas.
Controlling the density of the alpha in an example Noise node.
Alpha Issues
When you key smoke, fog, or other semi-transparent things, they can sometimes look either too transparent or too dense when you composite them over a new background.
The natural response when the element looks too transparent is usually to push the key further. However, that can often introduce unwanted hard or dark edges.
When the element looks too dense, you might reduce the opacity overall by adjusting the mix in the Merge node, or by using a Multiply (Math) node. However, you may want to keep pockets of denser smoke/fog, while organically reducing the density in other areas.
Alpha Density
A better approach to thickening up or thinning out the alpha of an element, making it more opaque or transparent over the background, is to use the Gamma node.
By adjusting the midtones of the alpha, you leave room for the brighter and darker areas to remain for longer, which gives a more natural look to the element.
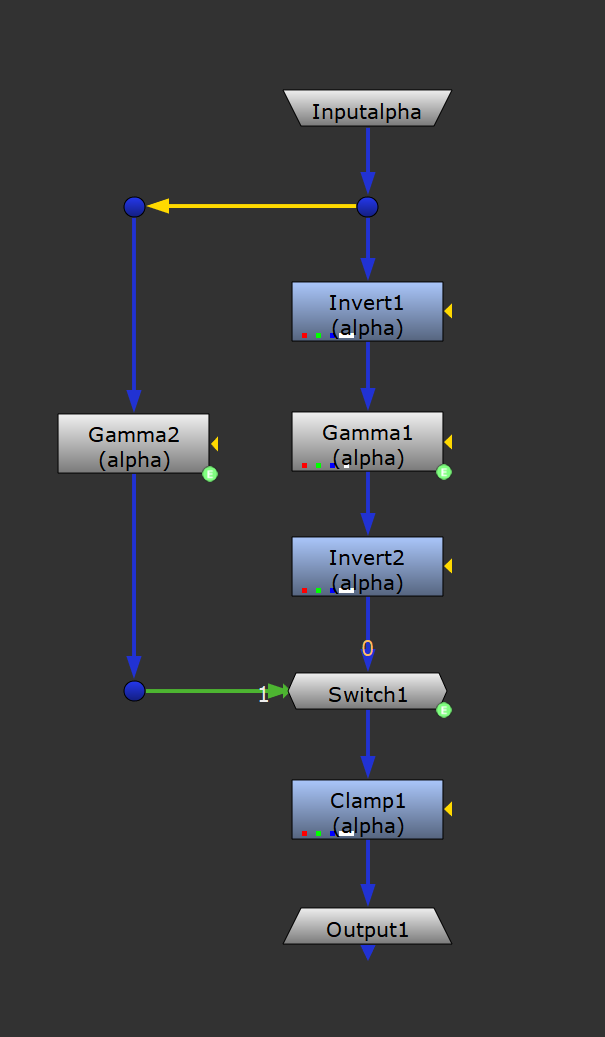
The Alpha Density setup.
Here, we operate within the 0-1 range of the Gamma nodes. A value of 1 means no change to the alpha, and a value of 0 means the semi-transparent areas of the alpha will be completely black (a value of 0).
By inverting the alpha before the Gamma node and then inverting it back after, the opposite happens. A value of 1 still means there is no change, but now a value of 0 means the semi-transparent areas of the alpha will be completely white (a value of 1).
In the Group node's property panel, I created a Floating Point Slider called density with a minimum value of -100 and a maximum value of 100. (Just personal preference, the thinking was that a value of 0 means no change, a value of -100 means a 100% transparent alpha in the previously semi-transparent areas, and a value of 100 means a 100% opaque alpha in the previously semi-transparent areas).
Then, I added the following expressions in the Gamma nodes to convert those values into a range between 0 and 1:
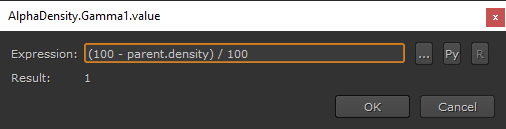
A value of 100 in the density slider becomes a value of 0 in the Gamma1 node. A value of 0 in the density slider becomes a value of 1 in the Gamma1 node.

A value of -100 in the density slider becomes a value of 0 in the Gamma1 node. A value of 0 in the density slider becomes a value of 1 in the Gamma1 node.
The Gamma nodes only behave as intended when the density slider is operating within their specific range. For Gamma1, that is 0 to 100, and for Gamma2, that is -100 to 0.
For example, a value of 100 in the density slider gives a value of 2 in Gamma1. And, a value of -100 in the density slider gives a value of 2 in Gamma2. Which is not what we want.
That’s why there is a Switch node, to hand over between the two at the value of 0 in the density slider:
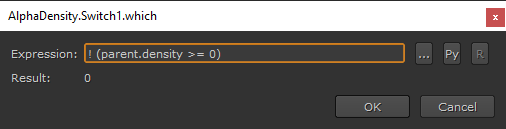
When the density slider is at or above a value of 0, use the Gamma1 pipe. If it’s less than 0, use the Gamma2 pipe.
That way, you get the best of both worlds, and one slider controls the whole tool.
You can download the tool here:
I hope you found this tool useful. For more Nuke tips & tricks, see Nuke.


