Warp Transformations In Nuke
The Warp Transform setup lets you apply an iTransform-style effect to any type of transformation node or series of nodes...
You may have used gizmos such as iTransform or TransformDisplace before. If you are unfamiliar with these tools, they enable you to mask transformations to only affect a certain area of your image.
The brilliant thing about these gizmos is how they handle the soft areas of the input mask (where the alpha values are between 0 and 1). Unlike Nuke's native TransformMasked node, when you feather and/or soften the input mask it affects the amount of transformation applied to the image in the soft areas, and not the transparency. So you can soft transform or warp a section of your image while smoothly blending between the transformed area and the original image.
The gizmos do this by applying the transformations to a UV coordinate system instead of to the image directly. Then, the transformed UV coordinates are piped into an iDistort or STMap node which is what actually transforms the image.
The transformations applied to the UV coordinates can safely be soft masked because it only affects the instructions (which pixels to move and by how much) sent to the node distorting the image, and not the image directly.
You can use a similar approach to build a setup that works with any transformation, or series of transformations, such as a Gridwarp or CornerPin2D, and not only the standard Transform node.
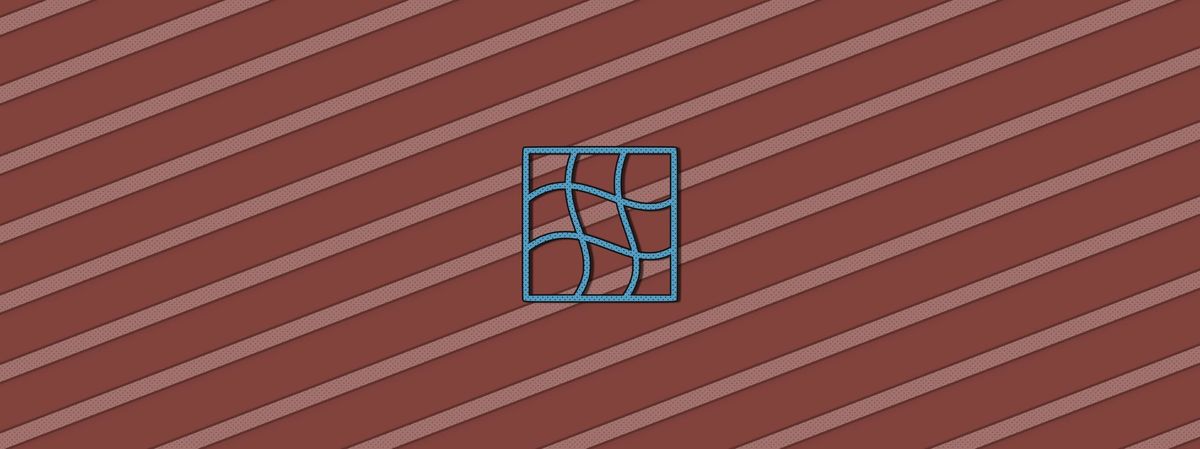
This is useful in a number of scenarios. From common tasks such as aligning mismatched CG and fixing tracks, to even animating morphing effects. It could be used to set up some really creative effects if you think outside of the box.
In the setup, you can take advantage of the IDistort’s slider called UV scale to adjust the overall amount of the transformation to apply. A value of 1 being 100%. If the client asks for 20% less of a complex effect that you have set up using multiple warps and transforms, you can just slide it to 0.8. Or add 20%? Just set it to 1.2. It is a great way of quickly addressing feedback without having to go back in and readjust potentially dozens of keyframes in multiple nodes.
The Setup
From the Input at the top, which you would connect to your image, you branch off a pipe and remove all channels. You only need the incoming format of the image, and nothing else. Then you add an AdjBBox node so you can add overscan as needed later on.
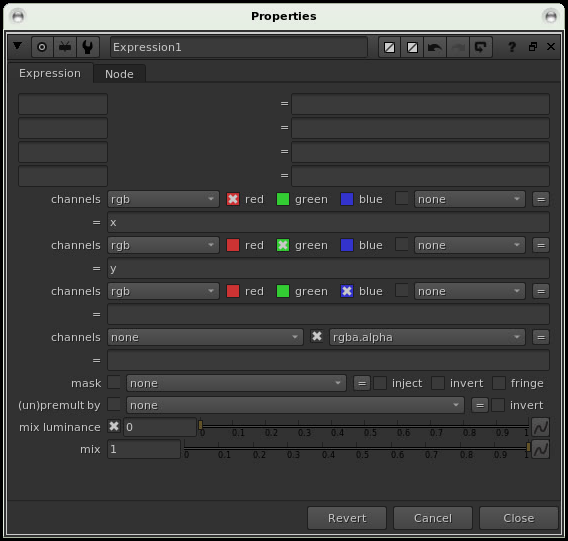
Next follows an Expression node. Here you set up x and y coordinates in the red and green channels, respectively. This will map values across the image based on the pixel positions. The pixel in the bottom left corner of the frame, where the pixel position is x=0, y=0, will be black because the red and green channels will both receive a value of 0.
The value of the pixel in the top right corner of the frame will depend on the format. For UHD, for example, the red channel would be 3840 and the green channel would be 2160. And all the pixels in between and outside of these two pixels will have values mapped accordingly, based on their positions.
Next in the setup, you apply your transformation. This could be any transformation node or series of nodes. Then, you subtract the original coordinates from the transformed ones, leaving you with the difference. That is, the instructions for how to move the pixels in the image.
Below that, you mask these instructions using a Roto node. You can connect any matte you would like here, and then soften it as much as needed.
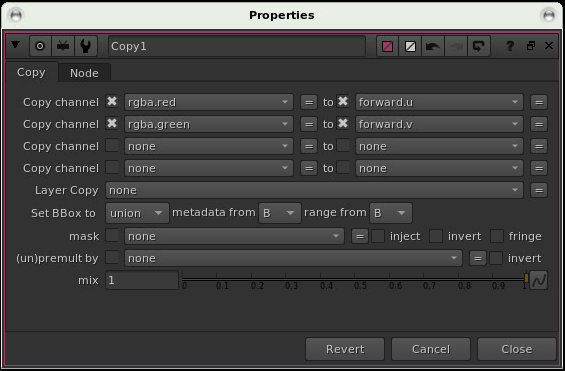
You now have the complete instructions you need for distorting your image. Copy the red and green channels into the forward.u and forward.v channels of the main pipe.
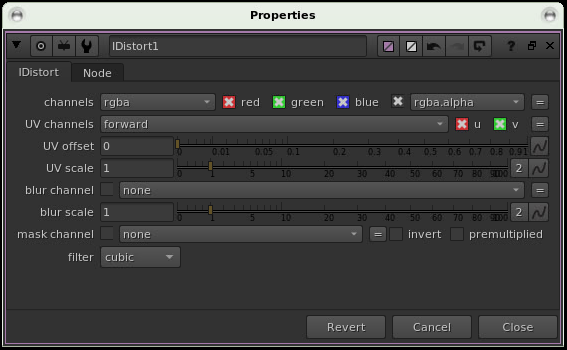
Then, add an IDistort node set to affect the RGBA channels using the forward channels as the UV channels.
Lastly, add a Remove node to remove the forward channels which are no longer needed after the IDistort node.
The setup is now ready for action:
Connect your image to the input at the top.
Add your transformation nodes in the green backdrop section.
Add your mask and soften it as needed in the yellow backdrop section.
Adjust the UV scale in the IDistort as needed to increase or decrease the effect.
I hope the Warp Transform setup will be useful to you. For more Nuke tips & tricks, see Nuke.


