Consolidating Retime Curves In Nuke
Combine multiple retime curves into one master curve…

Combine multiple retime curves into one master curve…
The Long Take
Once in a while, you may find yourself working on a long take.
In filmmaking, a long take (also called a continuous take, continuous shot, or oner) is a shot which is much longer than a typical shot. There might be significant camera movement and elaborate stunt choreography, all in one long take. (Or several shots stitched together to look like one long take).
Example of a long take from Mission: Impossible - Fallout. (It's actually three shots stitched into one).
On a previous project, we worked on a large fight scene. It had very long takes that captured different stages of the combat as the actor and stuntmen moved through the environment. (Thousands of frames per shot).
The work required a lot of retiming to make the fighting look more real and violent. We made heavy use of speed ramps and seamless jump cuts. And there was a lot of clean up and connecting of hits.
Because the shots were so long, we made the decision to split them up into different parts in Comp to make them easier to manage.
That meant for each shot, we used multiple Kronos nodes to retime the different parts. And we retimed the cameras as needed for each part in Nuke.
All the individual parts were assembled in one master script per shot.
As well as retimes and clean up, the shots also required CG renders. To simplify things for Lighting, who had one camera per shot from Matchmove, we consolidated all the retime curves into one master retime curve for each shot.
And we did that via custom metadata:
One Curve To Rule Them All
The setup we came up with boils down to the following:
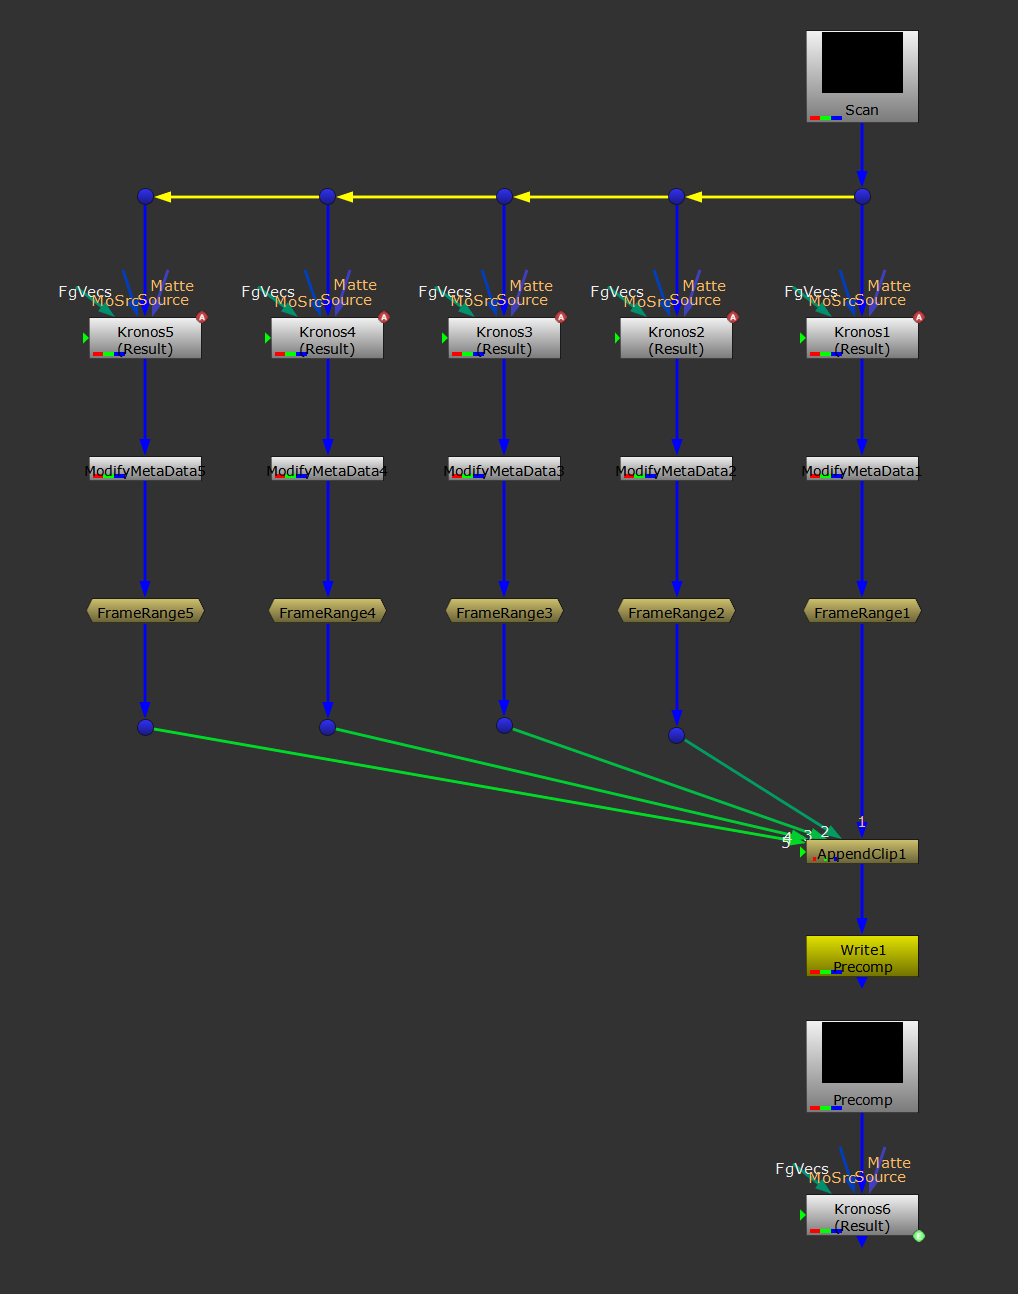
Consolidating retime curves.
The setup above is obviously stripped of all the complex work we did, but it shows how the retime curve consolidation process worked in a nutshell.
The scan was divided into multiple parts at natural points in the shot. Each part had a locked start and end frame so that when assembled they would all seamlessly fit together. However, within those frames the comper had freedom to speed ramp and jump cut as needed to make the fighting work.
To make sure the retime frame information from each Kronos node was successfully passed through, we created new metadata to store it in.
Here's how to do it:
Below each Kronos node, put a ModifyMetaData node.
To add new metadata, click the + button.
Then, double-click on the field in the key column to bring up a pop-up menu. Here, you can pick an existing metadata key or create a new one:
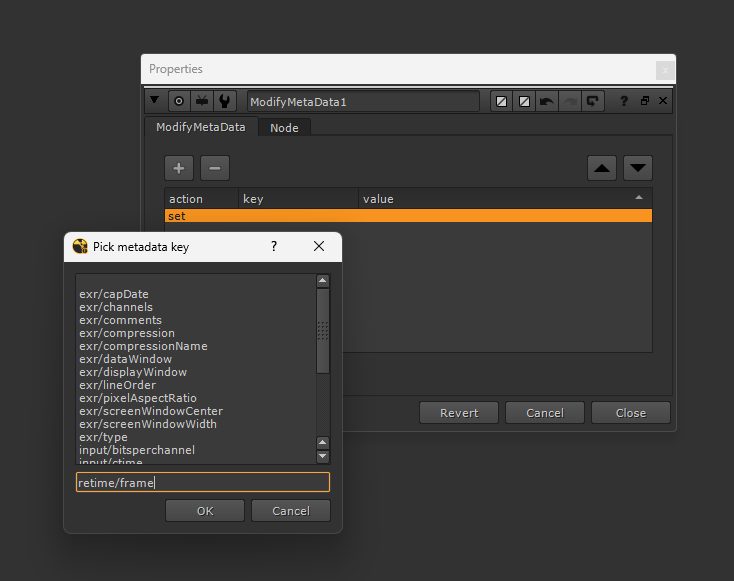
Creating a new metadata key.
Instead of picking a key from the list, type in a new name for your key in the bottom field. We chose retime/frame, but it can be anything so long as it's descriptive and easy to understand.
Next, double-click on the field in the value column and add the following expression:
[value input.timingFrame2]
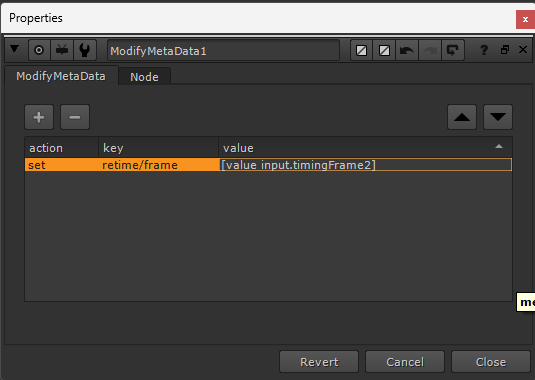
Adding an expression to the value of the new metadata.
This expression will assign the value of the retimed frames in the Kronos node to the new metadata.
Next, set the relevant frame ranges that you want to use for each part of the shot using FrameRange nodes, and then AppendClip them all together.
To use all the metadata in one Kronos node, the next step is important:
Render out a precomp of the combined frame range. We're going to be adding an expression to use the metadata, and due to a bug in Nuke it doesn't work with other live expressions upstream. The new metadata needs to be baked into rendered frames.
Once you've done that, import the render and connect a new Kronos node to it.
In the timingFrame2 knob, add the following expression:
[metadata retime/frame]
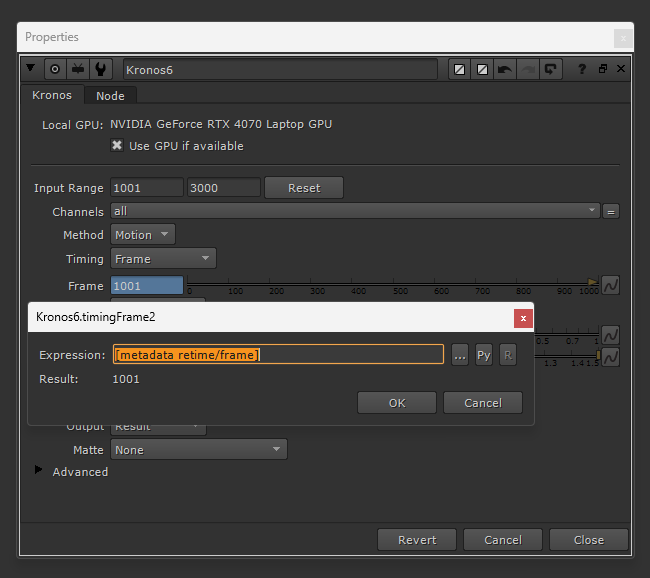
Putting the combined retime frame information in a Kronos node via an expression.
Next, let's bake the expression into keyframes in order to export the retime curve.
Right-click on the expression → Edit → Generate…:
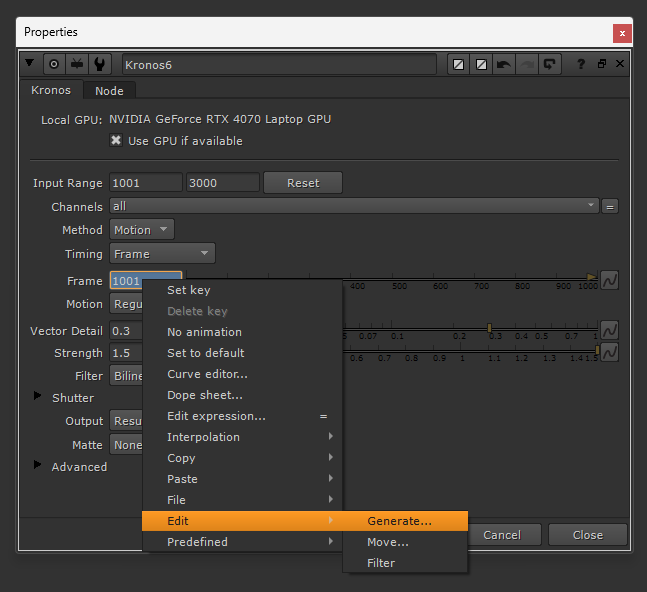
Edit → Generate…
And then, select your frame range in the pop-up menu:
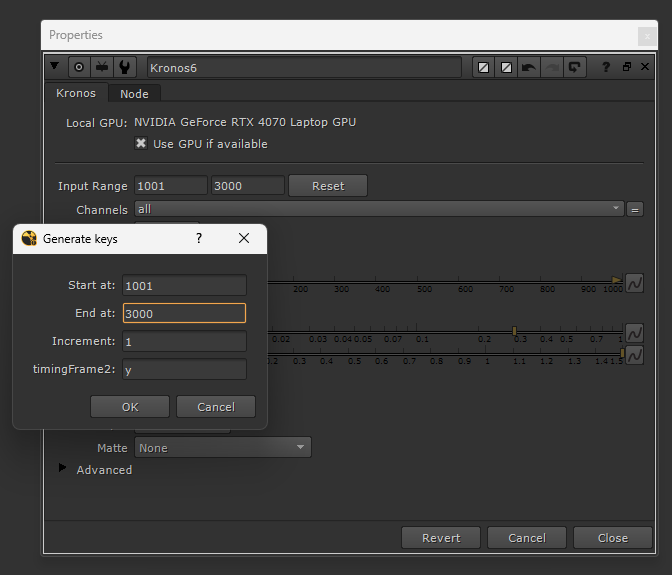
Selecting the frame range to bake.
Hit OK and your Kronos node is ready to go!
I hope you found this tutorial useful. For more Nuke tips & tricks, see Nuke.


