Element Integration Trick Using Nuke
A simple but powerful technique for integrating elements into a plate which has complex or varying lighting or texture…

A simple but powerful technique for integrating elements into a plate which has complex or varying lighting or texture…
I’ve previously written an article about a great technique for adding/removing dynamic light interaction to/from your CG render, patch, element, scan, etc. when compositing: Add Or Remove Flickering In Nuke.
In this article, I'll show you another really useful, and even simpler, technique – which can also transfer the scan's texture onto what you’re comping.
First, let’s take a look at an example of what it does:
Adding a graffiti element onto a concrete wall. No matter where the element is placed on the wall, it reacts correctly to the light, shadows, and texture of the wall in that area.
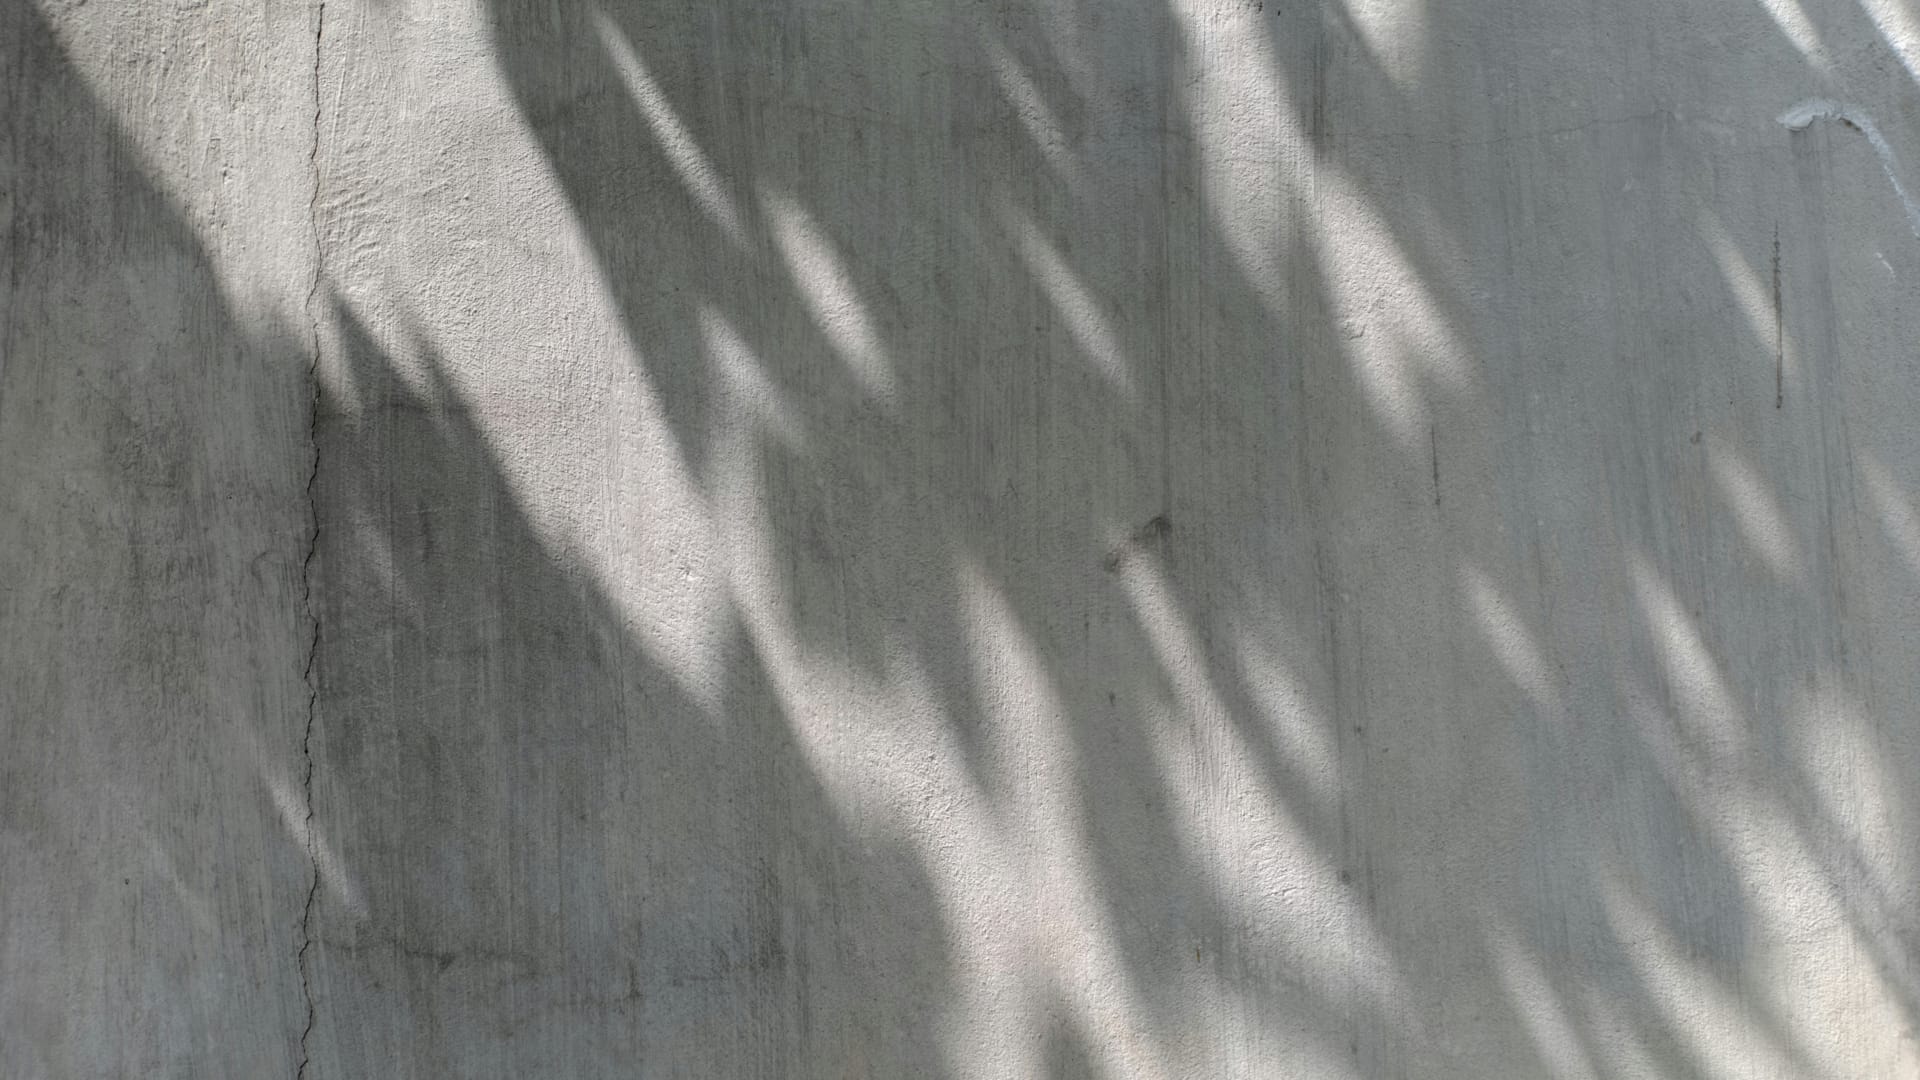
Wall image.

Graffiti element (premultiplied).

The graffiti element merged straight over the wall image. Notice that it’s missing the light and shadow interaction. The concrete texture of the wall is also missing from the paint.

The same graffiti element as in the previous image, except the wall has been multiplied over it using a custom setup.
Let’s build the setup:
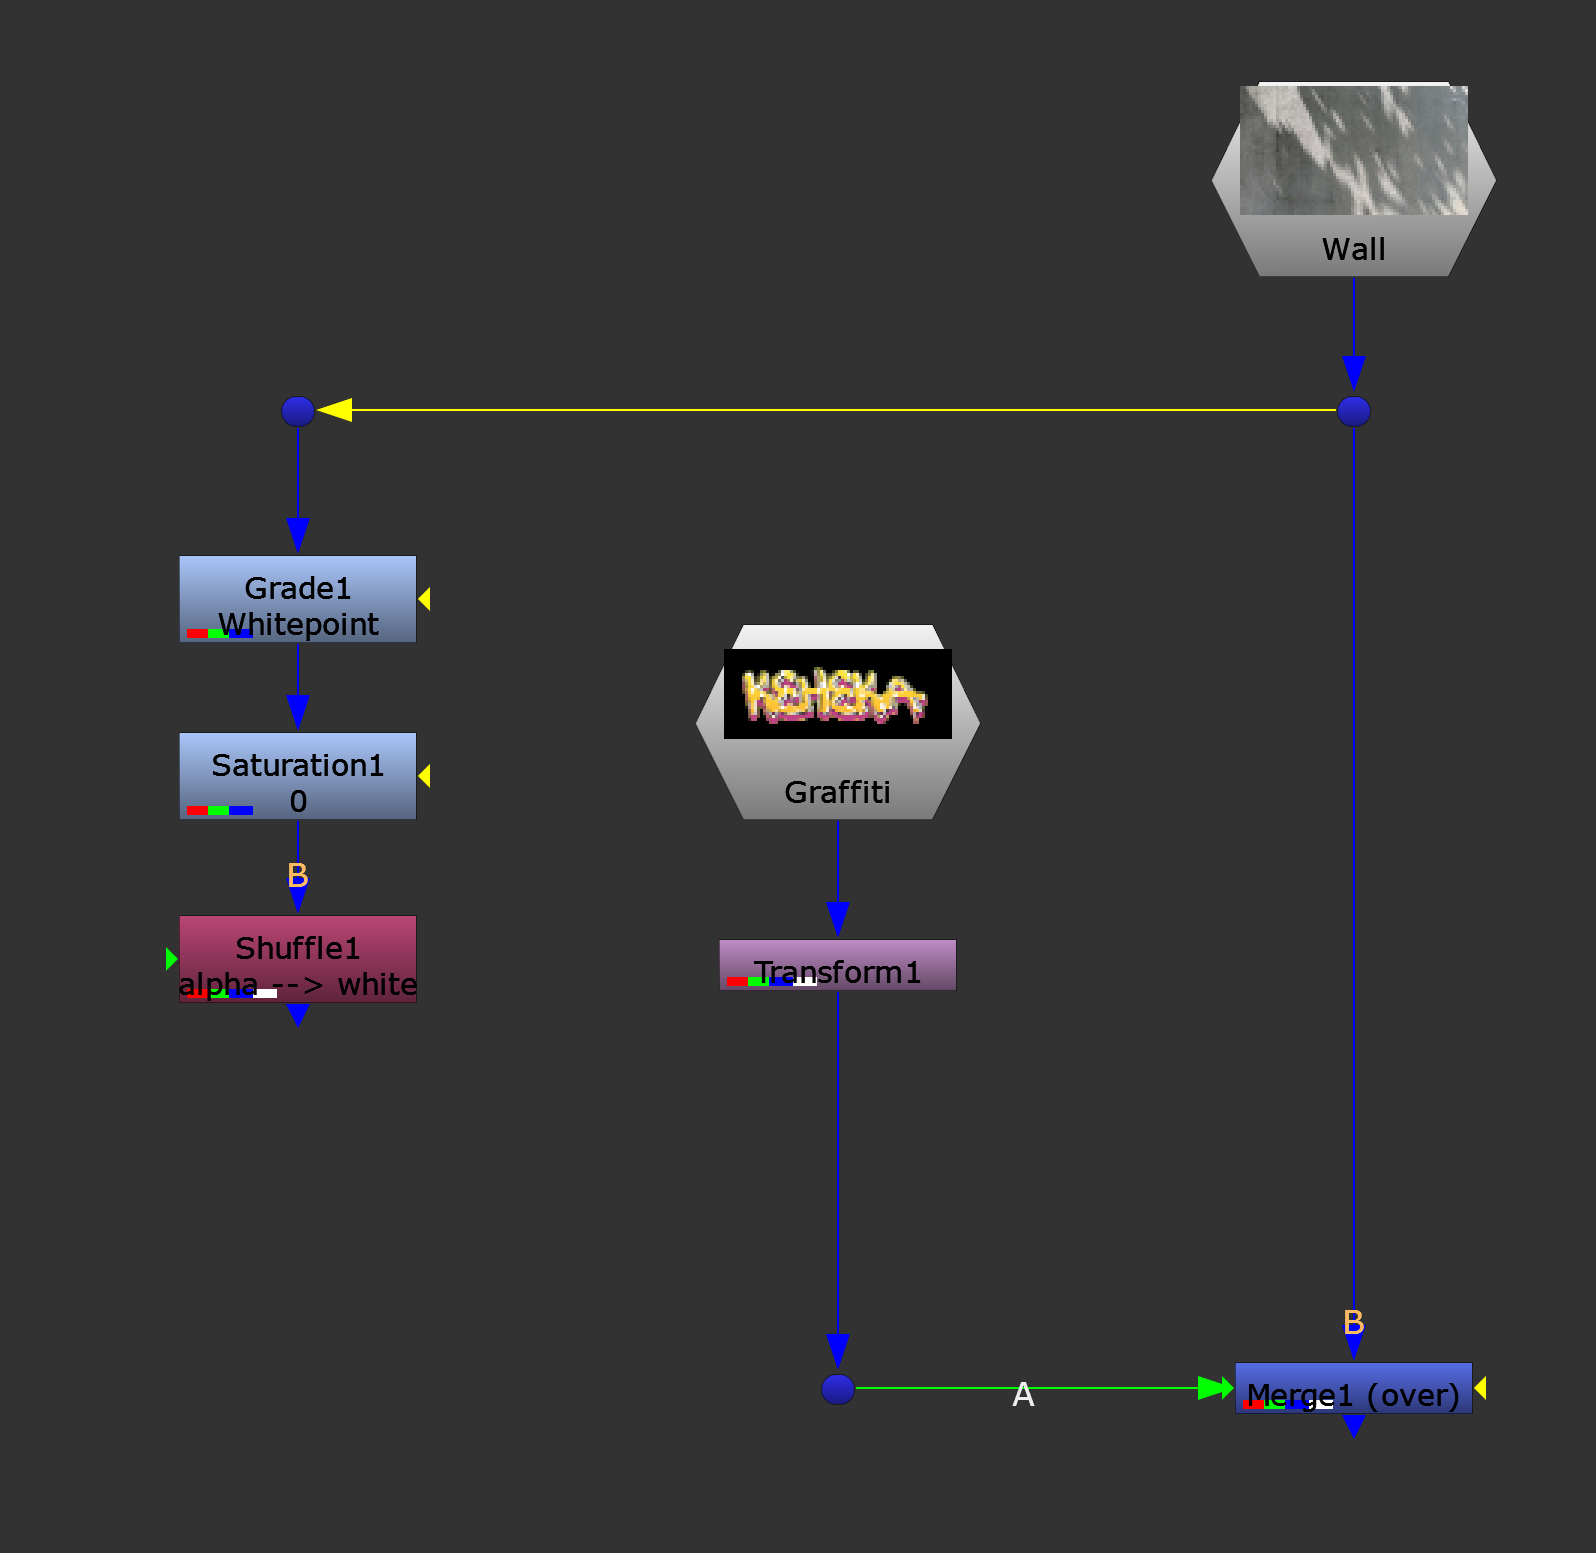
First, position and Merge (over) the premultiplied element (A) straight over the background image (B):
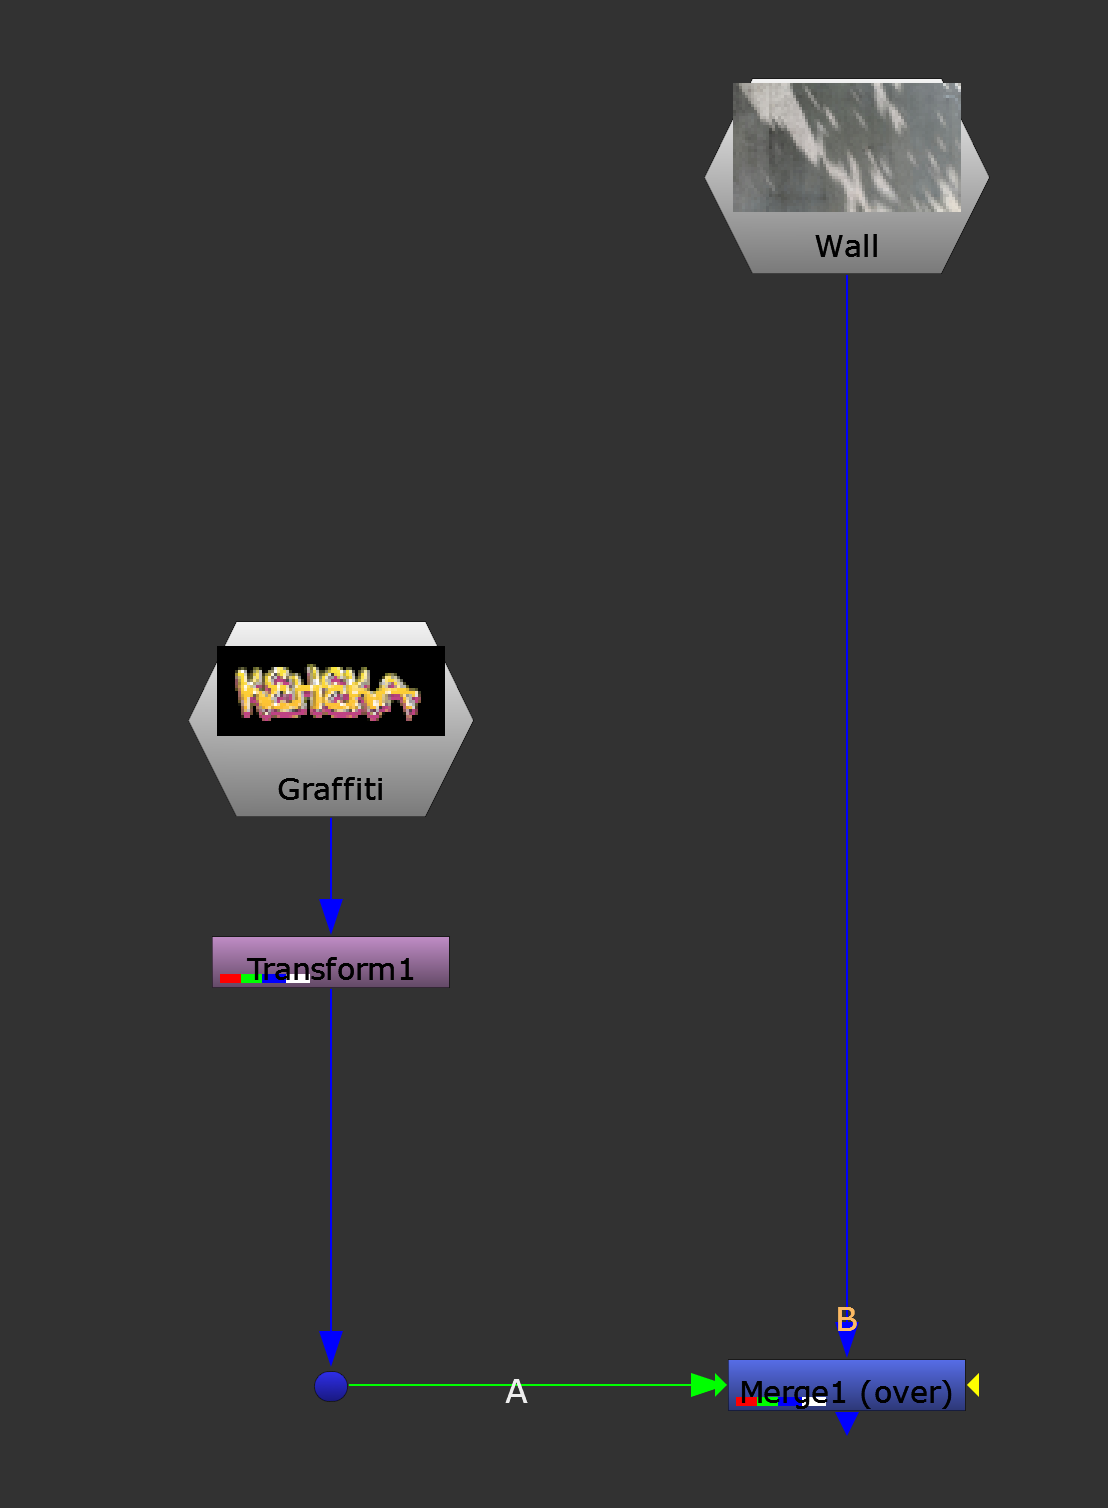
The premultiplied graffiti element is positioned and merged straight over the wall image.
Next, make a separate pipe out to the side from the background image. Connect a Grade node, and colour pick a bright area of the background image as the whitepoint.
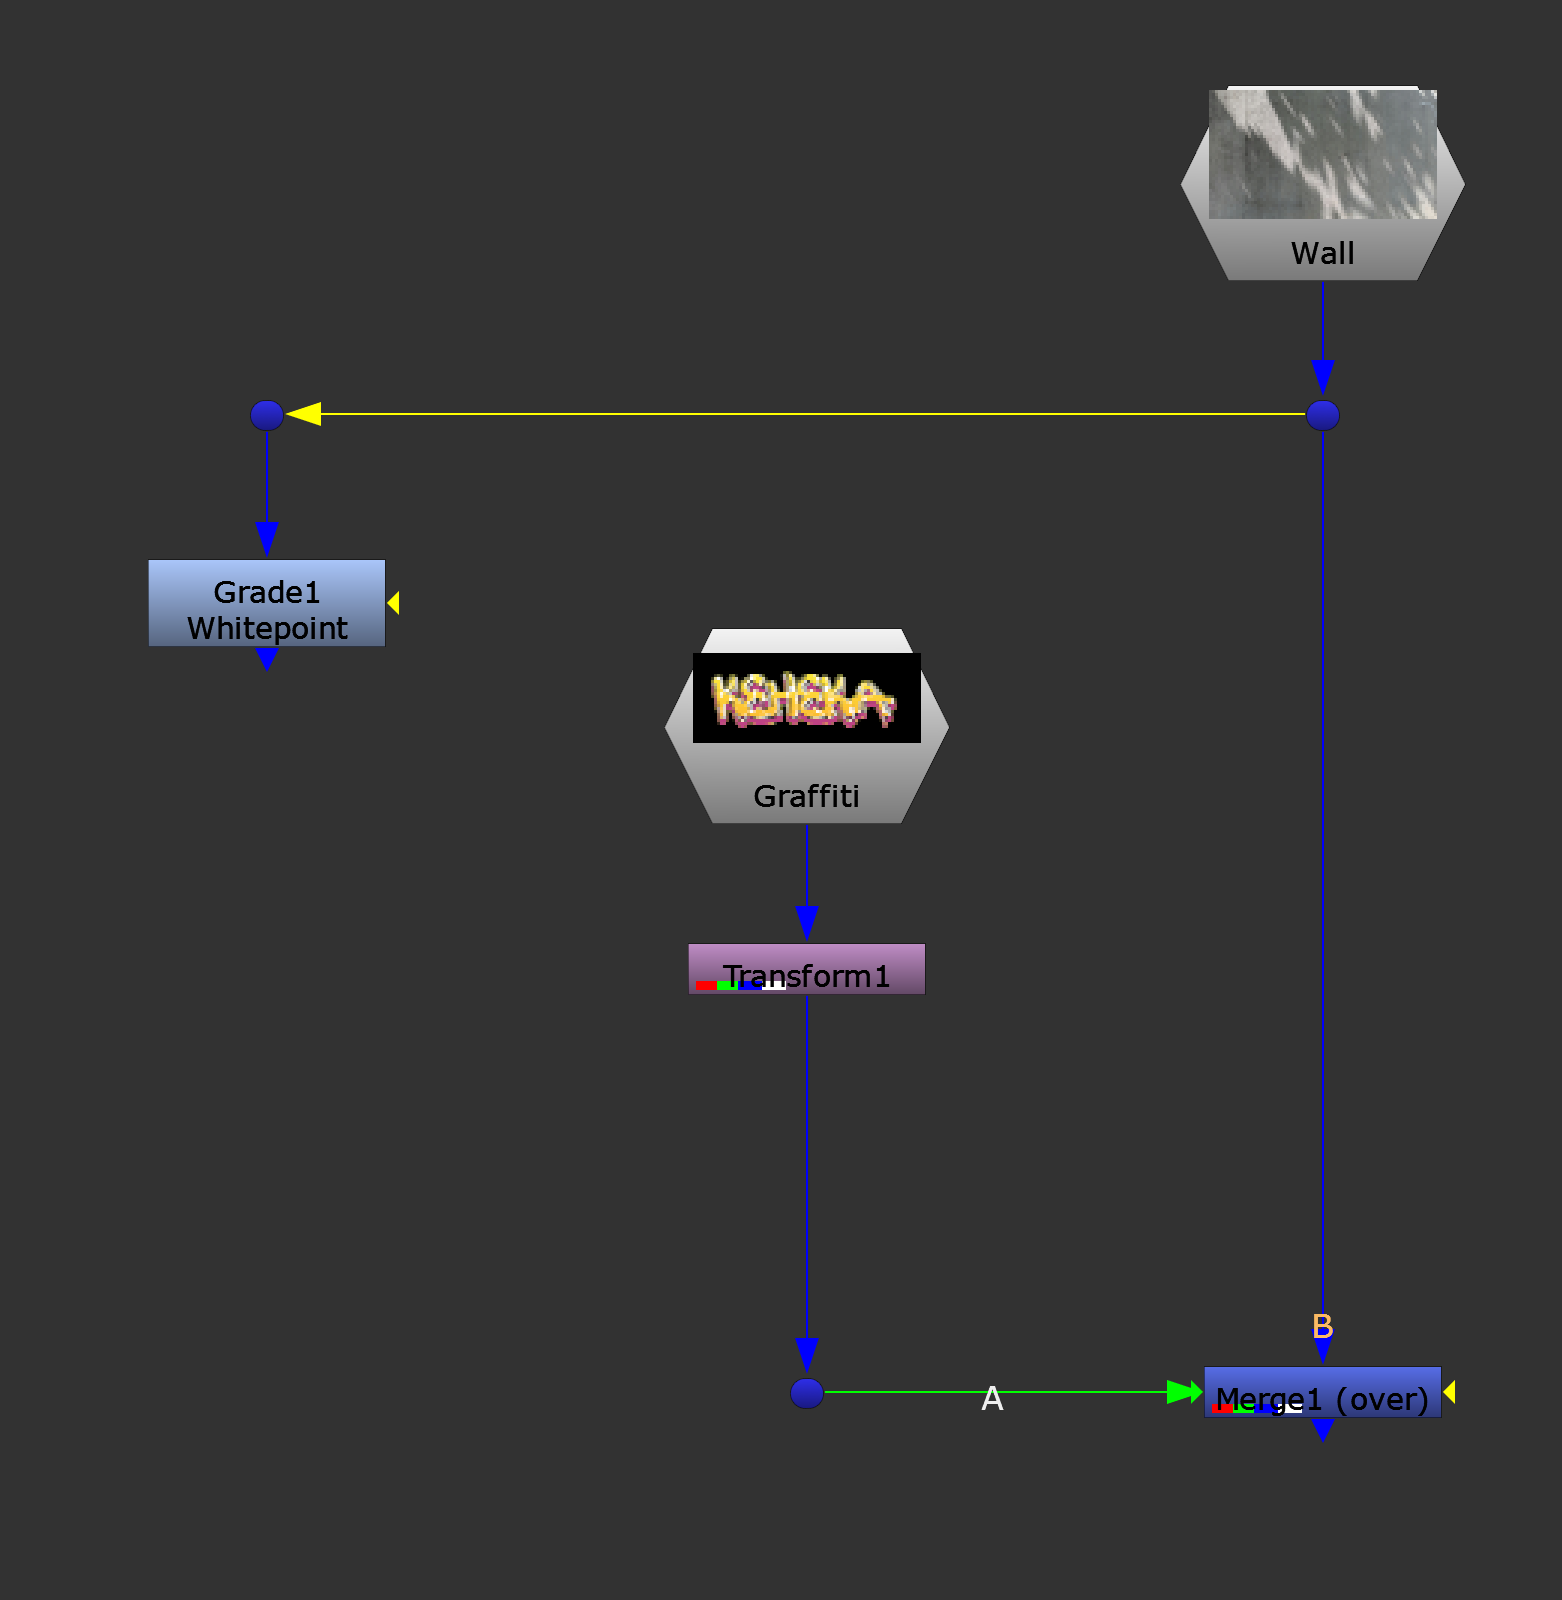
Setting the whitepoint of the wall image, so that the bright area gets a value of 1.
(In my case, I colour picked a bright area where the sunlight hits the wall).
This will remap (expand/compress) the pixel values in the background image. The bright area that you picked will become a value of 1, the darkest areas of the scan stay pretty much the same, and everything in between will be shifted proportionately to fit the new range. And, any areas that were brighter than the bright area that you picked will proportionately get brighter than 1.
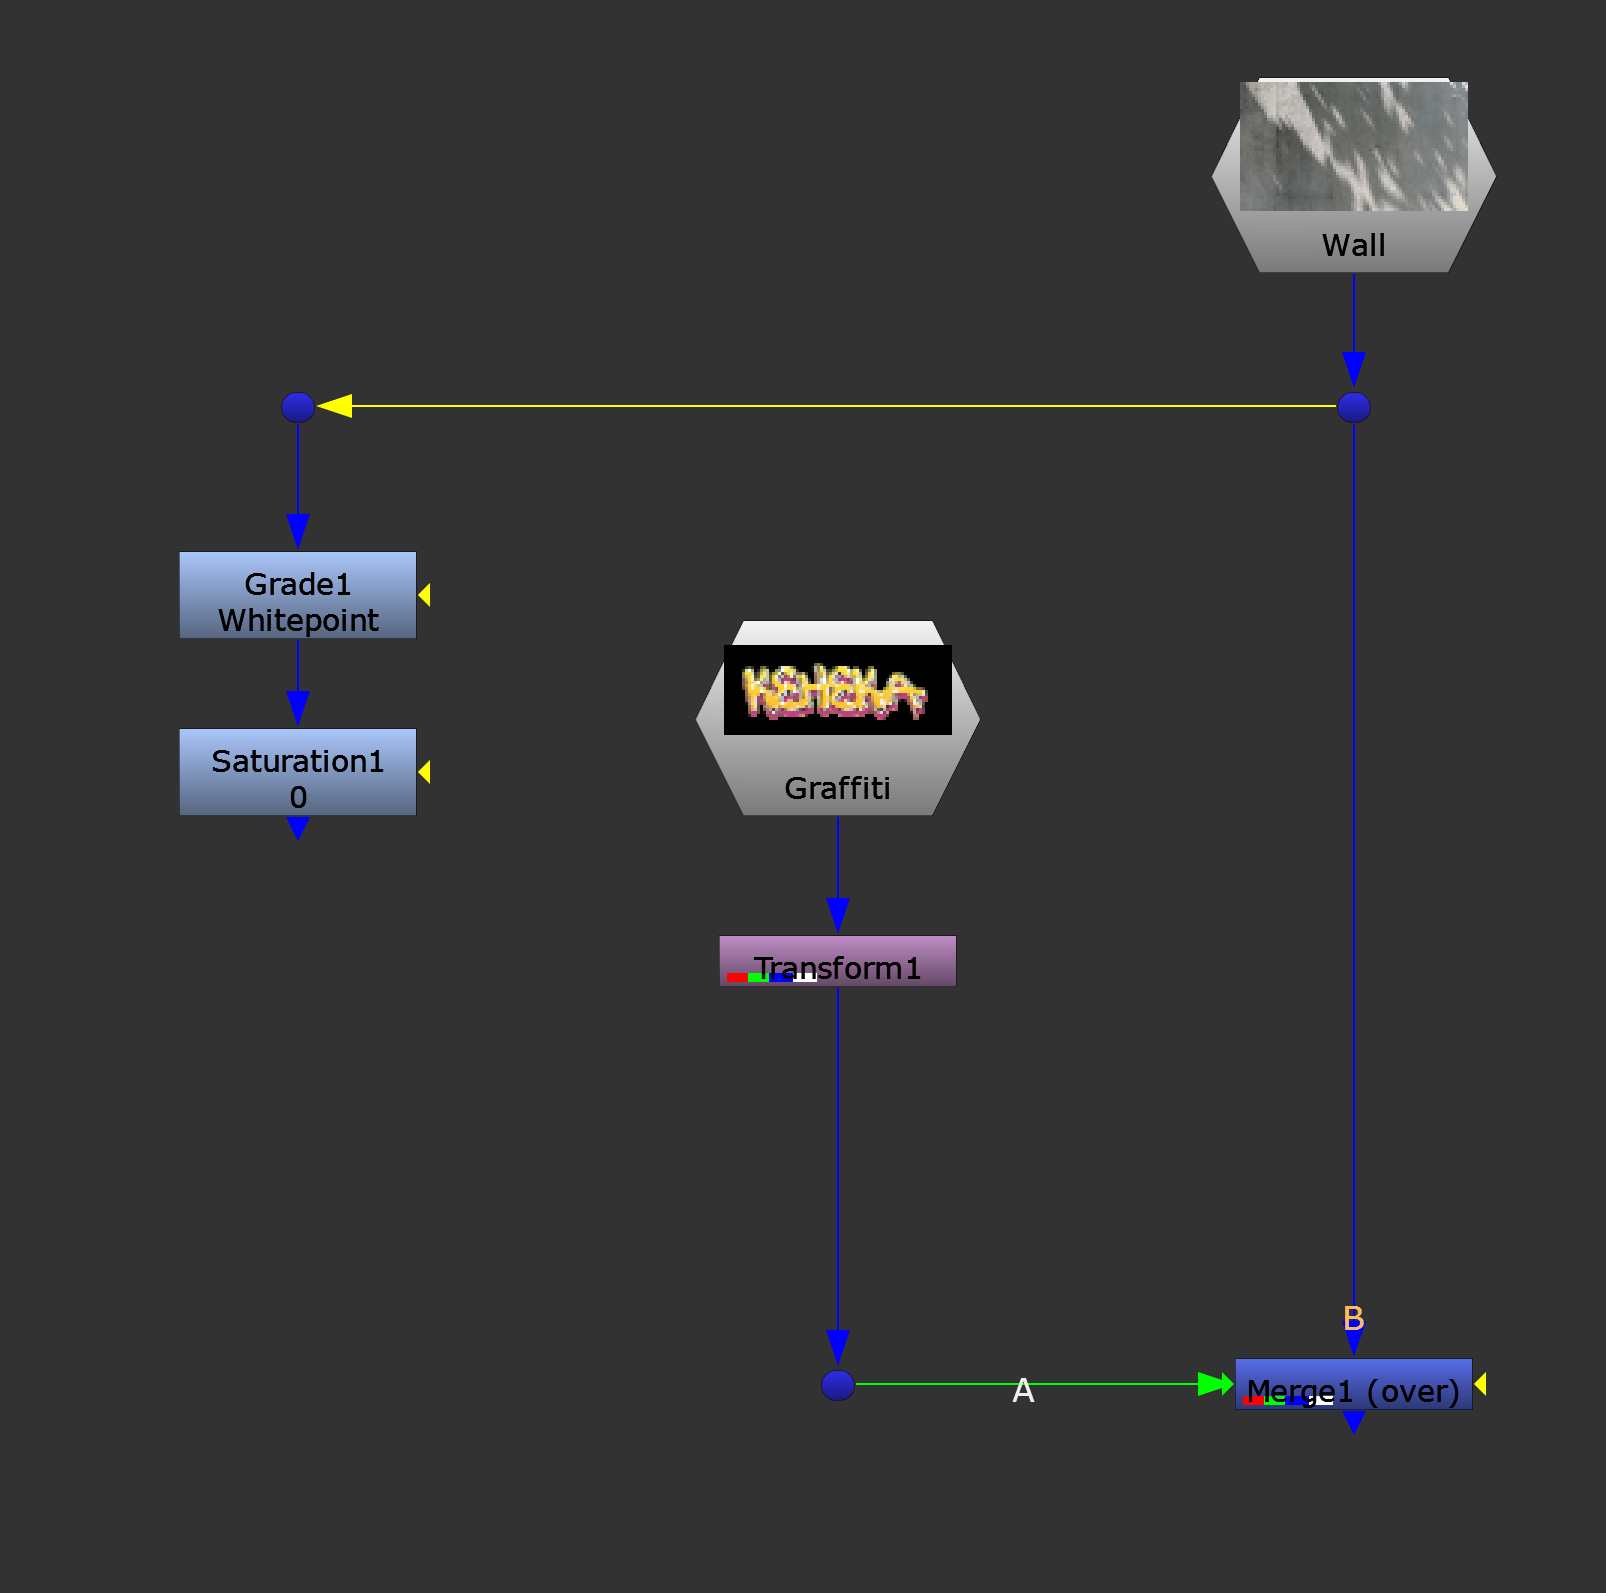
Next, remove any colour by connecting a Saturation node and setting it to 0.
Desaturating the background image.
This will ensure we don’t get unwanted colour contamination in our element.
Next, if the alpha is not already fully white, add a Shuffle node and set it to output a white alpha. (Keep R, G, and B as they are).
Turning the alpha channel white.
Finally, Merge (multiply) the result of the new pipe (A) by the element (B).
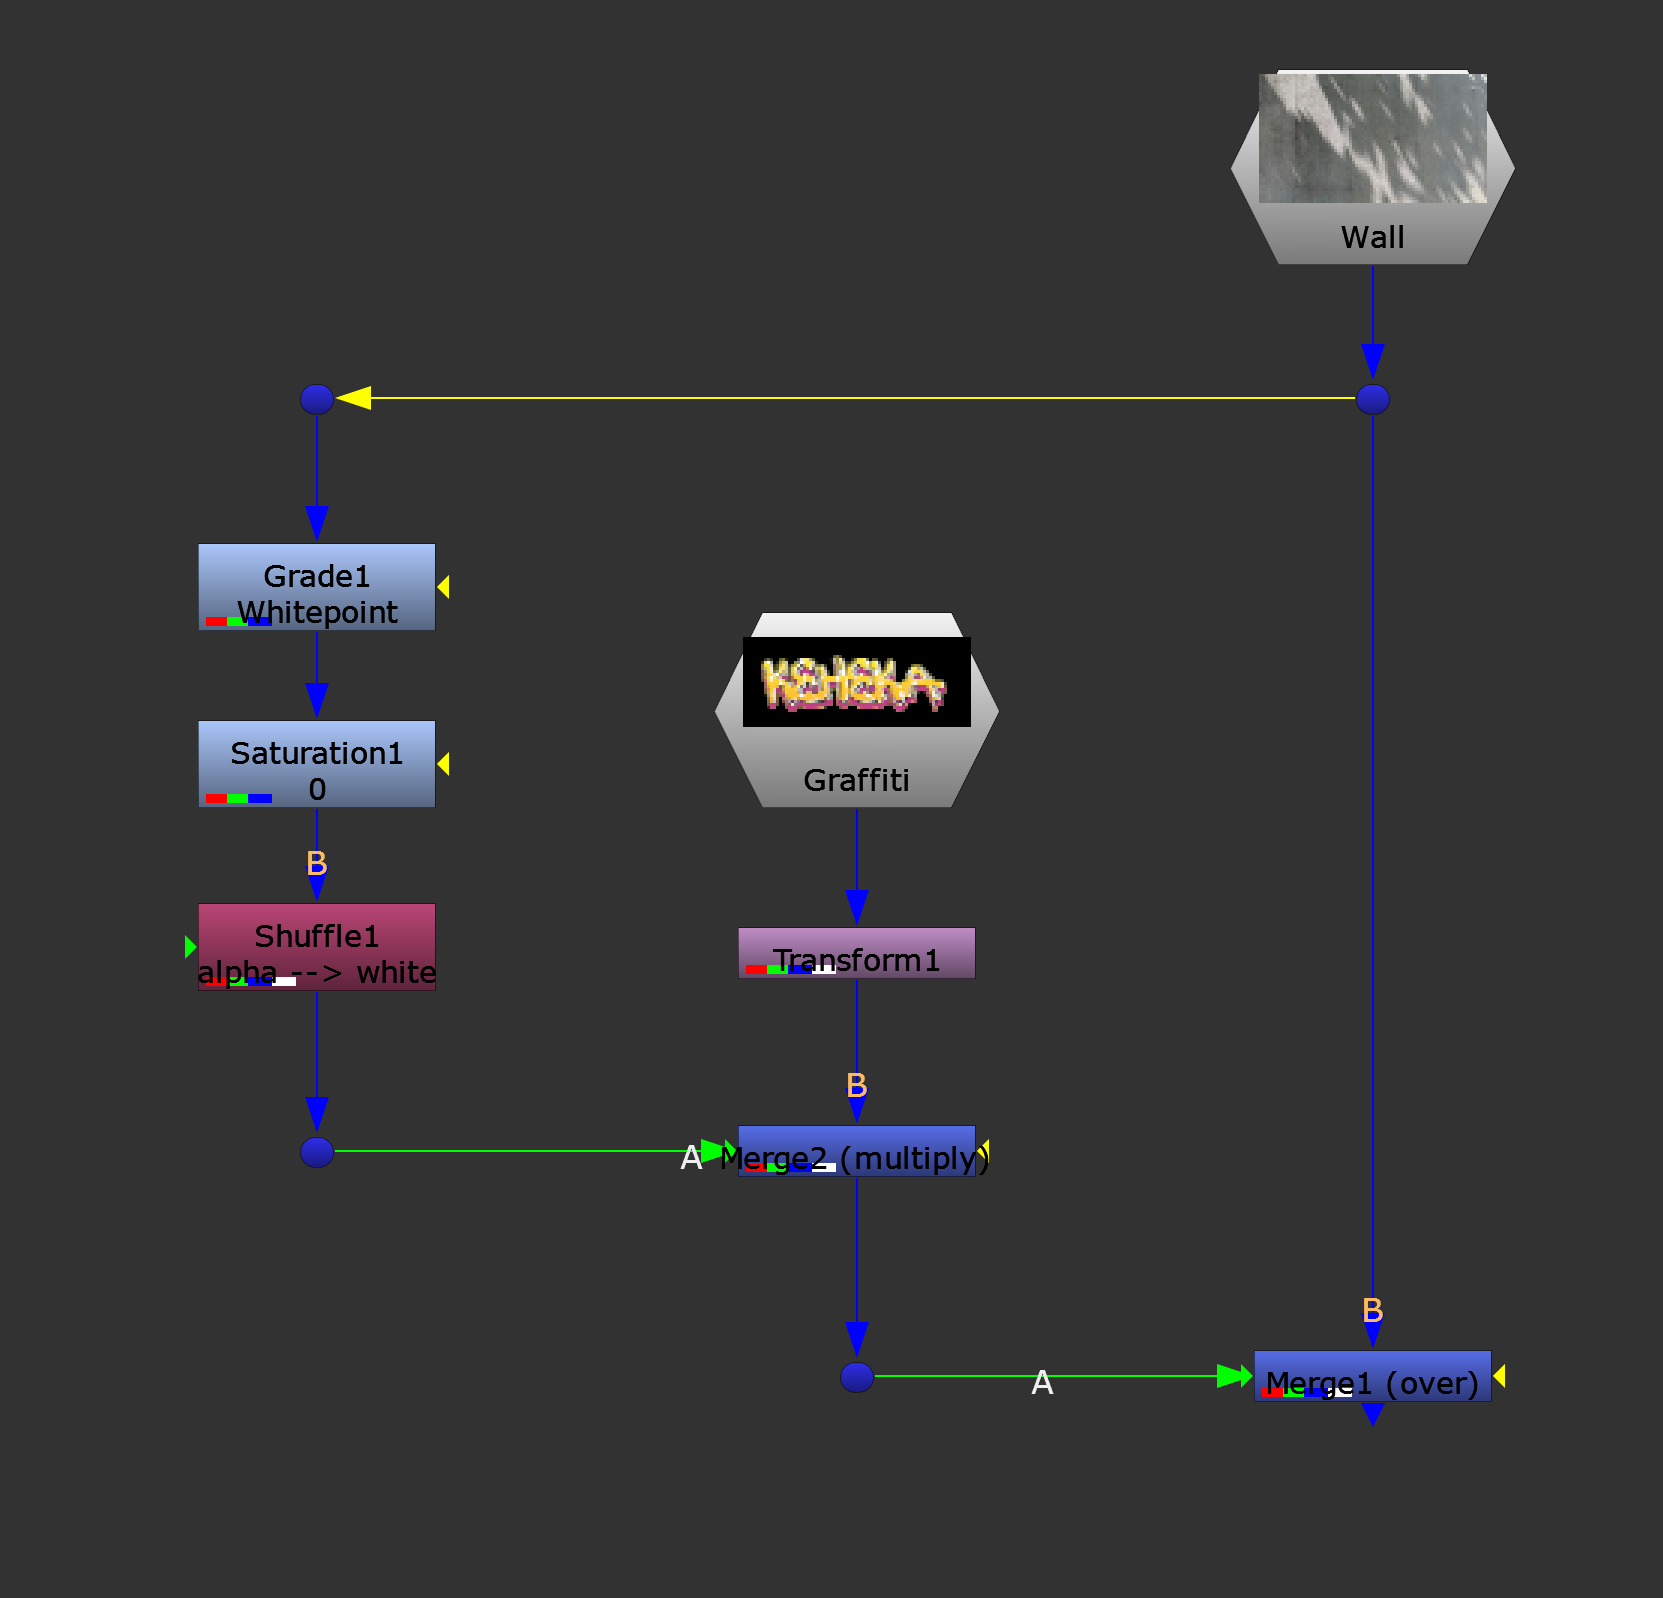
Multiplying the modified background image over the element.
Now, any parts of your element which go over the lit areas of your background image will stay as they are (anything multiplied by 1 remains the same), and any parts which go over a shadow area will get shadowed.
This technique works best in situations like the one shown above, however sometimes you don’t want the texture to show through onto your element. Let’s say we instead wanted to composite a picture frame onto the same wall:

Picture frame element (premultiplied).
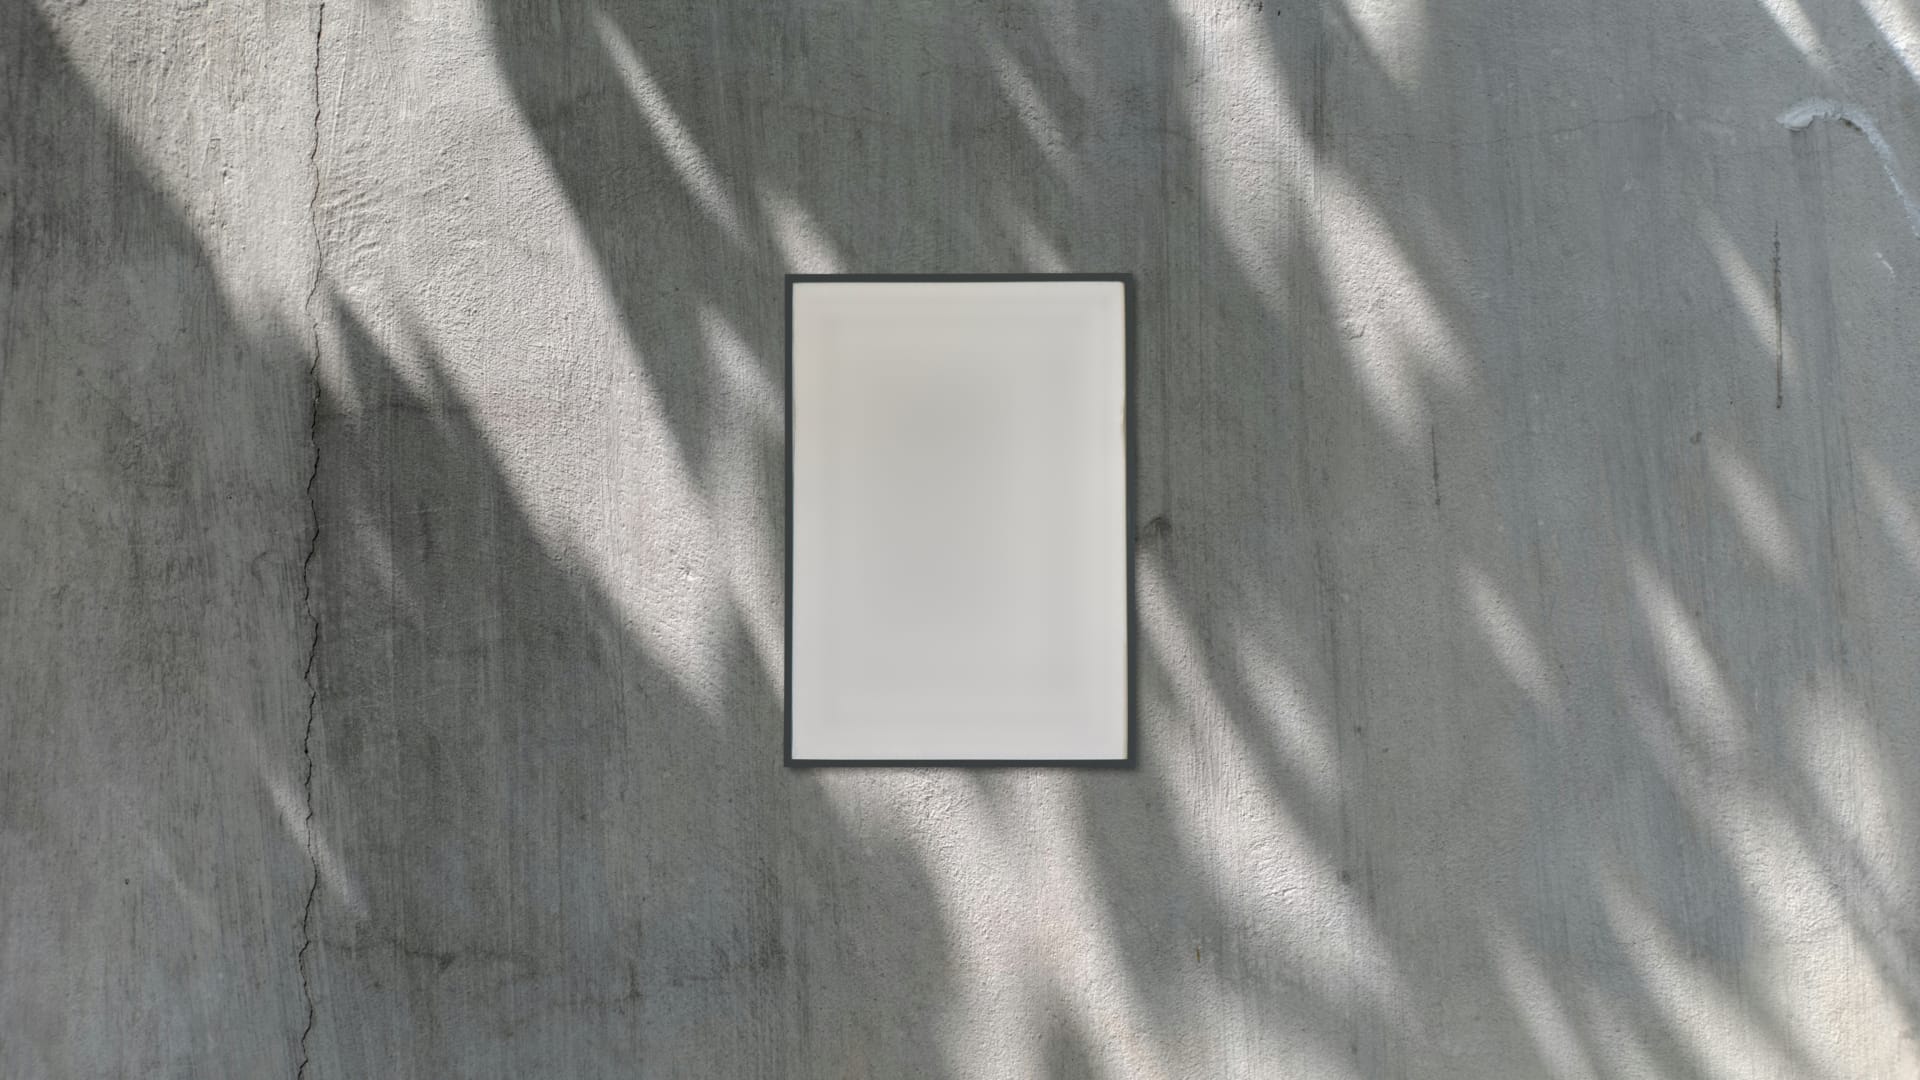
The picture frame element merged straight over the wall. Notice that it’s missing the light and shadow interaction.

The same as in the previous image, except the wall has been multiplied over the picture frame element using our setup. Notice that we’re getting (unwanted) texture from the wall onto the picture frame.
By blurring the background image before multiplying it with the element, you can remove fine texture detail:
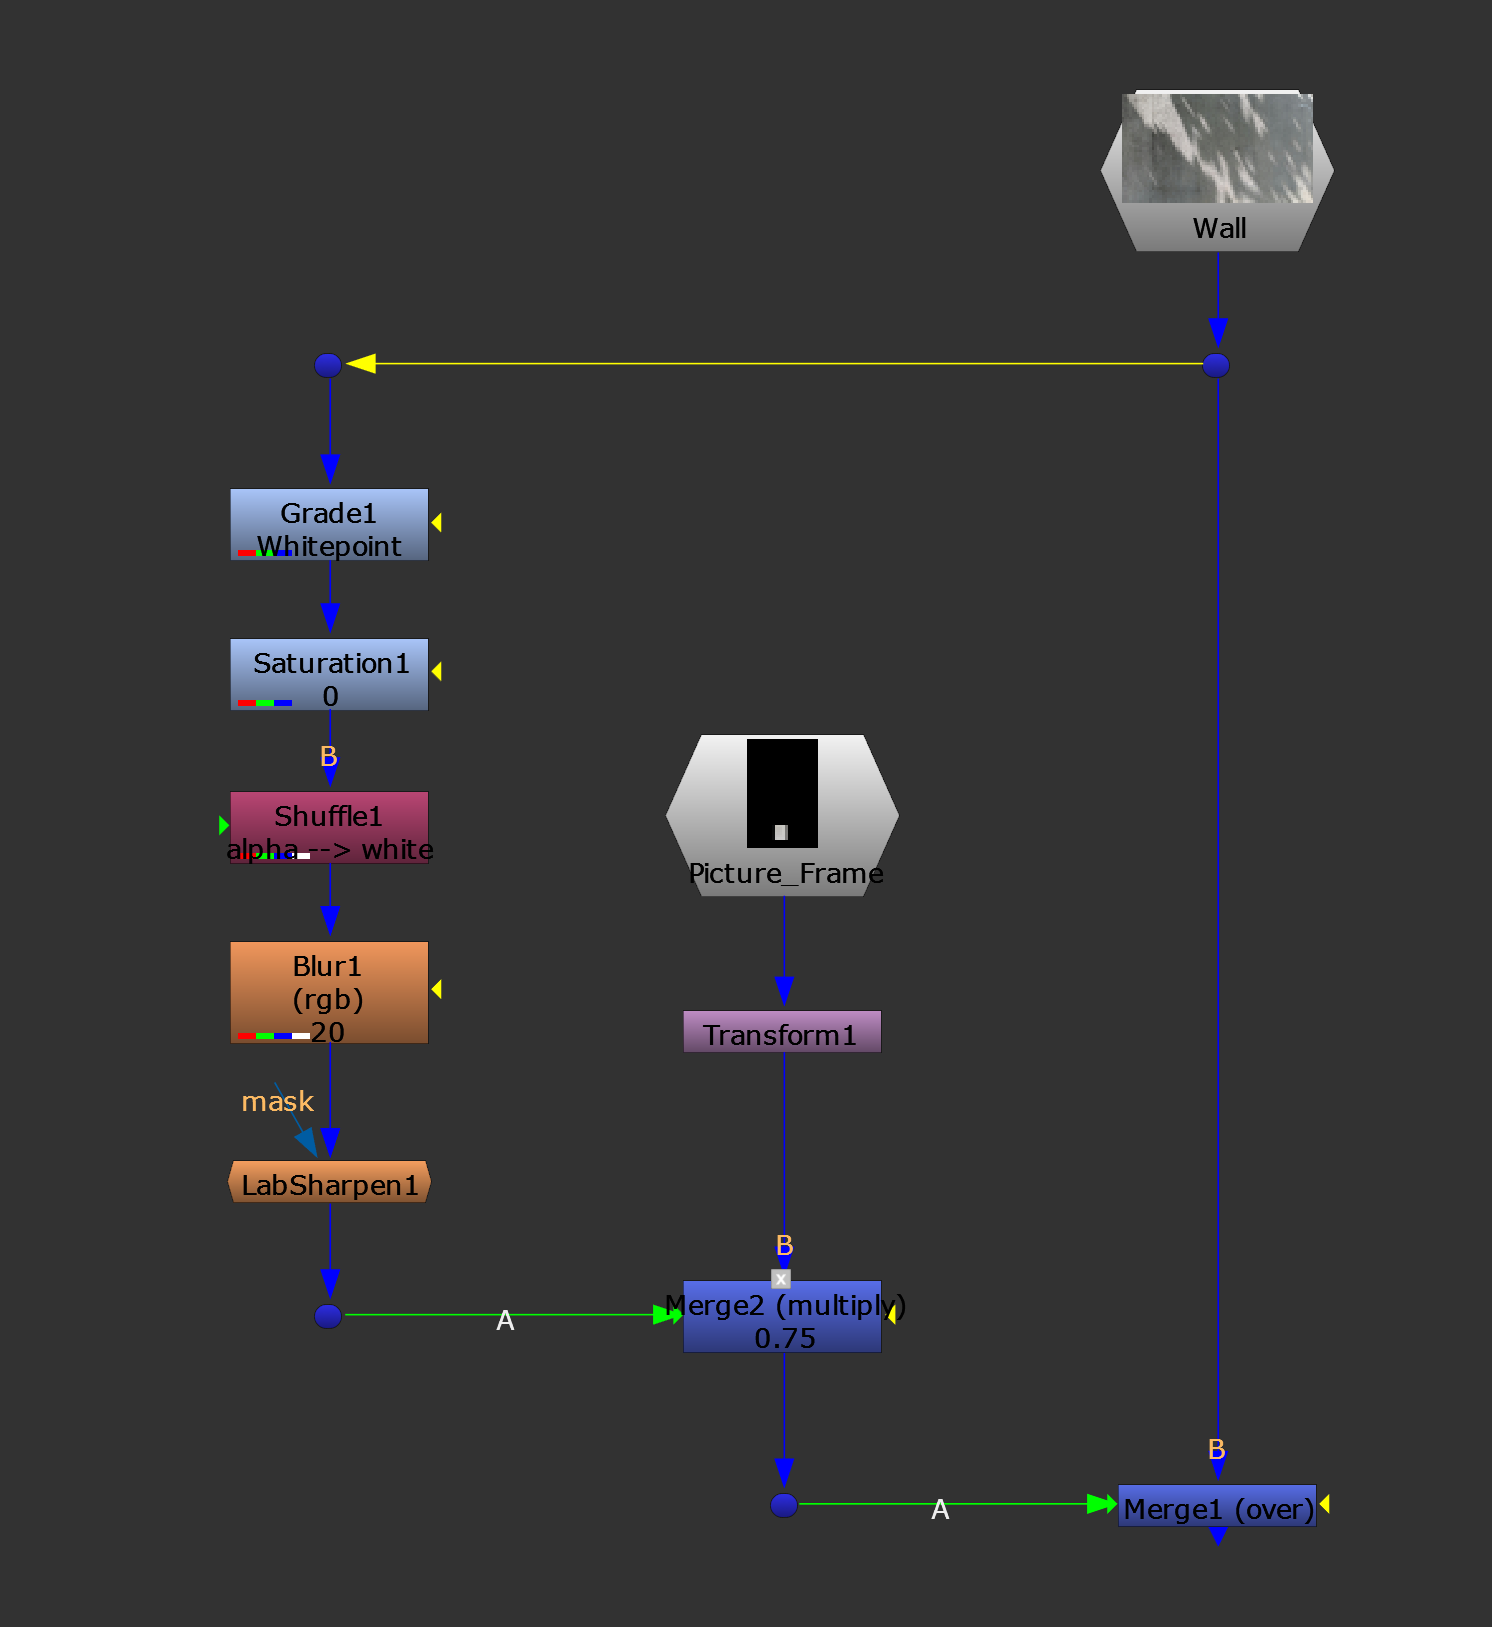
The same setup as before, except we’re removing the texture details using a Blur node. It may help to sharpen the image a little bit after the Blur to avoid softening the lighting/shadows too much.
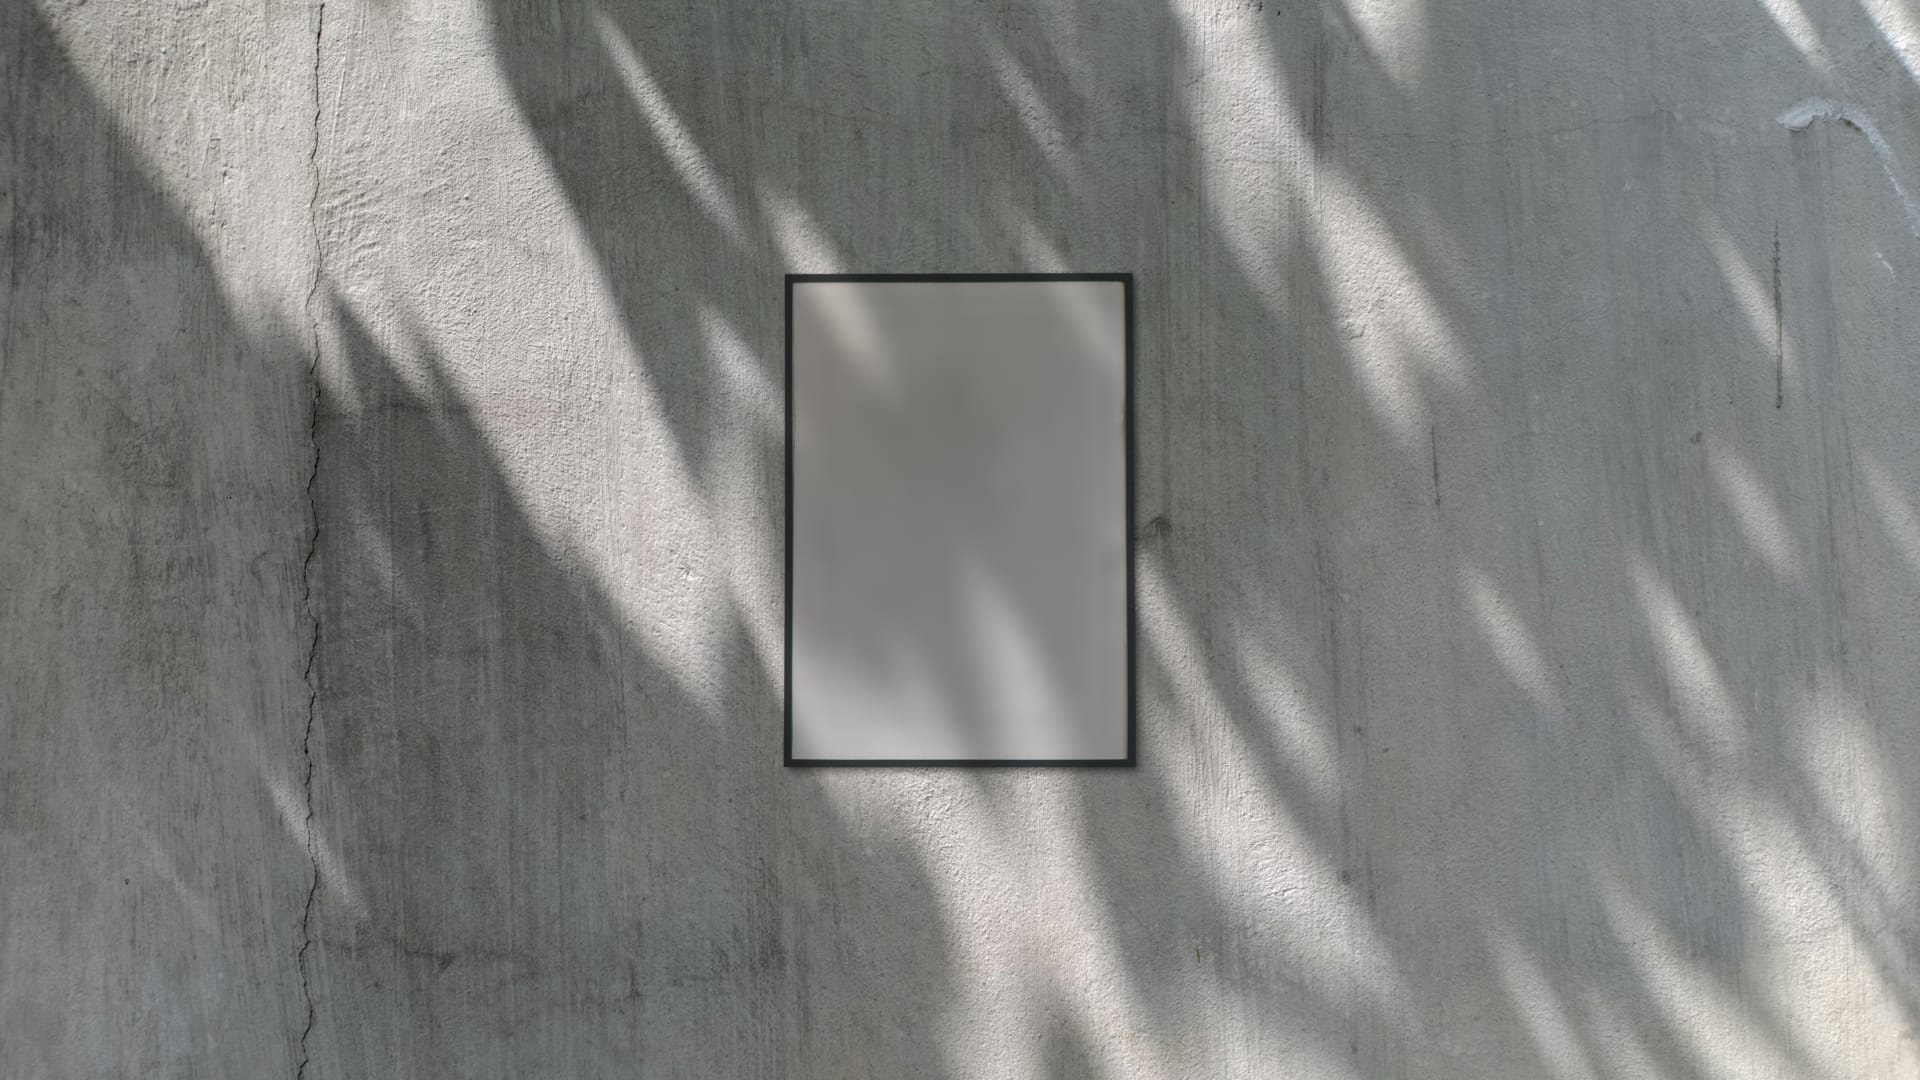
The same comp as before, except the wall image has been softened to smooth out the texture before being multiplied over the picture frame element.
I hope you found this tutorial useful. For more Nuke tips & tricks, see Nuke.