Creating Custom Lens Effects By Pre-Treating Your Images In Nuke
How to replicate interesting lens phenomena by pre-treating your images before applying your lens effects…

How to replicate interesting lens phenomena by pre-treating your images before applying your lens effects.
Astigmatic Lens Effects
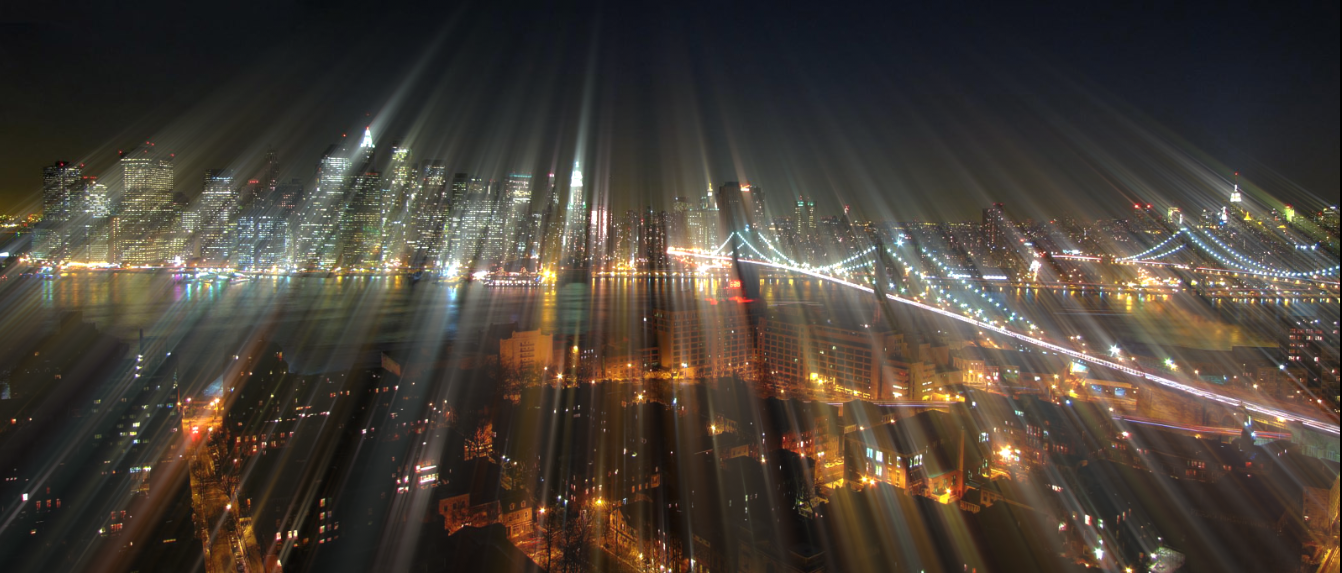
You may have noticed interesting things happening to the highlights of an image when photographing at night, or in low light scenarios.
Bright lights bloom and glow, and sometimes stretch out at particular (or even multiple) angles. Take a look at the example images below:
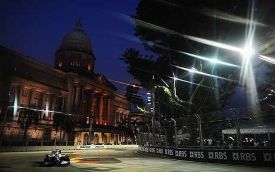

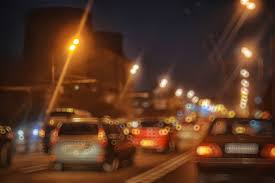
This happens because the light that’s hitting the lens converges on multiple focal points instead of just one. (This also happens in the eyes of people with astigmatism).
💡 You’re probably familiar with this already, but can simulate it yourself by squinting your eyes while looking at bright lights at night.
If you want to replicate this effect in Nuke, it’s not an immediately straightforward task. However, you can do it by performing a bit of simple image manipulation before your lens effect, and then reversing it after.
Creating astigmatism using scale and rotation.
So, how can we do this?
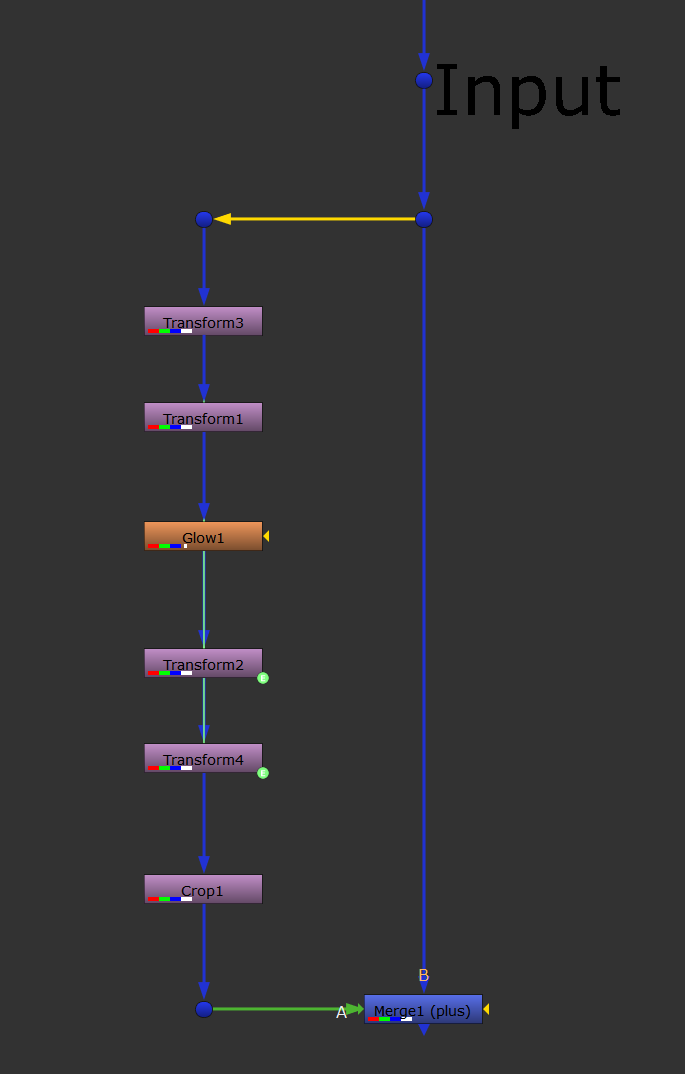
Rotation and scale inverse setup with a Glow.
Start by creating two Transform nodes connected together (Transform1 and Transform2), and connect Transform1 to your image. (This works best with night time images with bright light sources in them).
In both Transform1 and Transform2, make sure the “2” button next to the scale knob is ticked, to separate the width and the height scaling. Then, add the following expression to the scale knob in Transform2:
1/Transform1.scaleNow, any changes you make to the scale in Transform1 will be reversed in Transform2.
💡 You could also just directly link the scale value from Transform1 to Transform2, and then tick the invert checkbox in Transform2 – whichever method you prefer.
Next, create two more Transform nodes (Transform3 and Transform4). Connect the first one in between your image and Transform1, and the last one after Transform2.
Leave Transform3 as it is, but add the following expression to the rotate knob in Transform4:
-Transform3.rotateNow, any changes you make to the rotation in Transform3 will be reversed in Transform4.
In between Transform1 and Transform2, add a Glow node. I’ve used the standard Glow node in Nuke here, but use an exponential glow from for example Nukepedia for better results.
Whichever one you use, it’s important to choose to output the effect only. In the standard Glow node, tick the effect only checkbox. If your custom exponential glow node doesn't have that option, just Merge (minus) the output of the node (A) with the input of the node (B) to separate out the effect only.
This is because the transformations we are about to apply will heavily degrade the image, so we only want to output the glow effect from this stream and nothing else.
Next, add a Crop node after Transform4 to keep your bounding box in check – it can get quite big with this setup.
Lastly, Merge (plus) the end of the stream back with your original image.
💡 Keep in mind, the order of the Transform nodes is important. To correctly reverse the transformations, you have to reverse the order of the incoming Transforms and the outgoing Transforms. So, rotation (in) → scale (in) → scale (out) → rotation (out).
Now, you can increase the glow and then adjust the scale and rotate knobs in Transform1 and Transform3, respectively, to create astigmatism – just like I did in the video above.
💡 You can also create anamorphic blooms by just scaling the width (typically to 0.5) using the same setup.
If you want to make criss-cross patterns, you can just copy/paste the setup. Rotate the second setup oppositely to the first, and then Merge (max or plus) them together.
Doubling up the setup to make a criss-cross pattern.
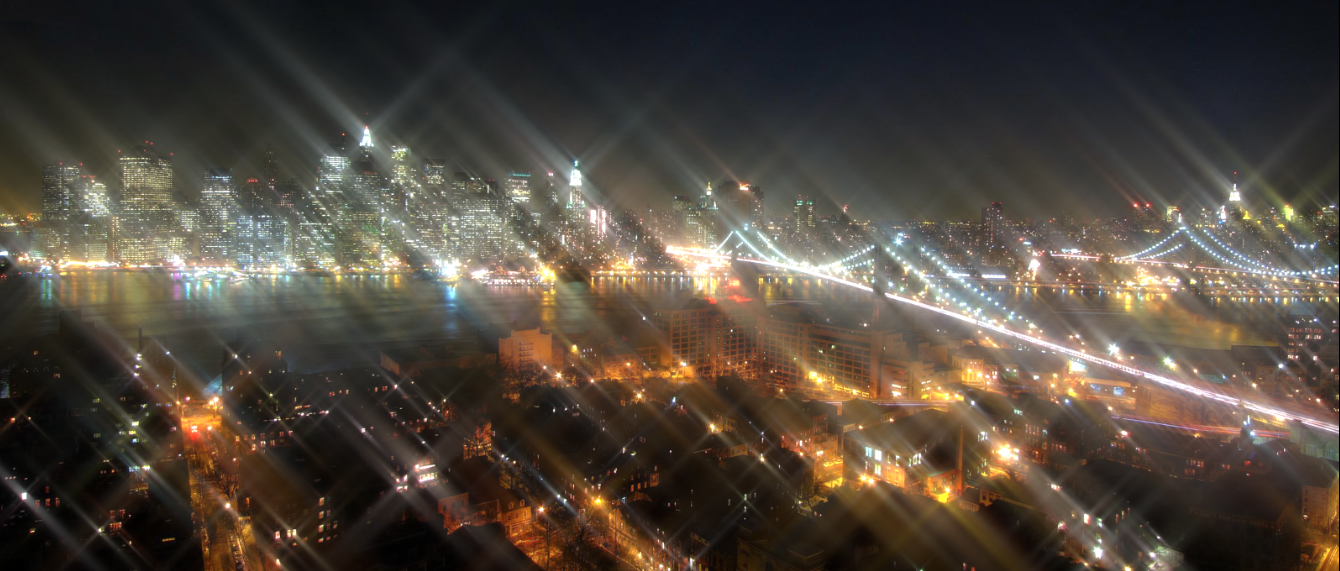
You can even keep adding more rotated copies, if you for example want to make star shapes.
Experiment with the setup to create new and interesting effects. Below, I have swapped the Transform nodes for two CornerPins, one reversing the other:
Using a CornerPin inverse setup.
No matter which transformations you choose, the glow stays interactive because it's reacting to the same bright light sources, just differently shaped and in different positions. Ultimately, only the shape and the direction it blooms out towards changes.
That means, when you rotate the image, the glow rotates around each light source. And when you scale the image, the glow scales around each light source.
Bokeh Control
You don’t necessarily have to pre-treat your images with transformations to adjust your lens effects. You can for example control the strength of your bokeh with a couple of Gamma nodes:
Controlling bokeh strength by pre-treating the image with a Gamma.
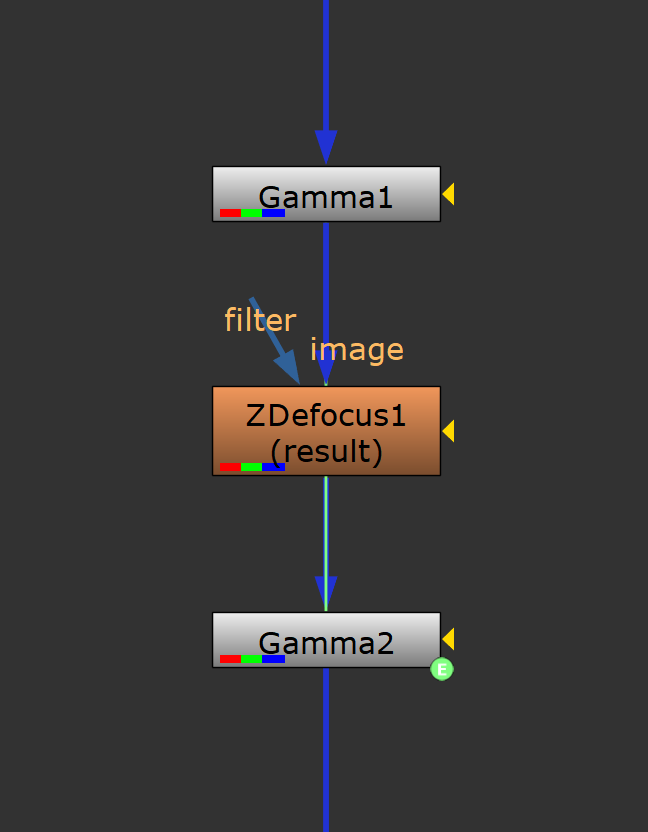
Gamma inverse setup with a ZDefocus.
It’s the same idea as before: The Gamma2 node is simply reversing the effects of the Gamma1 node.
In the Gamma2 node, add the following expression to the value knob:
1/Gamma1.valueBy lowering the gamma in the Gamma1 node, you increase the strength of the bokeh, and vice versa.
Directional Blur
If you wanted to, you could recreate a similar effect to the Directional Blur node in Nuke:
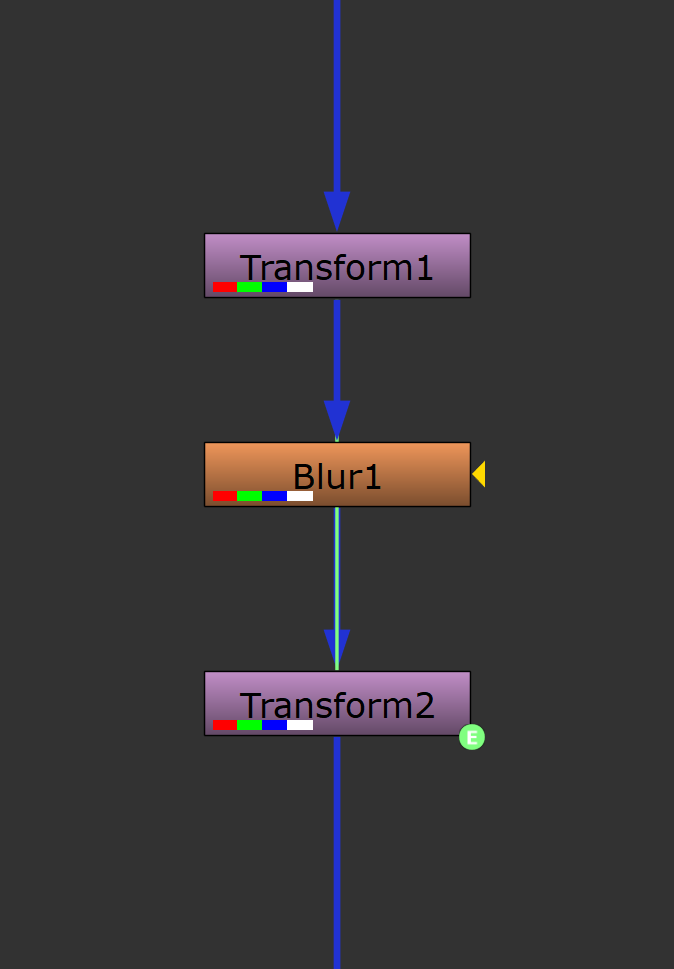
Rotation inverse setup with a Blur.
Same as before, you just add two Transform nodes, one reversing the rotation of the other. Then, put a Blur node in between them.
You can then control the blur direction by rotating the image, blurring it along one axis (e.g. width), and rotating it back.
I hope you found this tutorial useful. For more Nuke tips & tricks, see Nuke.


