Animating Paint Strokes In Nuke
How to create custom animated reveal masks and creative effects using the RotoPaint node…
How to create custom animated reveal masks and creative effects using the RotoPaint node.
Animating 'Hello'.
Paint Strokes Are Just Splines
You might not be aware of it, but when you paint using the RotoPaint node in Nuke, you’re just creating splines with multiple points.
To see what I mean, open up the RotoPaint node’s property panel, and with the RotoPaint node selected, enable both the toolbar_label_points and toolbar_show_paint_selection buttons at the top left, above the Viewer.
I have underlined the specific icons you have to press in yellow below:

The buttons to enable in the RotoPaint Viewer menu.
When you paint something now, and then select the paint stroke, the spline and every point on it will be displayed in the Viewer:
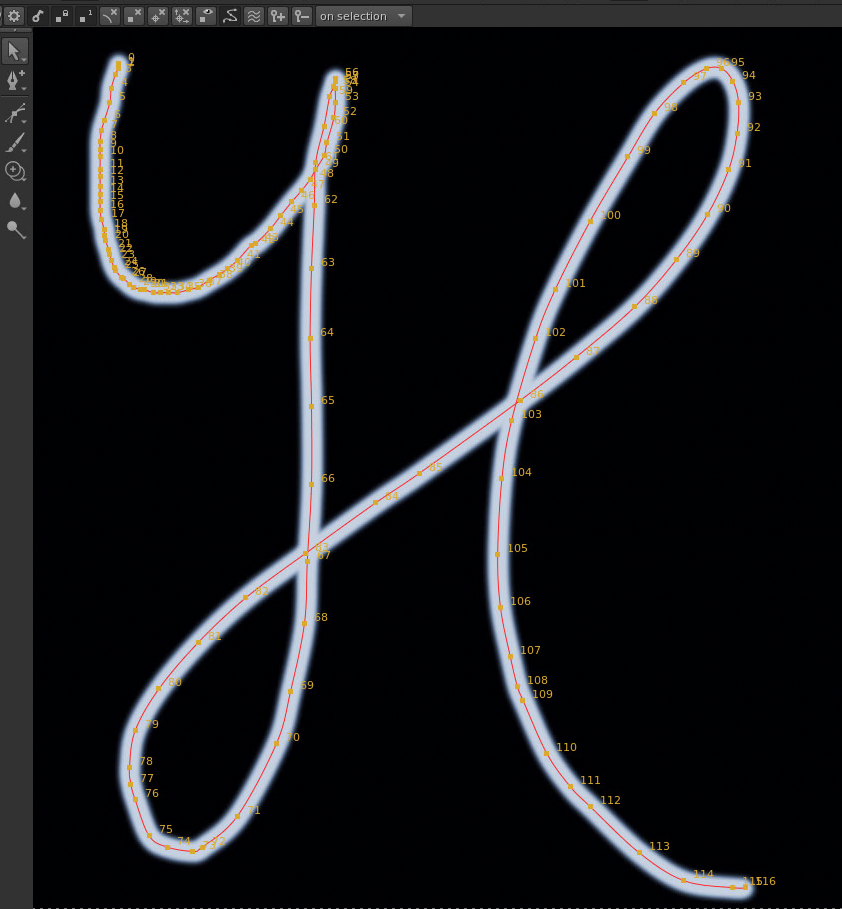
Nuke used 117 points on a spline to represent this H that I drew. (The first point gets the number 0).
You can even move the points around, just like on a normal spline:
Moving points on a paint stroke spline.
Splines Can Be Manipulated
Since every point on a paint stroke spline is added chronologically, Nuke knows the exact order in which you draw something. We can take advantage of this.
In the Stroke tab of the RotoPaint node, there is a knob called write on end. By default, it is set to 1, which means Nuke will display 100% of the stroke (as long as write on start is set to 0).
Just like in the video at the top, you can change this value between 0 and 1, and Nuke will only display that percentage of the spline you have drawn.
You can animate this value, which opens up interesting opportunities like being able to animate specific reveal masks or create different effects.
For instance, you can draw pathways along the veins under the skin of an arm, or along hair or clothing, and reveal a magical effect. Add some exponential glow and noise into the mix, and you can make a really interesting look.
Test out different colours, shapes, and animations, and play with the stroke settings. You can for example change the brush spacing in the Stroke tab to create a dot pattern, for a more graphic design type of effect:
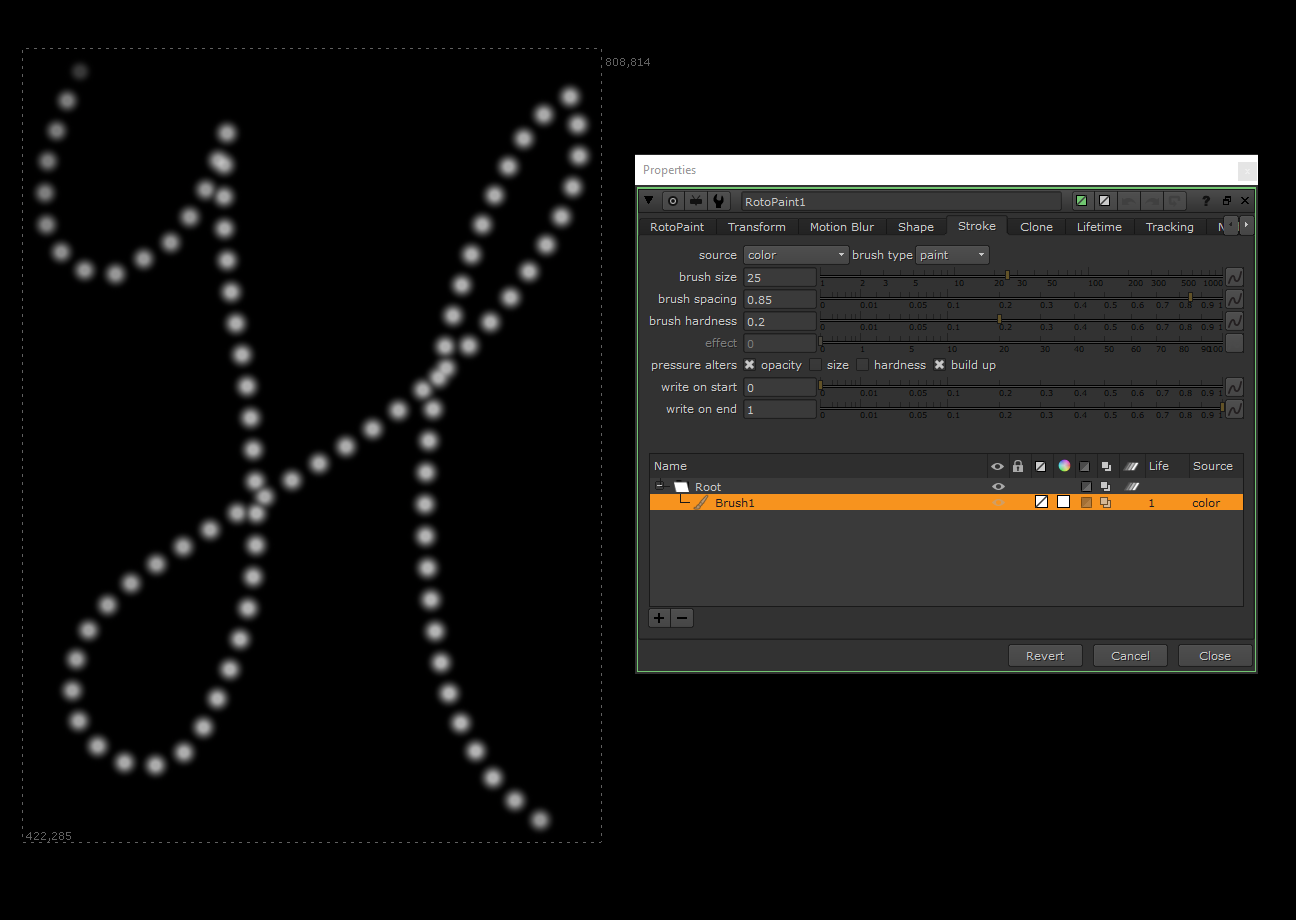
Making a dot pattern by increasing the brush spacing.
When you animate your paint strokes, you don’t have to do a linear A to B animation like I did in the first video. You can set both the write on start and write on end to 0.5, and then animate them back to 0 and 1, respectively. That will reveal the shape from the middle and outward.
💡 Keep in mind that if you want to animate a paint stroke over time, you have to change the lifespan of the stroke from a single frame to all frames, or to a long enough frame range.
Experiment and have fun with it 🙂
I hope you found this tutorial useful. For more Nuke tips & tricks, see Nuke.


