Multiplication Key Technique For Extracting Fine Detail In Nuke
⭐ The Multiplication Key technique is great for restoring fine or tricky detail such as hair and motion blurred edges…

⭐ The Multiplication Key technique is great for restoring fine or tricky detail such as hair and motion blurred edges…
This article contains a Companions Exclusive Tutorial at the end
If your key doesn’t restore enough of the fine detail in your image, you can use the Multiplication Key technique to supplement your work. It is a great way of extracting hair, motion blurred edges, and other fine detail from the image.

A zoomed in view of the green screen. (Credit: Hollywood Camera Work).

The green screen multiplied over a standard Checkerboard using the Multiplication Key technique. Notice that the key is sensitive and that you will need to mask out unwanted areas. Here, the tracking marker would need to be masked out from the key.
It is a very simple technique:
Add a Saturation node to your denoised green/blue screen plate and set the saturation to 0.
Then, go to the Viewer and colour pick the area of the desaturated green/blue screen right next to where the fine detail is, for example the hair. Notice the colour values.
Add a Grade node and grade the desaturated green/blue screen in that area so that it becomes as close to a value of 1 as possible.
Multiply the result with your comp – before you merge your normal key over your comp.
Mask out any unwanted detail that tagged along with the Multiplication Key.
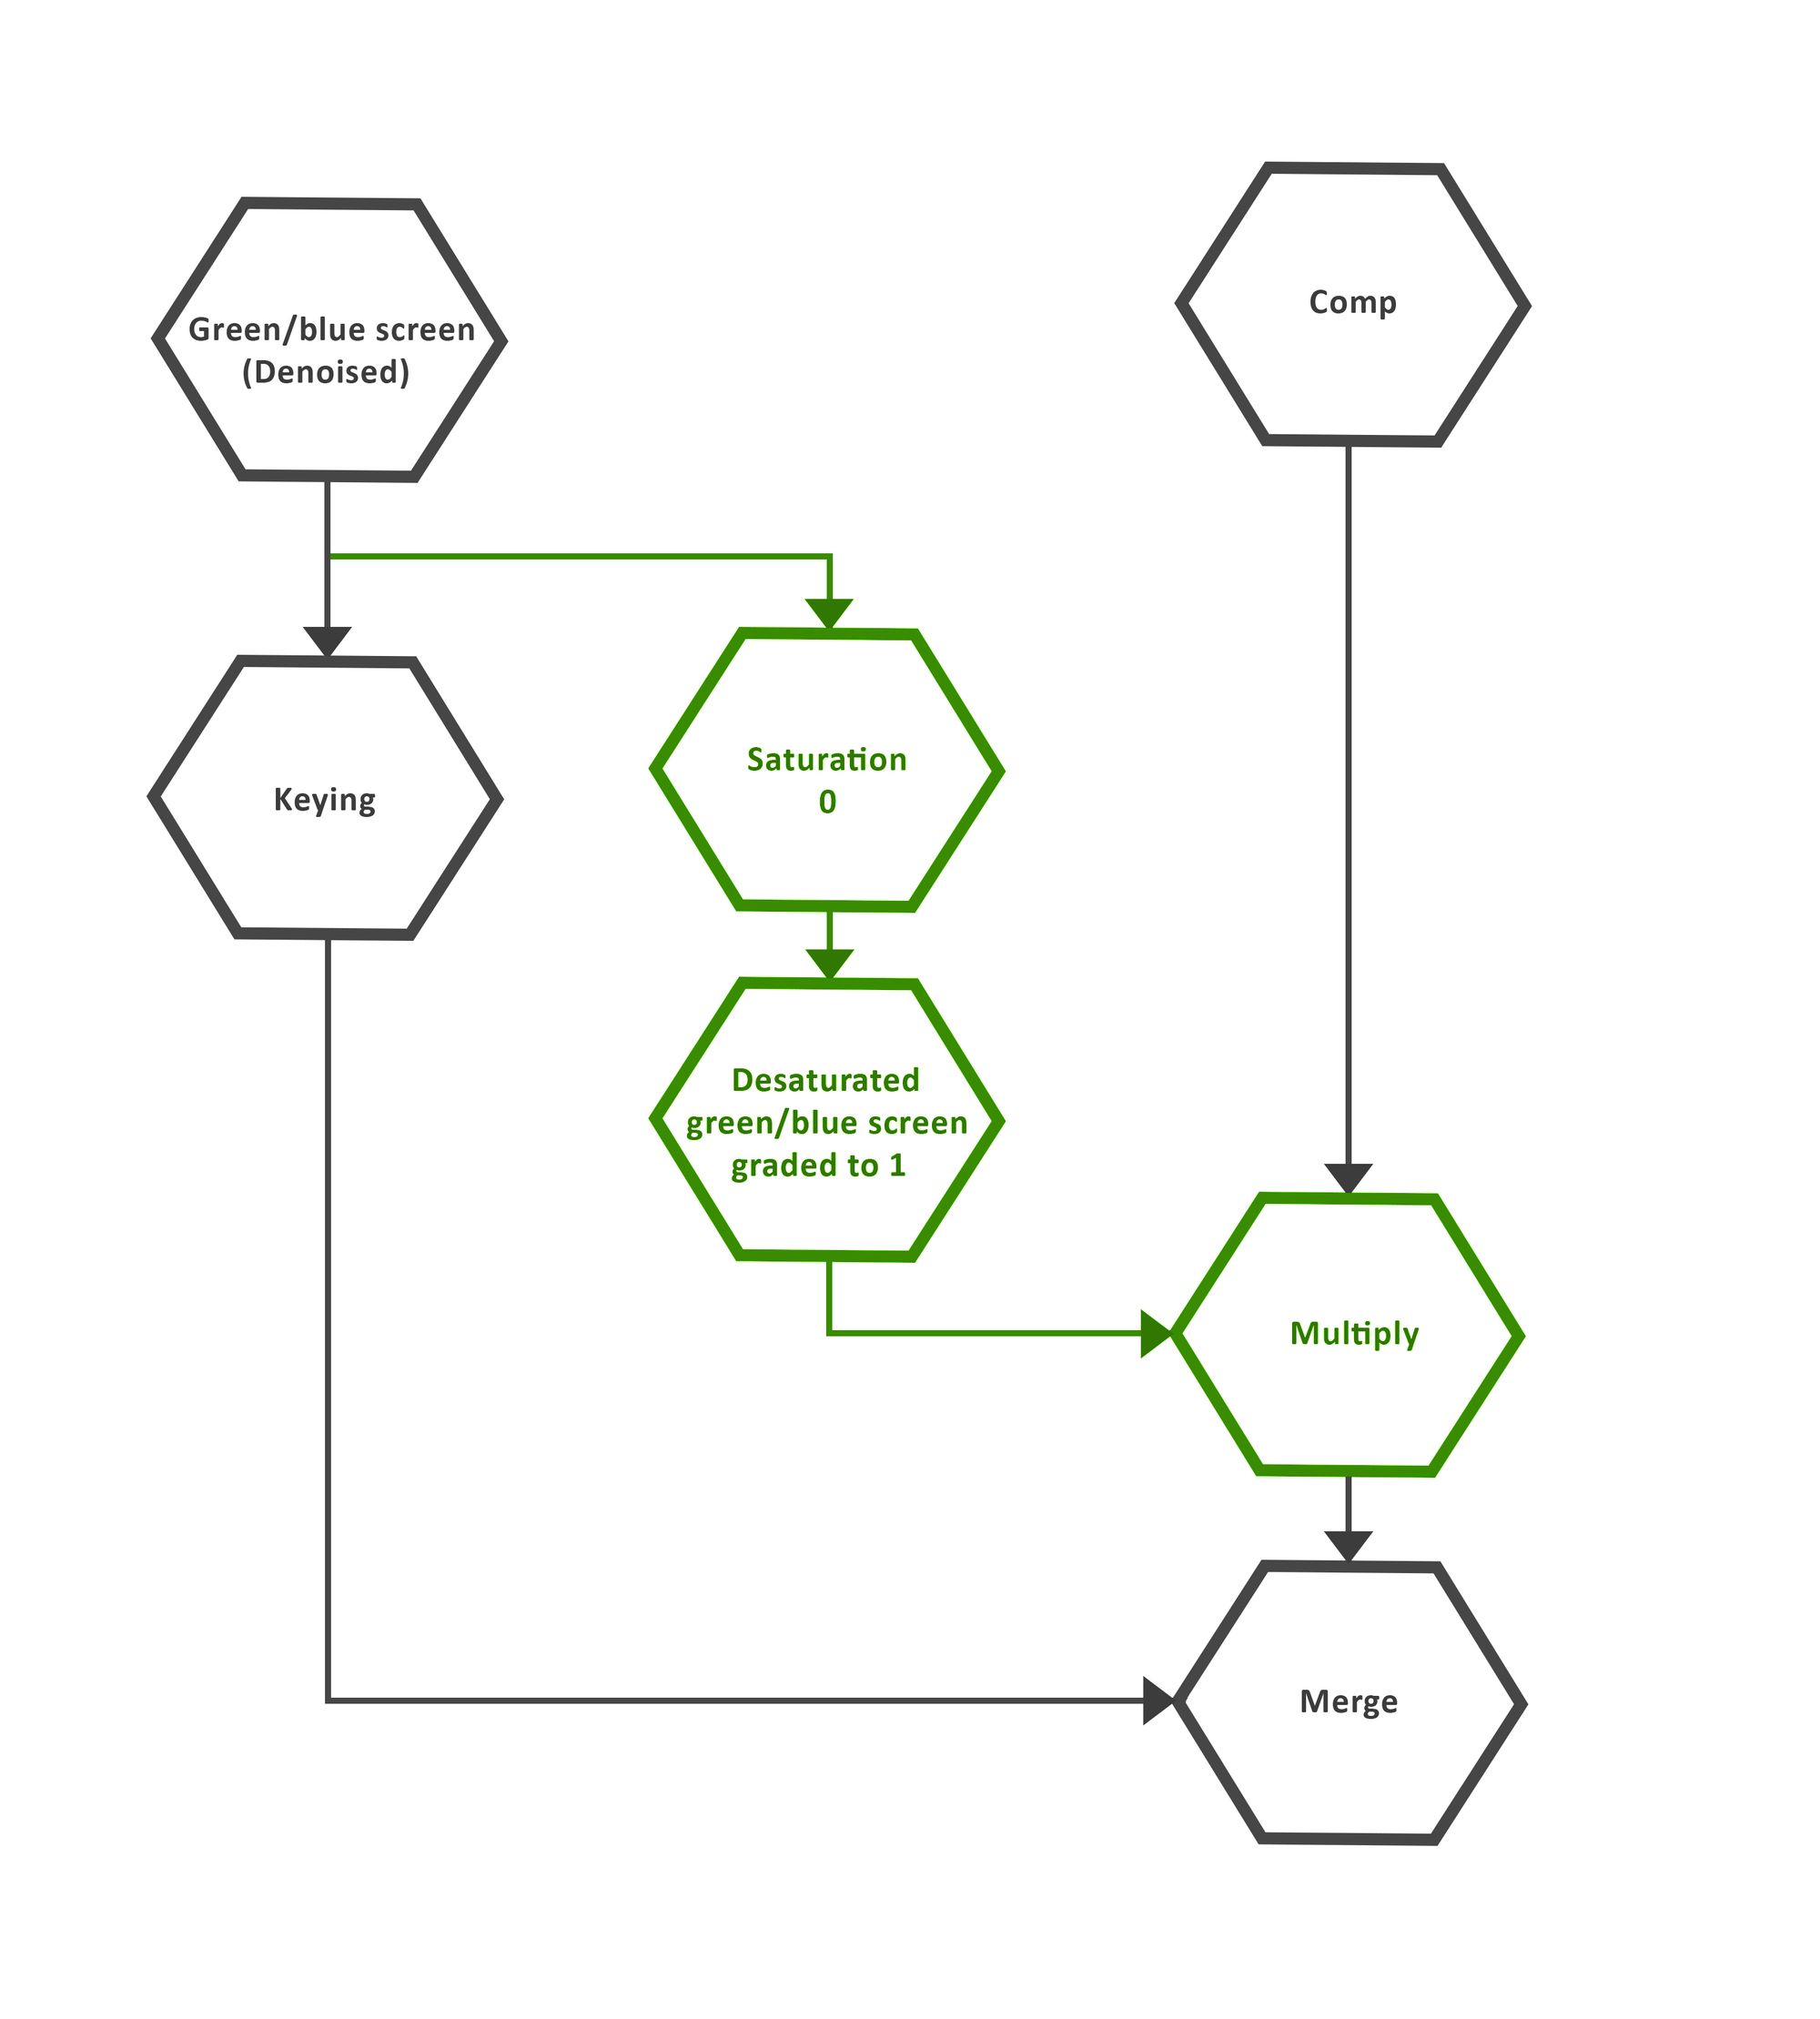
Flowchart for the Multiplication Key technique.
To quickly explain how the technique works; when you desaturate an image to 0, all three R, G and B channels will have the same value per pixel. So when you multiply them with the comp, all three R, G and B channels of the comp get treated equally.
You then grade the desaturated green/blue screen area next to the hair/detail to be a value of 1. And where you multiply the comp with 1 the comp stays the same. Where you multiply the comp with values lower/higher than 1, i.e. the hair/detail areas, the comp gets darkened/brightened appropriately and you capture the detail.
And so obviously where the green/blue screen has a shadow or a seam you will capture that with this Multiplication Key technique. Therefore, you have to be quite selective about where you use it, and mask out any unwanted detail that you restore.
💡 If you want to only add dark detail, you can clamp the result to a maximum of 1 before multiplying it with the comp. And if you only want bright detail, you can clamp the result to a minimum of 1 before multiplying it with the comp.
I hope you found this tutorial useful. For more Nuke tips & tricks, see Nuke.
Companions Exclusive Tutorial: Overlay Keying
As a thank you to all Companions, I have added a bonus tutorial below.
There is another technique which is also great for restoring detail. I call it Overlay Keying.


